I use my iPhone X for photos and often want to annotate the image to circle someone, point at something with an arrow, or similar. Is this possible with Apple iPhone apps or do I need to get a third party program?
While it may appear that the Apple iPhone – well, really iOS 13 – doesn’t include too many programs, a lot of the default Apple apps have hidden features that make them pretty darn powerful. Turns out that the Photos app is one of those. People think of is as a tool for viewing, sharing and deleting photographs from your phone, but it has quite a decent little edit and annotate toolbox too. You just need to know where to look to find the Markup toolbox within Photos.
I’ll walk you through the steps and you’ll see, it’s pretty darn easy if you’re observant of all the buttons, icons and other graphical elements on the various pages in the Photos app. As a starting point, I’m going to use a photo I took of a construction site and seek to use the Markup annotation tools to circle one of the workers balanced on the roof of the building that’s under construction.
Within Photos it looks like this:

The bottom tiny thumbnails lets you quickly skim through your photo library, but it’s the top buttons that are of interest. Top left the “<” gets you back to a multi-image gallery view. On the right, going from the center outward, are the share button, the favorite heart button, the trashcan to delete the photo and the Edit button that apparently doesn’t rte an actual icon! 🙂
A tap on “Edit” and things change quite a bit:
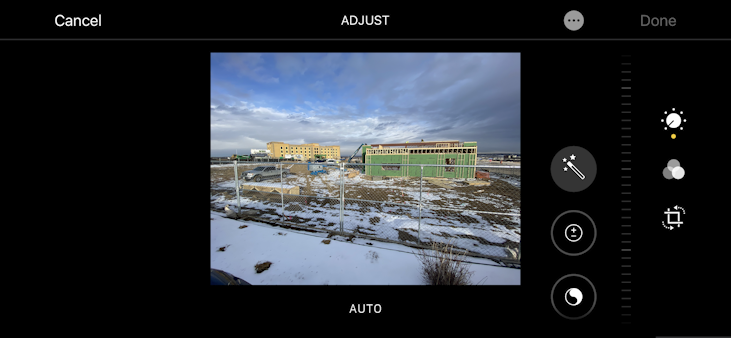
Along the right side are two columns of buttons. The icons closer to the photo let you use the “magic wand” to automatically fix photos (using AI it’s a pretty solid feature worth knowing about), an Exposure button to fix exposure, and a yin/yang symbol that lets you adjust “brilliance”. There are more buttons if you swipe upward on this column, but let’s go to the rightmost. Those three allow you to adjust modes: The ‘auto/adjust’ mode is already selected (see the tiny little yellow dot?), the three overlapping circles allow you to choose between preset image filters and the grid lets you rotate, crop and adjust the rotation of your image to fix a crooked horizon line.
We don’t want any of those icons or buttons, however. Instead tap on the “•••” button on the top. It causes a menu to appear, a menu that by default has exactly one entry:
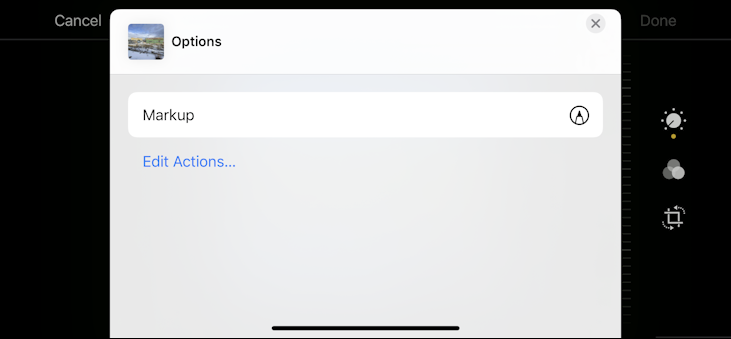
Fortunately Markup is exactly what we want, so a tap on “Markup” will launch these super handy tools:
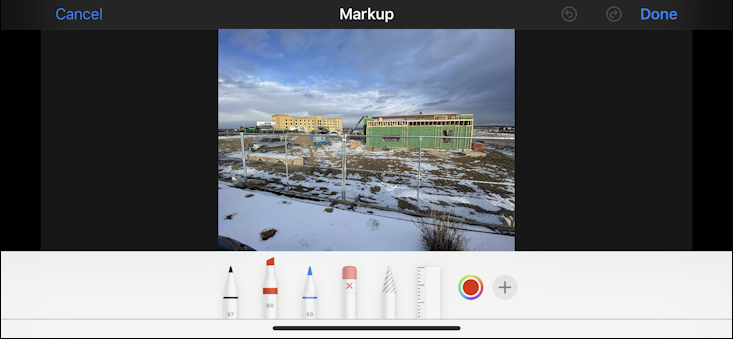
As you can see, there are a wide variety of annotation tools, each basically emulating a different style of line. The red circle is your color palette and the “+” lets you customize what tools are on this toolbar.
Tap on a tool to use it. For example, the highlighter:
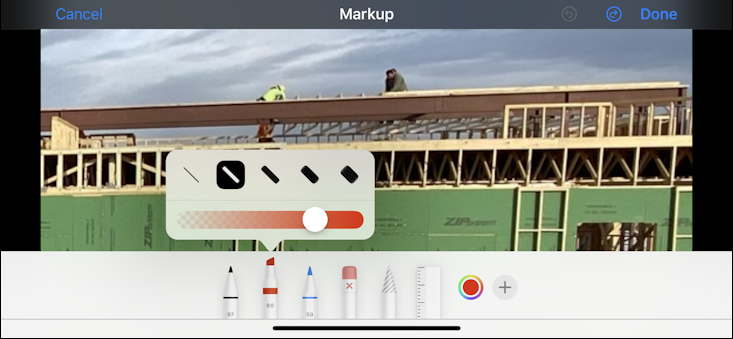
It takes a little bit of getting used to, but at this point tap once on the photo to remove the tool selection pop-up, then tap and drag your finger to highlight, draw, write, etc. In this instance, the pen ends up a bit fat for the task:
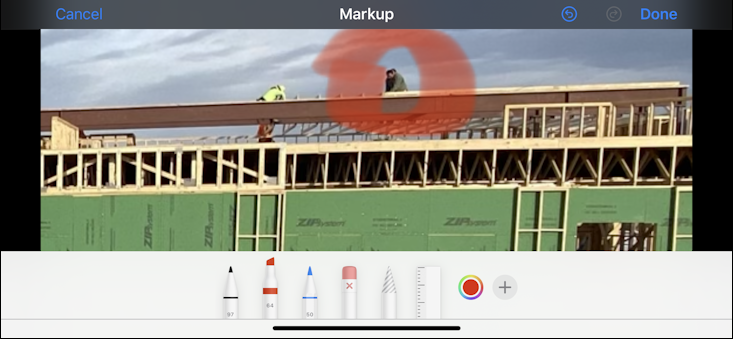
See the tiny, tiny little blue arrow in a blue circle to the left of “Done” on the top? That’s the undo button. Tap on it to remove the annotation (very handy for when you’re learning how to proceed!).
Instead, tap on the red circle to bring up the full color palette:
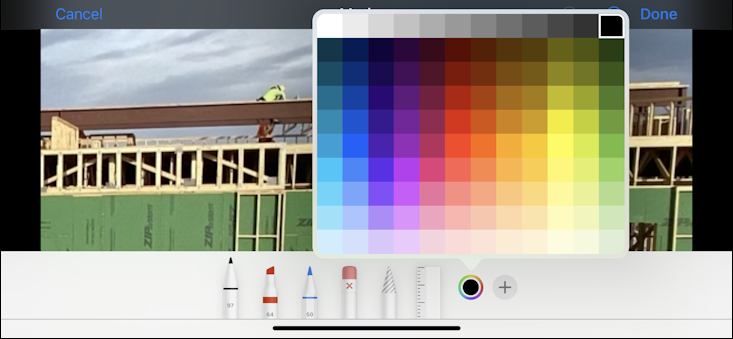
Lots of color options! I’m going to stick with red, however, but this time I’m going to use the leftmost ‘felt tip marker’ pen.
The results are quite a bit more satisfying!
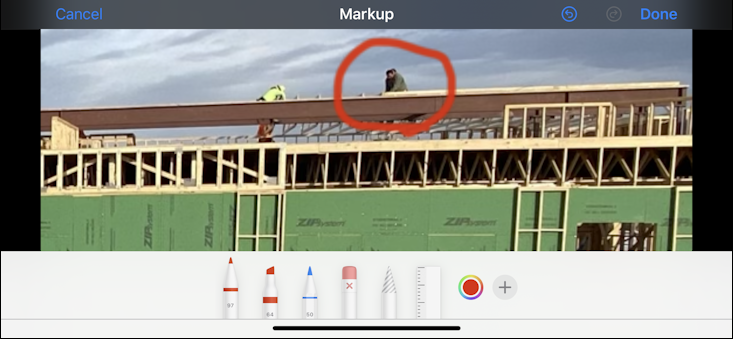
Done? Tap on “Done” to save this image and be back at the regular photo browser.
And here’s my final photo (note the original is never overwritten, so it’s a new image):

And that’s it. Not too tricky once you know to tap on the “•••” button to bring up the Markup feature and tools!
Pro Tip: I’ve been writing handy tutorials for the Apple iPhone since the release of the very first device. No kidding. Please check out my extensive iPhone and iOS 13 help area for lots more tutorials while you’re here!
