
I download lots of animated GIFs to share with my friends, but I would like to make some too. Is that even possible on a Chromebook, and if so, what app or program do you recommend?
First off, let’s address the real question: How do you pronounce “GIF”? I say it with a hard G sound, like the first part of “gift”, though I know, some people use a soft G so it sounds like “jif” peanut butter. My logic: “G” is short for graphics, which you’d never pronounce ‘jaffics”, would you? Tell me how you pronounce it in the comments.
But… let’s get on to the real topic. The answer is that you can indeed create animated GIFs on your Chromebook with the latest version of ChromeOS. How? With the Camera app, which, in the latest release, has slipped a fun animated GIF creator into the video recording portion. In fact, slowly but surely Google’s ChromeOS team keeps adding quite a lot of features to Chromebooks which makes them seem more and more like lightweight Windows computers more than systems running a completely different operating system. Perhaps that has always been the goal?
Anyway, let’s jump into creating an Animated GIF on your Chromebook. I’ll be using a Lenovo ThinkPad Chromebook for this task, but as long as yours has a built-in webcam that works, you can do the same. Start, as I said, by ensuring you have the latest version of ChromeOS.
RECORD AN ANIMATED GIF IN CHROMEOS CAMERA
Launch the Camera app and it’ll promptly show you an image of yourself:
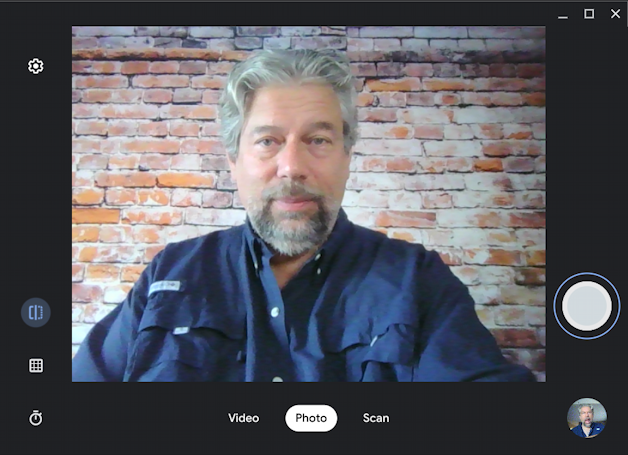
Easy enough to take a selfie: Just click on the white circle on the lower right. Notice the photo controls on the left side, including a timer.
Instead, however, click on “Video” along the bottom. Now you’ll switch into Video mode:
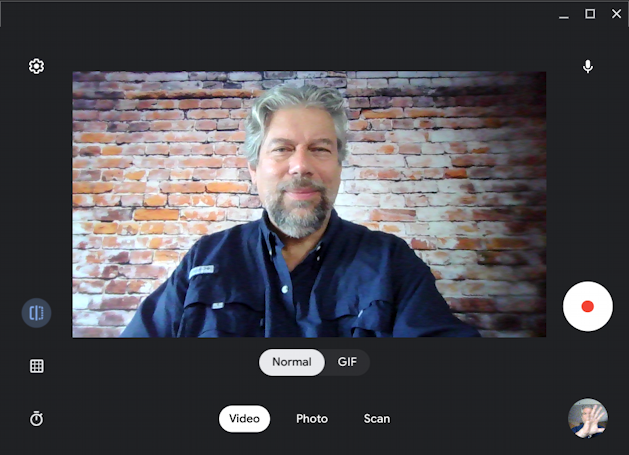
As you can see in the above, there are two types of video you can now record with the Camera app: “Normal” and “GIF”. Choose “GIF” and, alas, there’s no actual information about what will happen next…
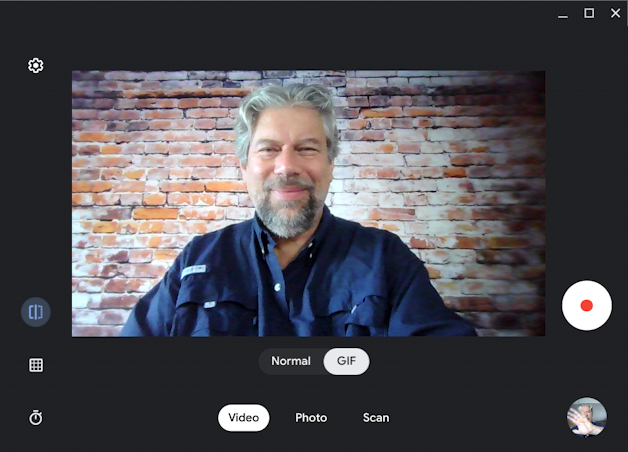
In this instance, it’s going to record an animated GIF – a single frame would be a “Photo” saved in GIF format – which offers a very, very short movie that’s in a widely portable graphics format, perfect for social media. But it doesn’t really indicate that with any helpful tip or prompt in the app.
To see what it actually does, you need to record your first test GIF. Click on the red record button on the lower right.
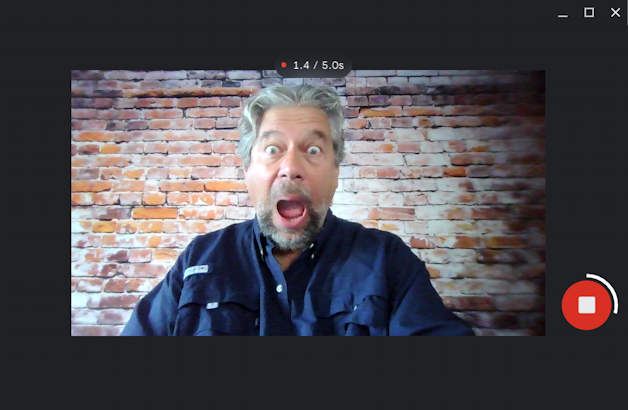
Now you can see what’s going on: It’s recording a 5.0s snippet of video, as shown on the top overlay. There’s also a white line that gradually goes around the recording button on the right. As I have done, you’ll probably want to do something very exaggerated, in the spirit of animated GIFs!
Once the timer runs out, it’s recorded 5 seconds and saved the image. But where?
HOW TO FIND YOUR NEW ANIMATED GIF
Click on the preview of the new animated GIF on the lower right of the Camera app and it will offer a few options in gallery mode:
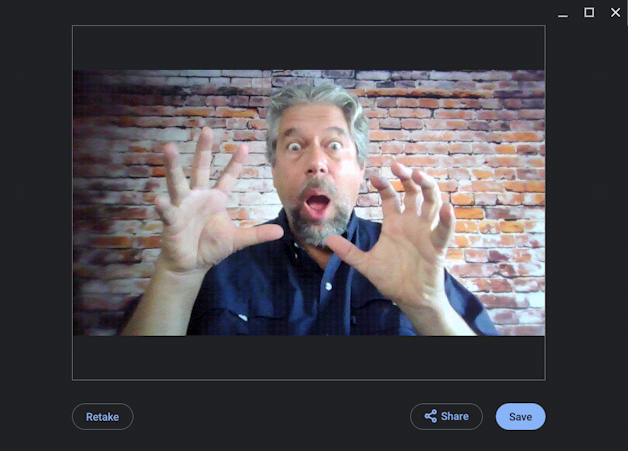
You can watch it in an endless loop, admiring your acting skills, or you can use “Retake” to try again. More fun is to share it with friends and family, as appropriate. Click on “Share” and here are your options:
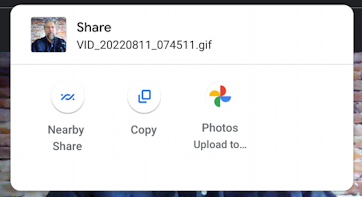
You can share it wirelessly with someone nearby, copy the image to paste into an email or similar, or upload to your Photos archive. Or just click on “Save” and it’s saved. Where? You have to figure that out. Easy enough, though. Go to My Files > Camera and it’s there with a snazzy name like “VID_20220811_074511.gif”:
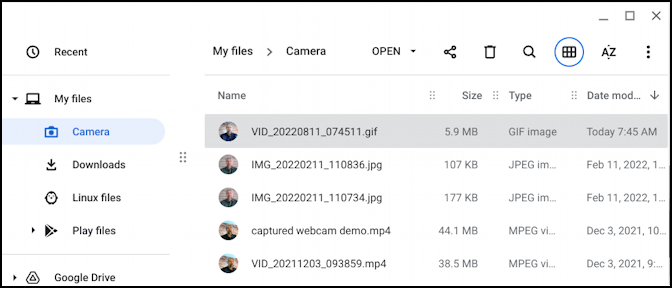
Notice that it might be 5 seconds of video, but it’s still pretty big: 5.9MB. Still, small enough to share via text message, email, or social media post.
THE FINAL ANIMATED GIF
Wondering what I recorded? Here it is!

That’s it. Now you know how to record and share your own animated GIFs from your Chromebook. Huzzah!
Pro Tip: I’ve been writing about operating systems for many years. You can find a lot more useful tutorials about Chrome OS in my Chrome OS and Chromebook help library here on the site. Why not check it out while you’re visiting?