
Just updated my Chromebook to ChromeOS 121 and suddenly the workspace “desk” name is being shown on the Taskbar [ed: “Shelf”]. Can I hide that somehow?
More than most operating systems, ChromeOS is constantly changing and improving. Every few weeks it seems there’s an update that not only fixes bugs and tightens security, but also adds new features. Sometimes they’re hidden and you have to hunt to find them (like the new AI features in the Chrome browser in ChromeOS. Found ’em yet?). Other times they change the behavior or appearance of an important feature on your Chromebook and are impossible to miss!
ChromeOS has supported its workspace model, called “Desks”, for a while now, but all of a sudden the name of the Desk space appears on the Shelf [what we Windows folk would call a Taskbar]. It’s a bit jarring, particularly if you prefer to have things uncluttered. It does have a handy shortcut in that if you click on it, you can easily move between Desks and even add new ones, but it’s just… there. Fortunately, you can hide it. But that comes with a problem too. Let’s have a closer look.
CHROMEOS DESK WORKSPACE BASICS
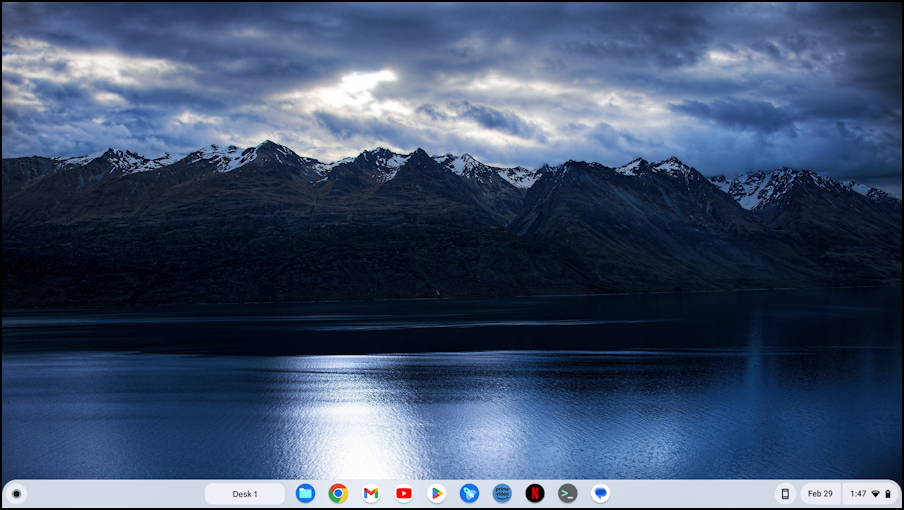
Now that you’re up-to-date with ChromeOS [Settings > About > Check for Updates] you will find that your workspace name shows up to the left of your app icons and shortcuts:
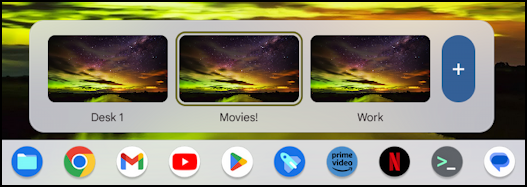
Can you see it along the bottom? “Desk 1”. Big and kind of annoying. Click on it and a little window pops up with the two workspaces, uhhh, Desks, I have active, one of which I just created by clicking on the “+” button:
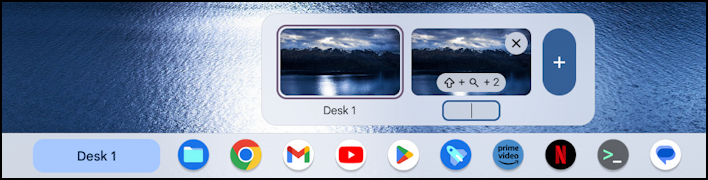
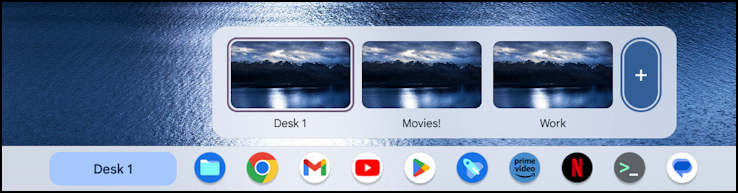
When you create a new Desk space, you’re immediately dropped into the name field, ready to type. I’ll call this “Movies!” and create one more. Now I have three:
If you haven’t worked with Desk workspaces before, it’s pretty slick because you can open up an app and it stays in its own space, so you can have a game in one workspace, email in a second, and a project you’re developing in a third.
To navigate between them, simply click on the Desk space you want to view.
CHANGING SHELF SETTINGS FOR DESK SPACES
Pretty helpful feature once you get the swing of it, though there’s still that annoying addition to the Shelf itself. Right-click on a blank portion of the Shelf and a menu appears:
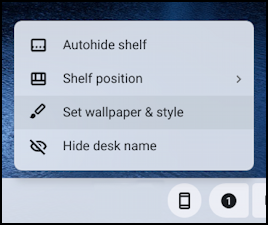
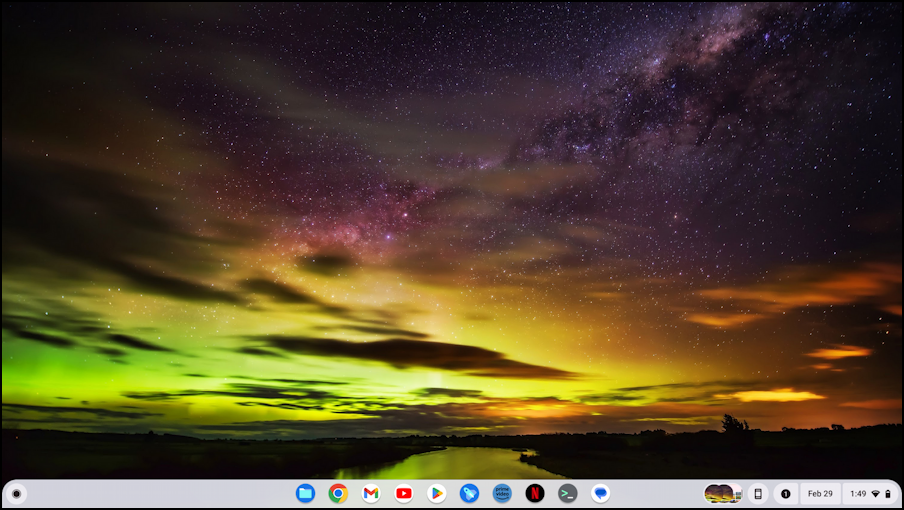
Time for a slight tangent! Choose “Set wallpaper & style” and you can change your desktop image with just a click or two:
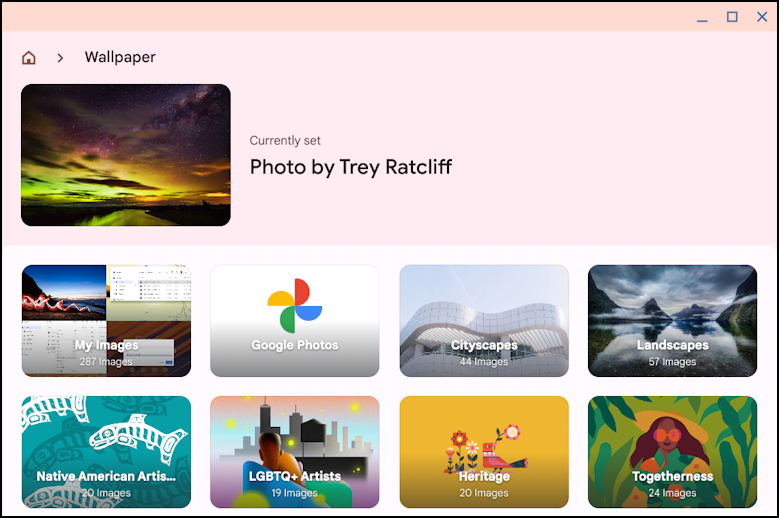
I’ve picked a rather spectacular sunset with stars amongst the clouds. Why not, right?
Unliked other operating systems, be aware that you get the same wallpaper on every workspace, as is immediately obvious when you go back to the Desks thumbnail view:
But what’s much more important is that one of the other choices on that menu is “Hide desk name“. Choose it and *poof* the Desk name vanishes from the Shelf. The problem is that you need to know the keyboard shortcut to be able to switch between spaces now, and that might not be easy to remember!
HOW TO SWITCH BETWEEN DESK WORKSPACES
The keyboard shortcut sequence was shown earlier when we created a new Desk space. You could, of course, simply re-enable the Desk name feature but that shouldn’t be necessary. It can, however, show you what to press:
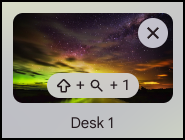
That’s the secret sequence: Shift (not the cursor up arrow!) + search glass + a number corresponding to which Desk space you want to visit. If you look at your Chromebook keyboard, the keys are adjacent making it easy to remember:
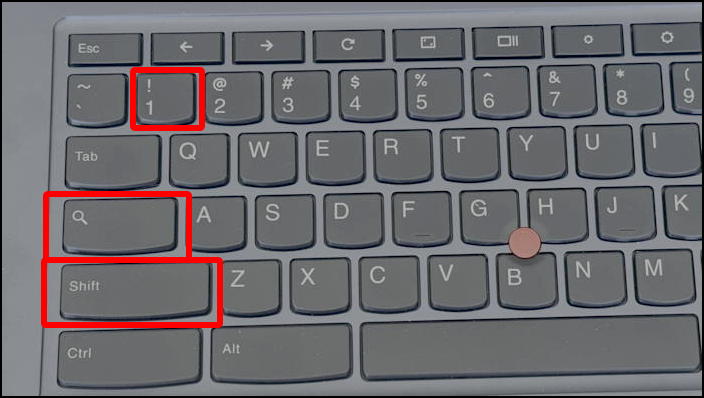
Want to get to the second Desk workspace? Use Shift + 🔍 + 2.
Armed with that knowledge you can finally hide the Desk name from the Shelf and have a clean, uncluttered look again!
And that’s how to work with the new Desks feature in ChromeOS. I suspect it’ll be tweaked a bit in the next release – or the one after that – but for now, do try it and you’ll see, it’s darn helpful!
Pro Tip: I’ve been writing about ChromeOS since it was introduced and have accumulated a LOT of helpful tutorials. Please check out my ChromeOS Help Area while you’re visiting. Thanks!