
My organization set me up with an email address and Outlook inbox, all living at outlook.office.com. It’s okay, but I live in Gmail. Is there a way to auto-forward all my email from Outlook to Gmail?
With over a billion active accounts, Gmail is one of the most popular programs in the world. Then again, if there’s one safe bet with organizations of any size it’s that they’re all running Microsoft Office, either the old-school apps-on-the-computer version or the more modern Office 365 as found at office.com. Billions of people. And some of them definitely have preferences about which program they use for their email. Suffice to say, you’re not alone.
In fact, you can automatically forward all your Gmail to Outlook if you want, or, as you prefer, auto-forward all email received in Outlook to your Gmail account. Since I spend all day with my Gmail open, I actually have a hybrid where I auto-forward all Outlook email to Gmail, but also keep a copy on Office.com too so I can respond with the correct email return address.
Worth noting is that some organizations might prohibit automatically forwarding all internal email to an external service like Gmail for security reasons. You might ask IT before you set this all up and get busted.
The Achille’s Heel of this entire setup, of course, is that if you respond to your organization’s email from Gmail, it’ll have the wrong return address and you’ll be exposed. Might not be a problem, but it might be a security issue, as per my note, above.
Well, that’s for you to figure out. Let’s get this forward set up!
SETTING UP AN EMAIL AUTOFORWARD IN OUTLOOK
Log in to your Outlook system and you’ll have a toolbar along the top similar to this:

You might automatically click on your icon on the right and go to your account settings, but we want Outlook settings, so click on the gear icon instead. It brings up some handy shortcuts:
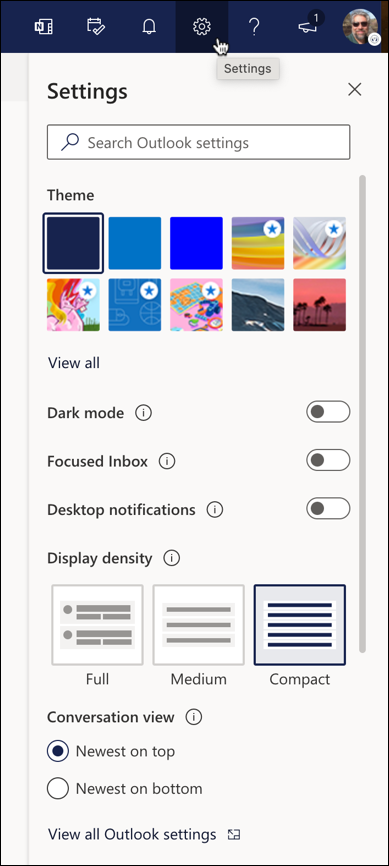
While I encourage you to experiment with themes and display density, the setting we want is actually not accessible from this shortcuts menu. Instead, click on “View all Outlook settings” at the bottom. A big window pops up with about a zillion different settings and preferences (possibly a slight exaggeration):
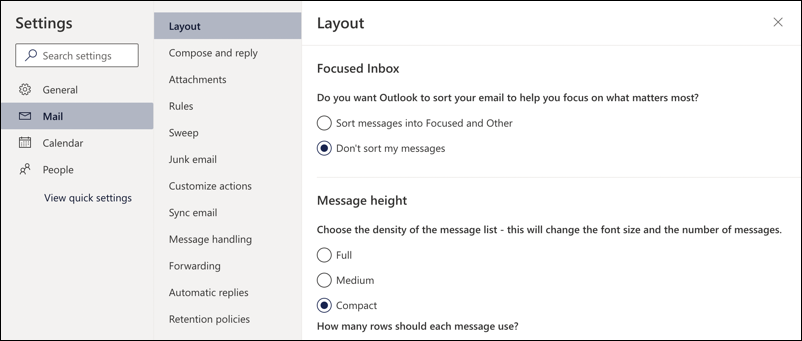
There really is a lot you can customize here, and it’s 10x easier to navigate than the weirdly crufty Gmail settings. For our task, find “Forwarding” on the middle menu and click.
You’ll be taken to a setting specifically for what you seek:
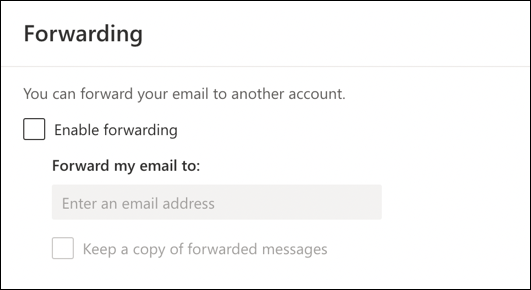
Check the “Enable forwarding” and enter the email address you want to have receive every email message that comes into the Outlook mailbox:
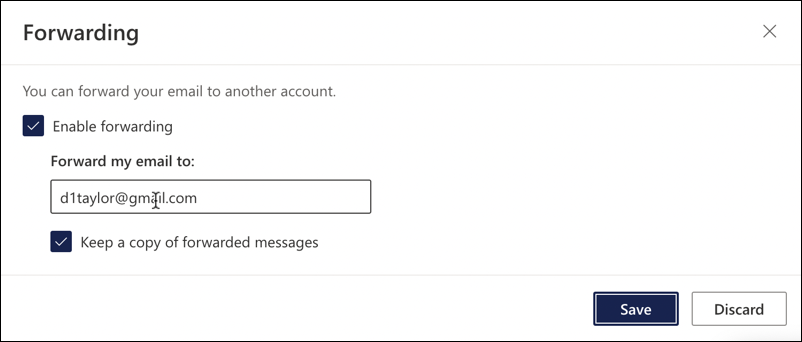
Want to keep a copy of every message in the Outlook inbox too? Check “Keep a copy of forwarded messages“. Make sure you click “Save” to save your forwarding rule and you’re done!
MORE SOPHISTICATED FORWARDING WITH OUTLOOK RULES
You might prefer something a bit more sophisticated for forwarding, however, perhaps only messages from your boss or partner, rather than have every darn message, from spam to junk email…
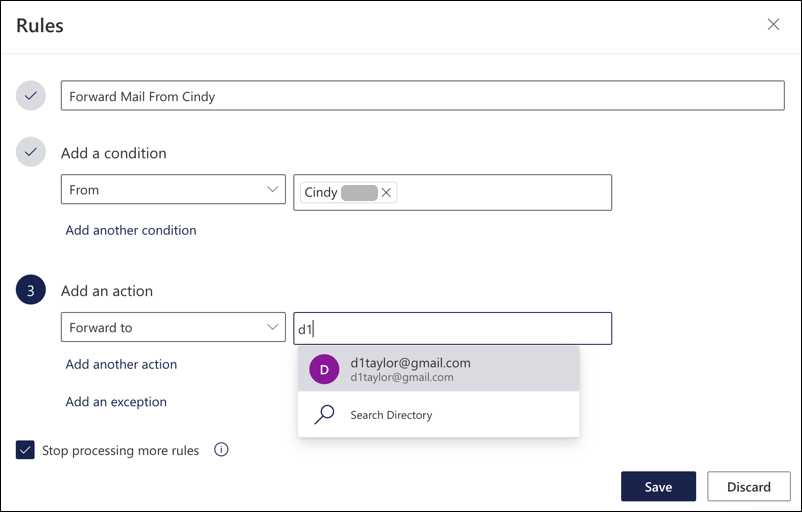
To do that, you’ll need to set up a Rule in Outlook. Easily done, go back to the main settings page and find “Rules” in the middle column. A click, then “+ Add new rule” and you’ll be able to set up a new rule. Each has a name, a set of conditions, and a set of actions when those conditions are met. For example, I’ll set up one so that all email from Cindy is forwarded to my Gmail account, instead of using the bulk forward everything setting:
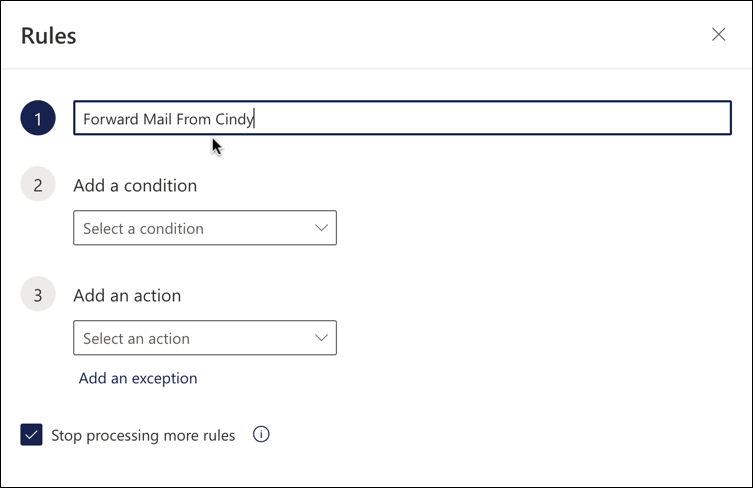
I encourage you to use long, explanatory rule names so you can remember their purpose months or even years later. I’ve named mine, so it’s time to pick a condition. There are a lot of conditions from which you can choose:
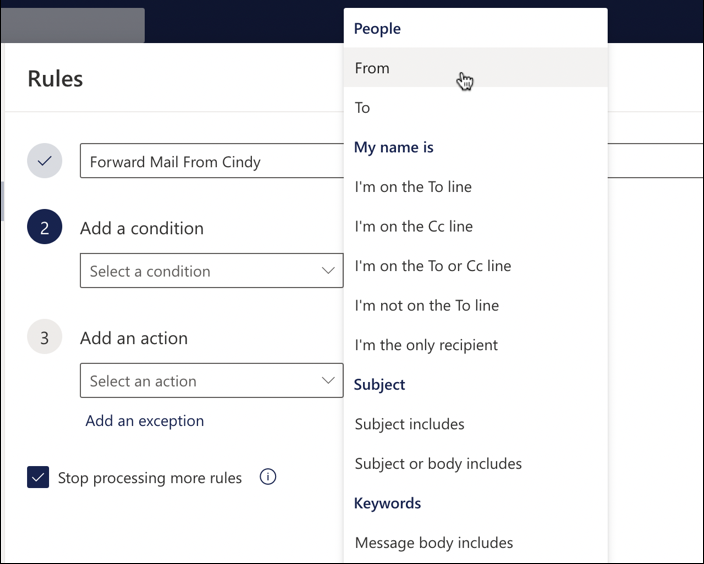
My rule is going to be simple; email from Cindy. Notice all the other options, however, offering quite a lot of power and flexibility in your set of conditions.
Choose From or To and Outlook conveniently pops up suggestions for that person’s email based on your address book or your organization’s directory:
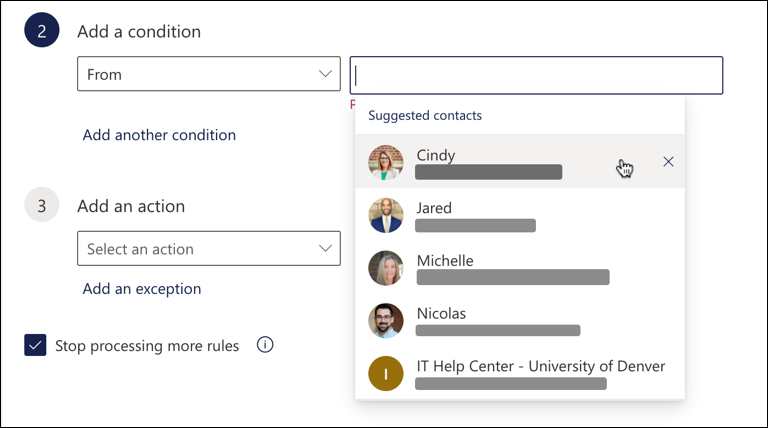
There’s Cindy, right up top. Easy!
Now it’s time to specify the associated Action. Again, a lot of choices:
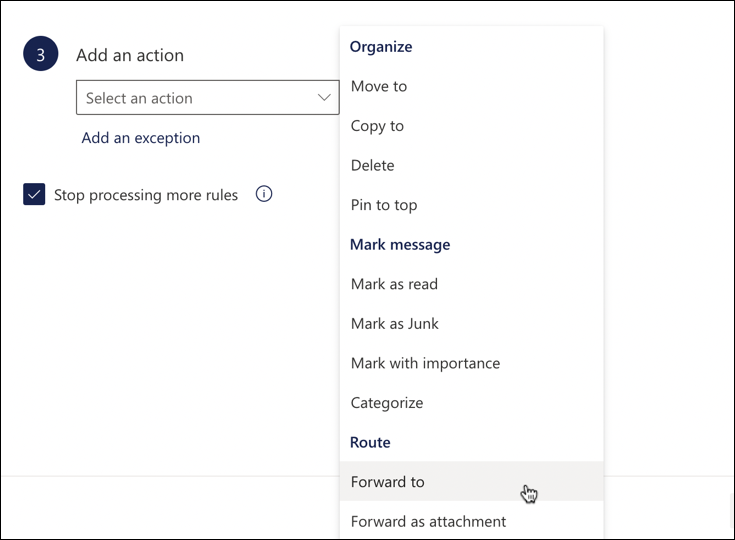
Choose “Forward to” and I can then enter my Gmail address:
That’s it. A click on “Save” and it’s set up as an active rule. Note that it’s redundant with the Forwarding rule, so I would recommend you choose one or the other, not both. But that’s how it’s done. Now, go set things up!
Pro Tip: I’ve been using and writing about Microsoft’s Office Suite for many years. Please check out my Outlook help library for plenty of useful tutorials, as well as additional Office 365 help pages! Thanks.