
As a technical writer, I take a lot of screenshots and drop them into documents. Every time I have to select the image and add a border. So tedious! Is there a way to have Snipping Tool add a border automatically for me?
There are a remarkable number of different tools and utilities to help you capture the perfect screenshot on your Windows PC, but I tend to go old school with the built-in Snipping Tool. It’s fast, easy, logical, and guaranteed to be included in every single version of Windows. What’s not to like? If you do a lot of annotation or want to capture more than what’s show n on the screen, well, that gets a bit more tricky, but for basic “here’s what I see” sort of images of either the entire screen, an entire app window, or just a portion of the display, it’s hard to beat the simplicity of pushing Windows + Shift + S or the f12 [print/capture] button to grab what you’re seeing.
While Snipping Tool doesn’t have a lot of capabilities, it does have some options and settings that can make it more useful for people, notably including the ability to have it automatically add image borders around captures. Better yet, you can choose color and thickness. If you know where to look, and if you have permission to do so. Yes, for reasons I can’t explain, the ability to enable borders on your screen captures is actually something that can be enabled or disabled within the Win11 security settings too.
GETTING TO SNIPPING TOOLS SETTINGS
Let’s start with the basics though, by launching Snipping Tool. You can use one of the key sequences, but I’m going to just search for it on the Toolbar:
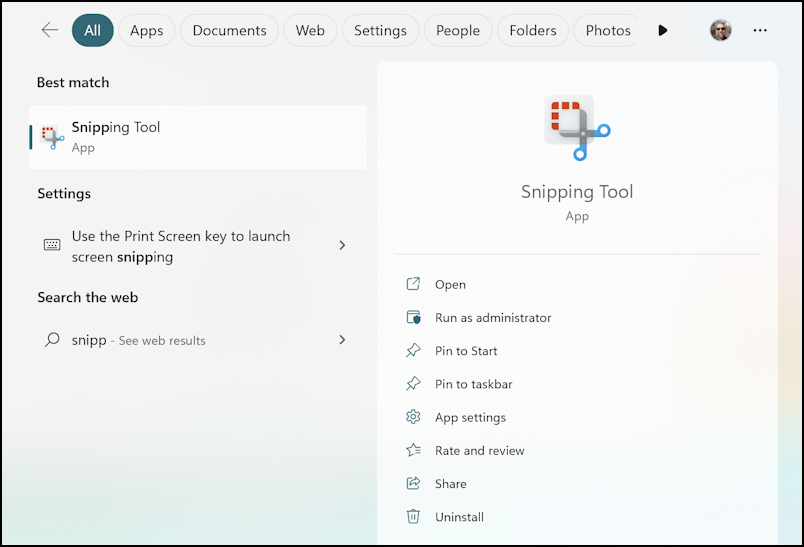
A search for “snip” and there it is, ready to go! Click on the icon or choose “Open” and it’ll pop up its full window that you might not have seen before if you only use the shortcut:
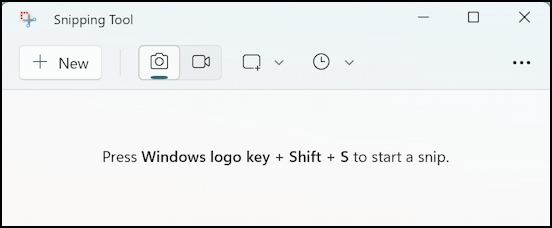
A convenient reminder in the middle of the window about the shortcut – and notice there’s a delay feature accessible with the clock icon too – but we want settings. To access them, click on the “•••” button on the right. A menu pops up:
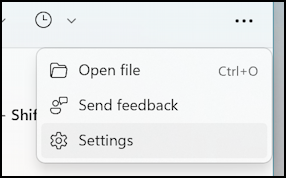
This is a handy place to send feedback if you wish the utility had an additional feature and “open file”? I’ll let you explore what that allows for yourself, if you’re curious. For our task, of course, choose “Settings“.
SNIPPING TOOL CAPTURE BORDER SETTINGS
The main Settings window shows the following options:
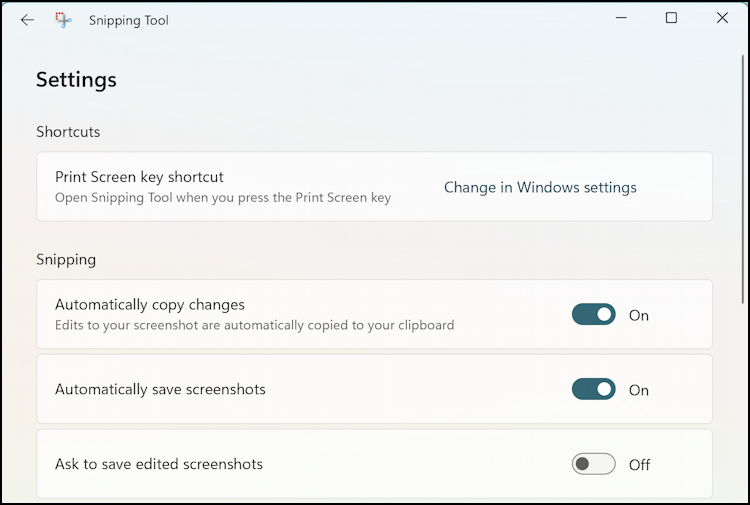
You can change the shortcut if you want (admittedly, in a different window) and there are some additional Snipping options. Scroll down further, however, and you’ll find the one we seek:

Click on “Add border to each screenshot” to enable it and open up this additional info. Then choose a color and a thickness, ranging from 1 pixel to a monster thick super border!
COMPARING SCREENSHOT BORDERS
With this disabled, grabbing a region capture within File Browser looks like this:

It can be good in some contexts to have the image “float”, but if I enable screenshot border, it’s a bit better defined as an image on the screen:

I’d probably not stick with a border quite this thick, but you can see the difference. Logical.
But what about the security settings?
WIN11 SETTINGS: ENABLE SNIPPING BORDER
Go into your overall Windows Settings (not within the Snipping Tool) and you’ll find you can move to Privacy & Security and you’ll find an entry for “Screenshot borders”. It looks like this:
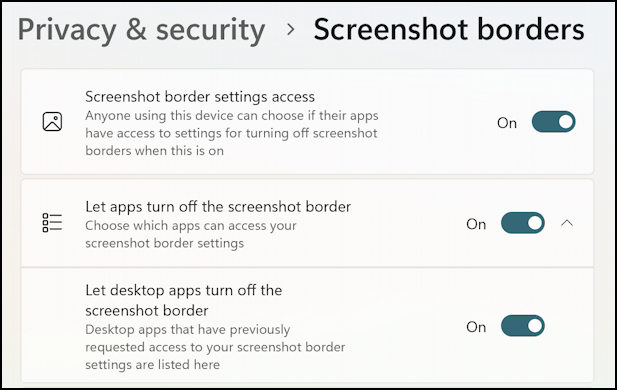
Now, why is this a security setting that you might have enabled or disabled? I cannot explain it. But if you can’t get your borders to show up, check your PC Settings to ensure it’s enabled!
Power Tip: I’ve been writing about Windows for many years and have an extensive Windows 11 help library here. Please check it out while you’re visiting. Thanks!