
Did you know that your Windows PC has the ability to wirelessly mirror your screen content onto another device, even a TV? There are two main options: Miracast, and Chromecast. Here’s how to use ’em…
While it’s easy enough to use an HDMI cable to connect your Windows PC to a nearby television or external display, why have the clutter? It turns out that there are three major wireless video transmission protocols, two of which are built into the Windows operating system: Miracast, Chromecast, and AirPlay. The latter is Apple only so it’s no surprise that Microsoft hasn’t embraced it, but ‘casting offers a ton of flexibility anyway. Even better, lots of SmartTV systems include built-in Chromecast, making it one of the easiest to work with. Miracast is also supported by many tablets and smartphones, in addition to a subset of displays and SmartTV systems. Be aware that Miracast sometimes shows up under a proprietary name, like Samsung AllShare Cast or LG SmartShare.
Shortcuts: Miracast Shortcut | Establish Miracast Connection | Chromecast from a PC
You can also take over the screen of a nearby Windows PC if you want to extend your laptop screen onto that device, once they install the correct Windows optional Miracast support. Let’s start with Miracast and then I’ll show you how Chromecast works from a PC too. Ready? Let’s do it!
WHERE’S THE CAST SHORTCUT?
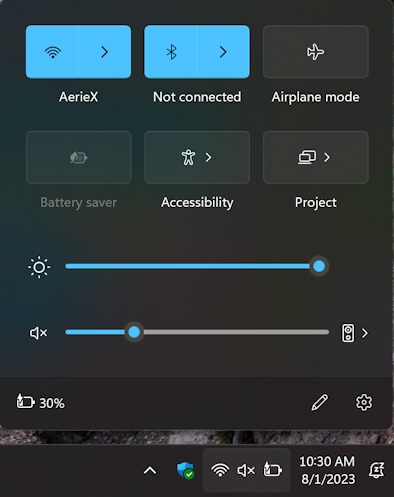
The first step is to enable the ‘Cast shortcut from the shortcut menu: You want sharing to be as easy as possible, right? A click on the lower right of the Taskbar and, well, where is that shortcut?
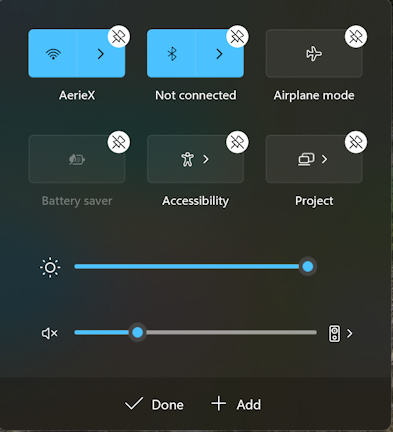
Turns out that for most people, it’s hidden until you reveal it. That’s done by clicking on the pencil icon on the lower portion of the window, which reveals a couple of new buttons:
If there are shortcuts that you never, ever use, you can easily remove ’em from this point, but we want to add one, so click on “+ Add” to proceed. A small menu of available shortcuts appears:
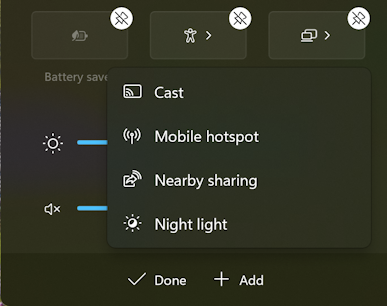
Choose “Cast” and, if you want, anything else that looks useful. Why it’s called “Cast” rather than “Miracast” to avoid confusion with Chromecast is beyond me, but… we’ll get back to that in a moment. For now, click on “Done” when you’ve added it.
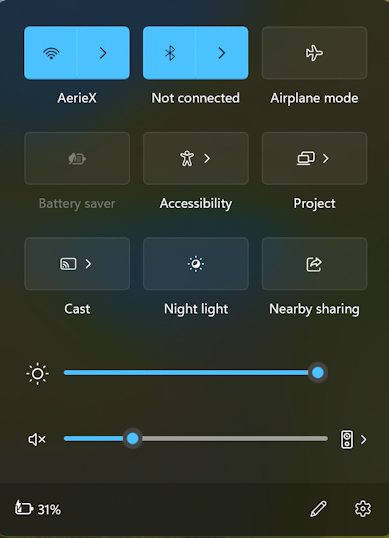
There it is. Now, let’s use it.
ESTABLISHING A MIRACAST WIRELESS DISPLAY CONNECTION
From this point, click on “Cast” and it’ll scan your current wireless network for possible connections…
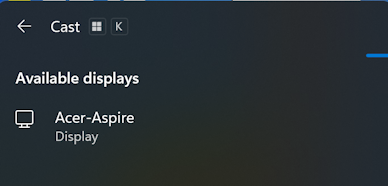
If you don’t see any, check to ensure that your Miracast display is on the same wireless network. Want to set up a secondary PC as a Miracast recipient device? Here is a handy FAQ from Microsoft on doing just that: Use Your PC as a Miracast Display.
I’ve already done just that with my Acer Aspire laptop, which is why it’s showing up as a secondary display. Once chosen (and you’ll need to be running the “Wireless Display” app on the recipient PC) you should have your screen mirrored in that window on the remote PC! On your source PC you’ll be able to enable – or disable – input from the remote computer too:
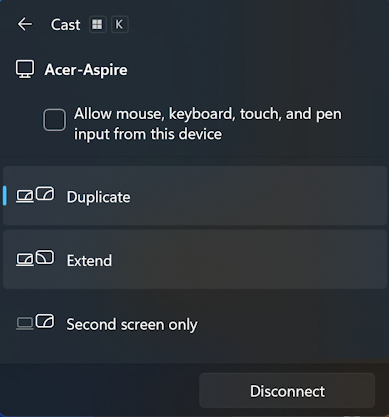
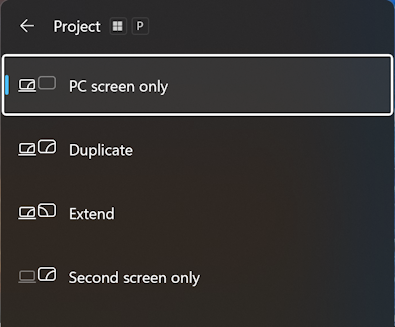
Choose “Extend” if you want it to be additional screen real estate, or “Duplicate” if you want it to mirror the content of your own computer screen. When I got it all hooked up, here’s what I had:
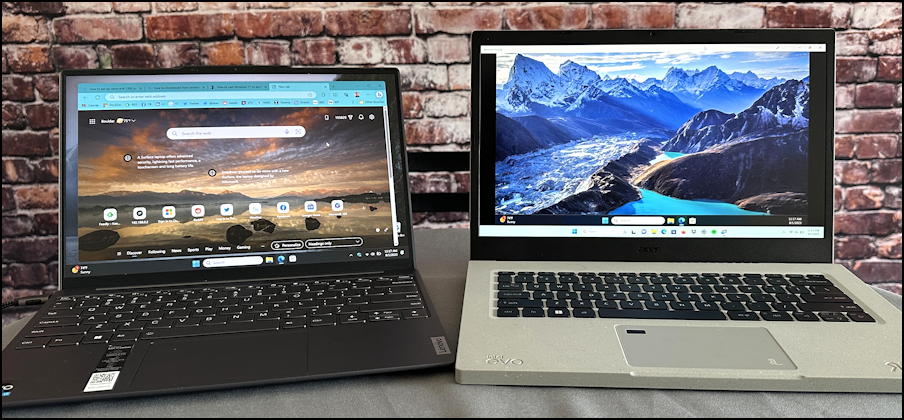
The left computer, the Lenovo, is the source computer, while the right computer, the Acer Aspire, has the Wireless Display app running in full screen. Notice that the Acer has two Taskbars along the bottom!
WHAT ABOUT CHROMECAST?
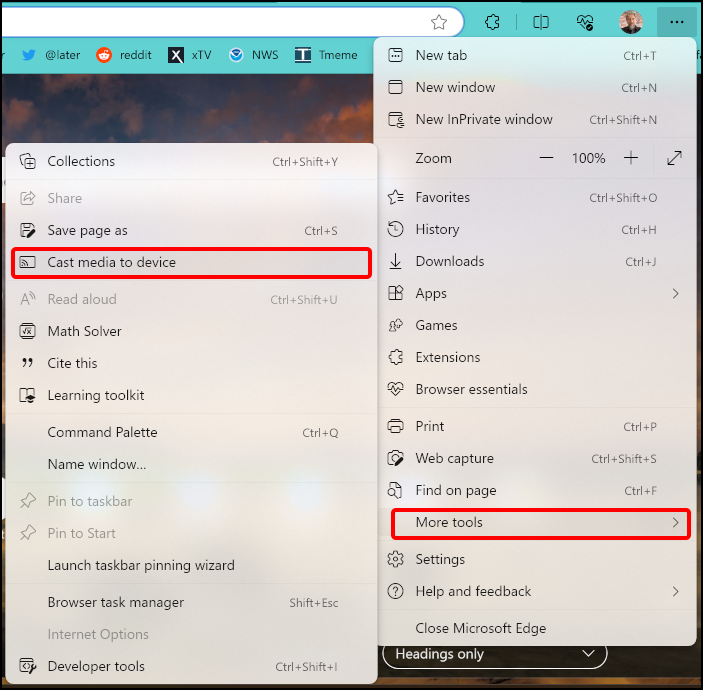
Having gone through all of those steps, it actually turns out to be easier to use Chromecast, a Google wireless display protocol that’s built into Microsoft Edge, YouTube, Google Chrome, and many other apps. It’s also included with most SmartTVs and a lot of external monitors too, including my Vizio TV. Chromecast is easier to get working, but the feature is rather hidden within Microsoft Edge (or Chrome, if you prefer that browser). In the browser, go to “•••” > “More tools” > “Cast media to device”:
This will bring up a little window showing the connection options:
Before you proceed, however, click on the “Sources” button, because it’s where you’ll have that “a ha!” moment:
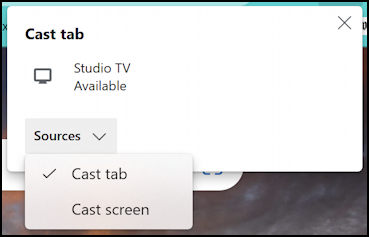
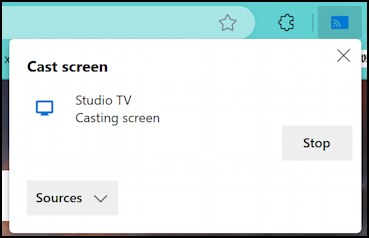
Choose “Cast screen“, then choose your TV or another Chromecast device, and you’re in business! Want to switch from mirroring to have it as an extended display? Just use the Windows+P key shortcut to get to the appropriate menu:
That’s it. Once connected, the Chromecast menu in the browser will add a “Stop” button, or you can just power off the remote screen.
That’s it. Whether you use Miracast through the Windows Taskbar shortcut or Chromecast through your browser, they are both reasonably simple ways to get your screen showing up on another display without any wires being involved!
Pro Tip: I’ve been writing about computer and tech basics for eons. Please check out my Computer & Technology Basics help library, along with my Windows help and Mac help libraries for lots and lots of additional tutorials while you’re visiting. Thanks.