
I’ve been bouncing between Google Calendar and Outlook Calendar (part of Office 365 online) and wonder how I can set up a recurring event in Outlook? Thanks for any help!
It’s definitely tough to manage a schedule across multiple calendar apps, so are you aware there are ways to sync up your Outlook calendar and your Google calendar? Here’s a starting point: See your Google Calendar in Outlook. The other big calendar service is on the Apple side, but my experience is either people are Mac / Apple or Windows / Google / Microsoft, so hopefully your calendar needs aren’t quite that complicated!
In terms of individual events, all of the calendar programs work the same and allow the same level of flexibility with recurrence, frequency, alerts, attachments, etc. Outlook makes it easy with a straightforward event entry window, but there are hidden features and capabilities within too! Where things get tricky is when events repeat in strange patterns. Sometimes the easiest solution is to just duplicate events, honestly, rather than puzzle things out.
Either way, let’s jump into the basics of creating an event in Outlook through Office 365 Online, shall we?
HOW TO CREATE AN EVENT IN OUTLOOK CALENDAR
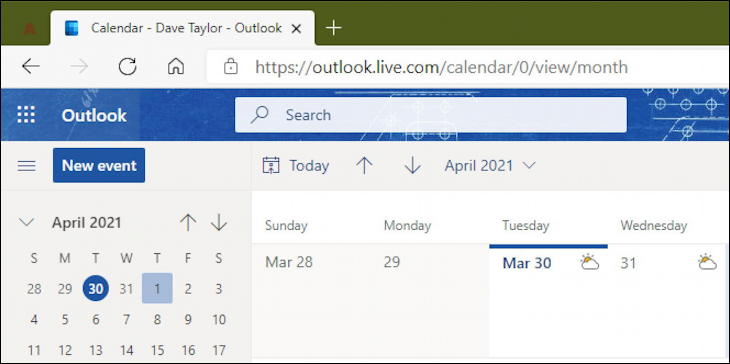
The easiest path is to click on the dot grid icon on the top left to move to the Outlook calendar. When you’re in Calendar view, you’ll see a “New event” button appear on the left side, as shown below:
No surprise, click on “New event” to open up the basic event entry window. It looks like this:

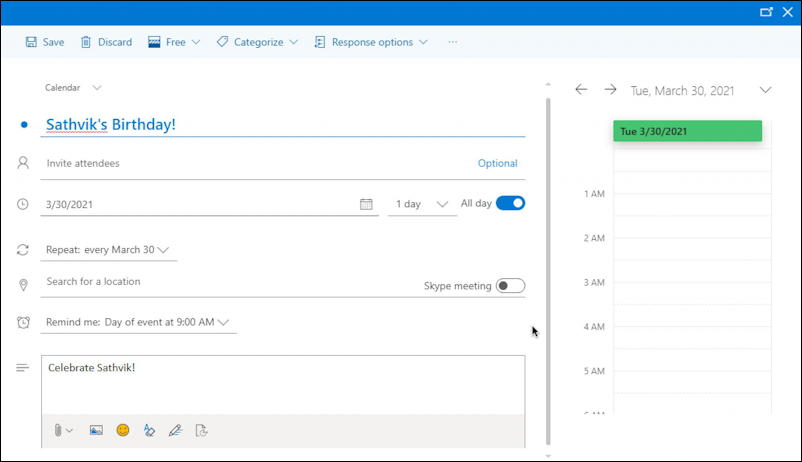
Some of the fields are obvious, but notice the switch on the top right “All day“. I use my calendar to track a lot of all day events and a great example is a friend’s birthday. Choose “All day” and the start and end times vanish from the input options. Otherwise, enter the basics of a title and the chosen date…
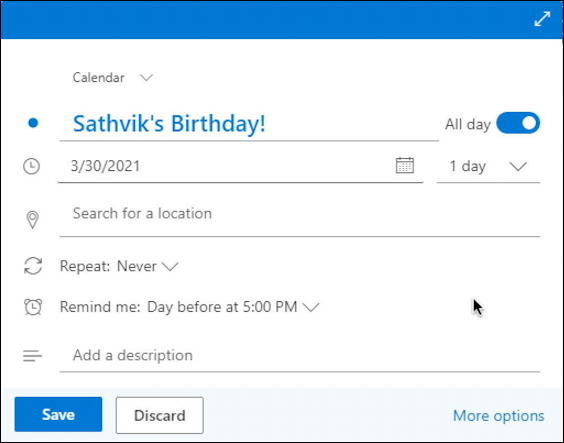
You can see that for my friend Sathvik’s birthday, I’ve entered the event title, specified the date and noted that it’s “All day”. Also note that I can specify that the event last for longer than a single day too (if he’s really into birthdays or it’s actually a different type of event).
SPECIFY EVENT REPEAT SCHEDULE IN OUTLOOK
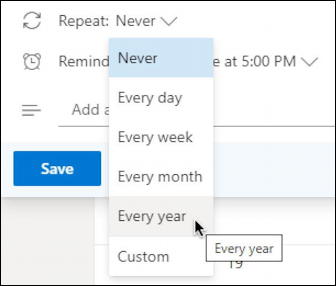
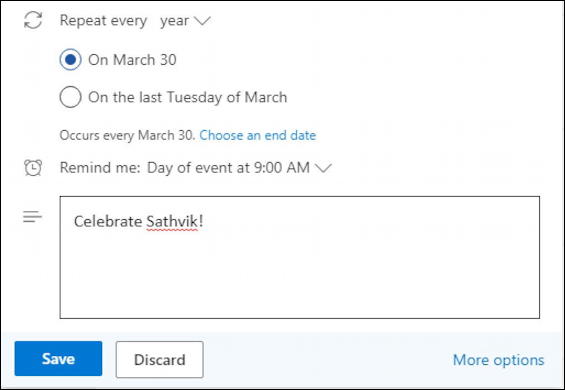
Birthdays generally are once a year on an annual event, though I suppose if you were born on Feb. 29 of a leap year, your birthday is technically only once every four years. Hmm… that must be awkward…
Anyway, if it’d “Every year” then you can simply choose that from the Repeat pop-up:
You can also specify more complicated repeat sequences too, including the last Thursday of each month or even every three months by choosing “Custom” from that menu. It replaces the repeat menu with a bit more sophisticated input field:
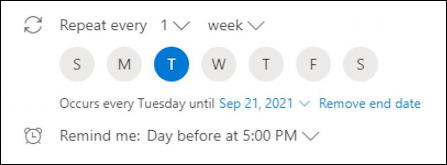
Poke around a bit and you’ll be surprised how many different repeat cycles you can specify with this input.
Once you land on a repeat frequency that works – like “every year” – don’t forget to fine-tune the reminder to match your needs. Perhaps it’s as simple as “Day of event at 9:00 AM”. Click on the default reminder and it’ll offer a small menu of choices:
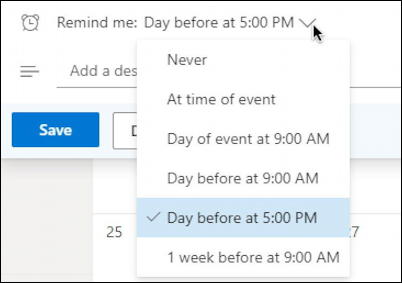
Of course, if it’s your life partner and you need to plan ahead with dinner reservations, then “1 week before” might be a better setting to help your life be in harmony!
Finally, you’re ready to add an additional note, if desired, and save your event, right?
Well, there’s more you can specify, so instead click on “More options” on the lower right to fine tune things.
ADVANCED EVENT CREATION IN OUTLOOK CALENDAR
The first thing you can improve is that the description can actually include rich content, including photos. Unsure why you’d want to use that feature, but you can do it:
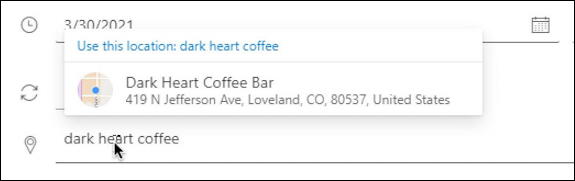
Perhaps every year you head to the same place to celebrate their birthday or whatever other type of event you’re entering has a specific location or business venue associated. Turns out that’s easy to enter and that Outlook even has a database of locations from which you can easily search. Simply type in a few letters of the venue’s name in the “Search for a location” box. I’ll type in the name of a great coffee shop in Loveland, Colorado:
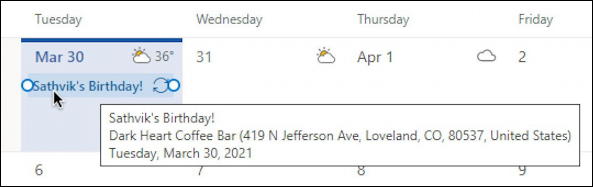
Got everything set up just so? Great! Now remember to click on the “Save” button on the top left of the advanced window or the lower right of the fast entry window and you’ll have a new item in your calendar. Hover the cursor over the event and useful information pops up:
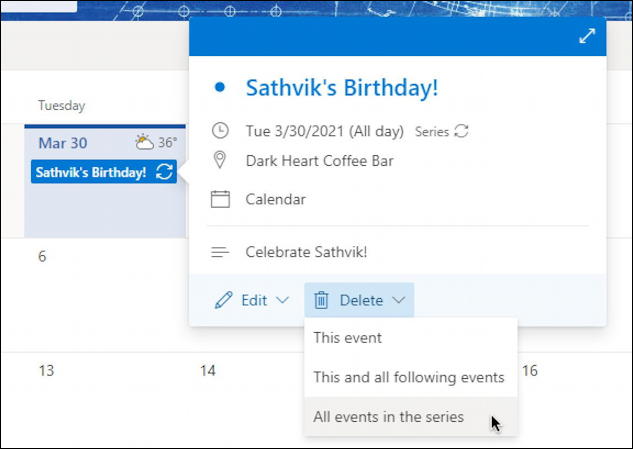
Click on it and a reminder window appears with key information including the somewhat confusing dual-arrow “recycle” icon that indicates it’s a recurring event. There are two buttons along the bottom and if you want to at any point remove the recurring event, well, you can do that too:
And that’s it. Now you know everything you need to know about adding recurring events in Outlook Calendar!
Pro Tip: I’ve been using and writing about Microsoft’s Office Suite for many years. Please check out my Outlook help library for plenty of useful tutorials, as well as additional Office 365 help pages! Thanks.