
I notice that Microsoft Windows 10 includes support for VPNs. Very nice. How can I hook ExpressVPN, my VPN of choice, into Win10 so it’s my default?
I’m also a fan of ExpressVPN and find it a solid balance of affordability, speed and reliability. I think it’s one of the best VPNs available. Don’t have a VPN yet? You might want to check out ExpressVPN. Not sure of the benefits? Privacy. Virtual Private Networks (VPN) allow you a lot more privacy and anonymity on the Internet by using a point-to-point encryption system. This means that even if the wifi network you’re using is monitored, you’ll be in the clear with your communication to and from the rest of the Internet being encrypted from your browser to the VPN server itself. Helpful even if you just don’t want people snooping on your Amazon purchases.
VPNs, however, can be a bit tricky to work with which is why it’s so darn helpful that Microsoft has tucked VPN support directly into Windows 10 and even lets you automatically start it up every time you boot. A lot of big corporations have their own VPN servers too, ensuring that sales and support staff in the field can safely and privately communication with HQ. Even then, though, do you really want the boss knowing every Web page you visit, every email you get, every time you pop over to Netflix?
Enter the private VPN, a service for consumers and other network users. Lots and lots of choices but one of my favorites is ExpressVPN. Setting it up is pretty demonstrative of how to set any VPN up for Win10, so let’s just have a look.
To start out, you’ll need some data from the ExpressVPN service. Easily found by going to their Web site at expressvpn.com. You’ll need to log in to your account then go to the setup area. It looks like this:
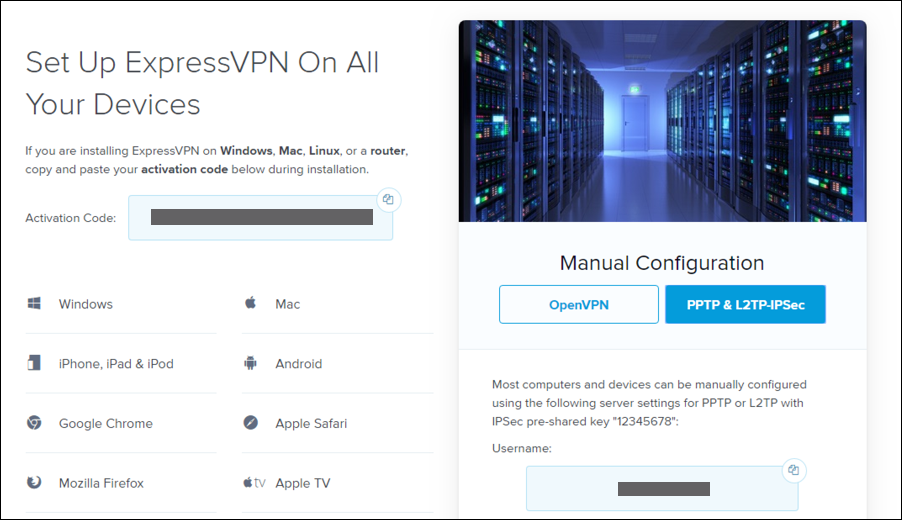
Well, not quite like that because you need to choose “Manual Setup” from the list of devices on the left side. Then the window on the right pops up. Make sure you click “PPTP & L2TP-IPSec” as the option!
On the right window you’ll see a username and password shown. You’ll need those. A bit lower down you’ll also see a list of servers by hostname. Click on the continent you desire, and it’ll open up to show you lots of options. Like this:

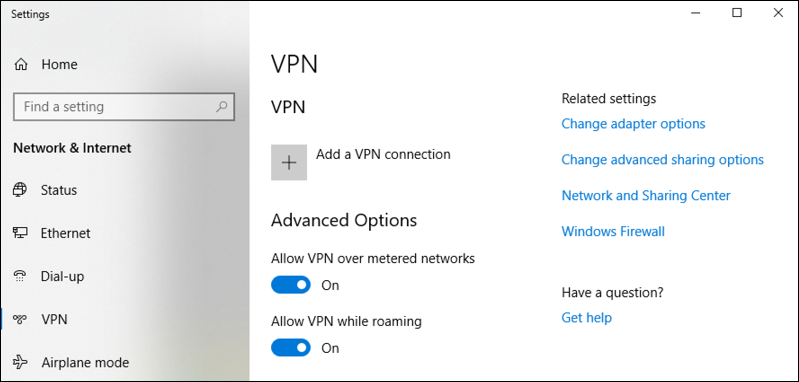
Now, go to the Windows Start Menu and search for “VPN” as a shortcut to get to the Win10 VPN configuration screen:

The default is what you seek, so click on “Change virtual private networks (VPN) system settings. Here’s the window:
No surprise here, click on the “+ Add a VPN connection” link near the top. That’ll pop up a blue window with a bunch of different fields to enter – most of which you just got from the ExpressVPN Web site!
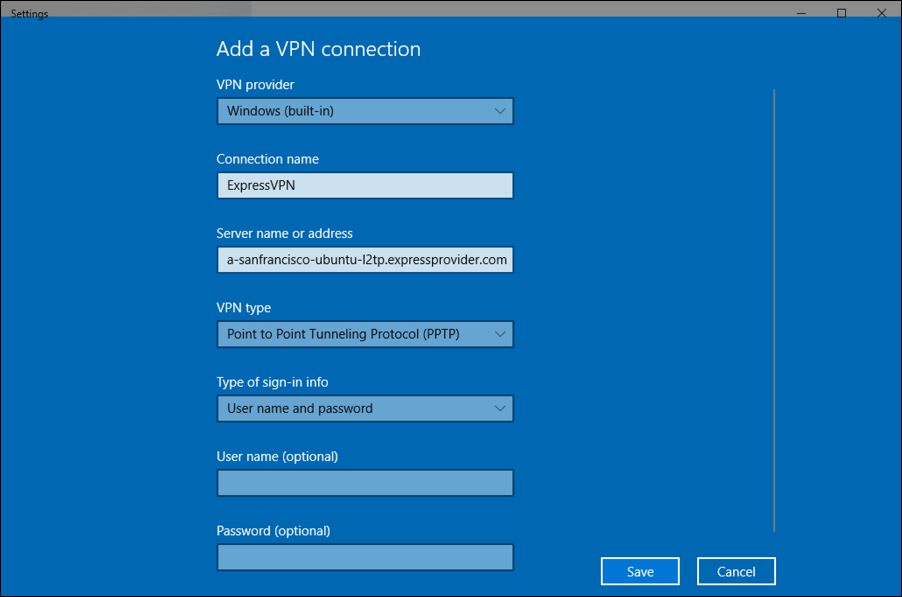
You can see how I’ve filled it out so far, notably including the server name. It’s a bit confusing, but you want to choose “Windows (built-in)” as your VPN provider. Most importantly, choose “Point to Point Tunneling Protocol (PPTP)” as the type of VPN connection. Enter the host, then enter the username and password exactly as shown on the ExpressVPN site (copy and paste, obviously) and click “Save“.
Done. That’s it. Really! Now there’s a new VPN in town:

Click on it and you’ll see the various options:
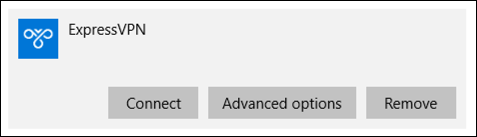
You can go to this window and click “Connect” every time you want to connect with ExpressVPN, but check it out, it’s also now an entry on the connection shortcut too, as you can see here:
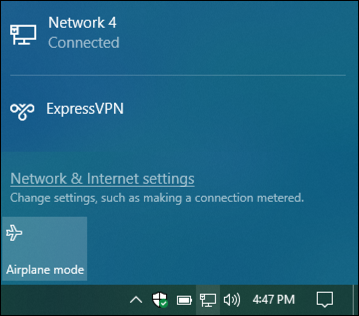
That makes it super easy to choose ExpressVPN – or whatever VPN you’ve configured – any time you want an additional layer of privacy for your network connection.
I’ll also note in passing that ExpressVPN has its own Windows client app too if you’d rather use that. It’s nice and makes using your ExpressVPN account a breeze. Still, having a VPN built into Windows is undeniably cool too.
Disclaimer: I’m a user and big fan of ExpressVPN and have been for years. I have also used affiliate links throughout this article; you’ll pay the exact same price if you want to try it out for your own VPN usage, but it’ll also help us keep the server running too. Thanks!