
Got a shiny new Windows 11 PC that includes a fingerprint scanner? With a lot of modern PCs it’s easy to forget the scanner’s even included, but if it is, here’s how to get it set up as an alternative login method…
Just like smartphones have a variety of biometric systems to help you prove your identity and login to the system with the minimum possible fuss, so do Windows PC computers now have a variety of biometric systems too, including facial recognition. One of my favorites is fingerprint scanning, something I use on both my Windows and Mac laptops; it’s typically so fast that it’s less than a second from putting my finger on the scanner to being logged in and ready to proceed. All while ensuring no-one else does the same when I’m not watching!
Shortcuts: Windows Hello | Scan Finger | Set Up A PIN
The question is how to get the fingerprint scanner set up. Typically, when you’re first setting up your PC it’ll give you a prompt to set up your biometric scanner. If you skipped it when you were setting things up or weren’t the first person to have the PC, however, it can seem like quite a mystery. Since I have a new Acer Aspire Vero Windows laptop, I’m going to show you how I set it up on this computer and it should show you how to do the same on your own.
What does a scanner look like on a PC like the Acer? Here’s the tiny black scanning device embedded in the top left of the trackpad:
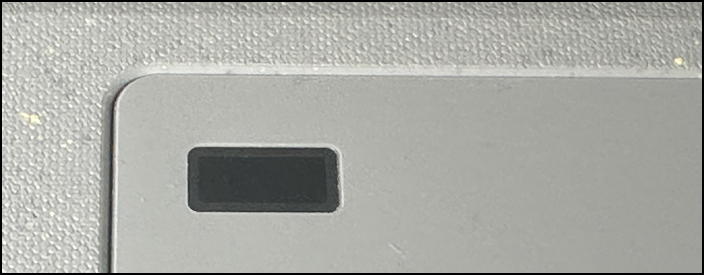
Rather easy to ignore, but once you set it up, you’ll love using it to log in. Let’s get it set up!
WELCOME TO WINDOWS HELLO
The general name for all of the login options in Windows 11 is “Windows Hello”. Find it by searching for “finger” on your PC:
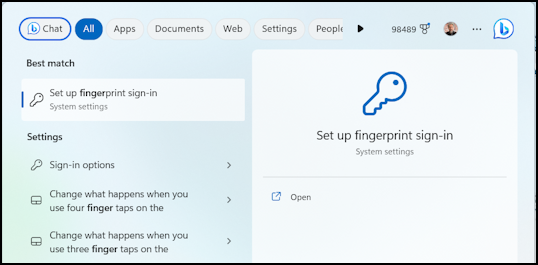
If it’s an option for your system (since not every PC has a sensor) you’ll see “Set up fingerprint sign-in”. Choose it to proceed.
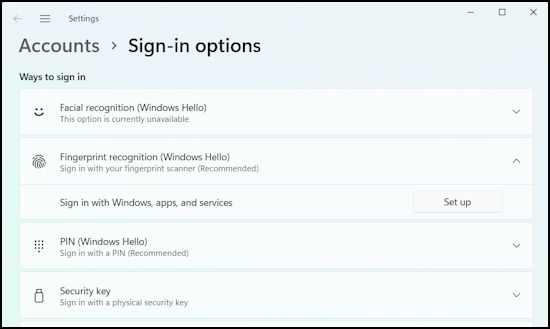
My system doesn’t yet have any passwords or similar, so I’ll have to add a password and, later, a PIN, as part of the process too. If you aren’t seeing “Sign in with Windows, apps, and services” under “Fingerprint recognition” click on the “V” to reveal it.
A click on “Set up” and you’ll be moved to… you guessed it! Windows Hello!

Let’s proceed…
SCAN YOUR FINGERPRINT IN WINDOWS HELLO
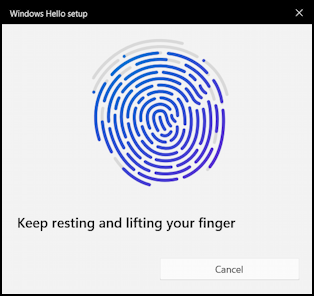
Click on “Get started” and it will probably ask you to verify your password to ensure that it’s really you poised to scan your fingerprint. Logical, if you think about it. Now it’s time to scan your finger. This means that you’ll need to place your finger on the scanner, again and again, slightly varying the angle and portion being scanned until it can build up a representation of your entire finger. To start, you’ll see it portrayed like this:
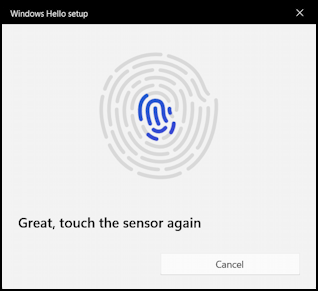
As you touch the scanner again and again – maybe 15+ times total – you will gradually see the grey lines filled in blue to represent progress:
Once you’re done, it’ll prompt you to set up a PIN. An easy one are the last four digits of your best friend’s phone number or similar. Longer, however, is better, so I tend to use 7-8 digit numbers.
SET UP A SECURITY PIN
Windows Hello wants you to set up a variety of ways to verify your identity on the computer, including a password, biometric (fingerprint), and PIN code. Here’s how it asks:

Click on “Set up PIN” and enter your code. I tend to use 7-8 digit codes, as I said, so here’s what I see:

Want to make it more complex? Check the “Include letters and symbols” box, though then it’s just another password so why not just use a password and be done with it? A PC security conundrum, for sure.
Done! Now when you look at the Windows Hello configuration screen, it will offer the chance to scan an additional fingerprint, which can be one of your other fingers or that of a trusted companion:

That’s it. You can now close the “Accounts > Sign-in options” window. I recommend you log out of your system – or even restart – then try logging in by sliding your finger along the fingerprint scanner. Cool, eh?
Tip for Power Users: I’ve been writing about Windows for many years and have an extensive Windows 11 help library here. Please check it out while you’re visiting. Thanks!