When I go to add a printer to my Ubuntu Linux system, it shows a “CUPS” generic printer, but not the actual LAN printer we have on our network. What’s up and how do I add our printer to the system?
While adding a printer to a Mac, PC, or Linux system is way easier than it used to be, there are still some hoops you might have to jump through to get it all working. Network printers seem to be the hardest to get properly configured because not every device advertises its presence, identity, and capabilities in the same way. The result is that we – or our admins – have to manually choose drivers or specify what cool features are included with the printer, like two-sided printing, color, multiple paper trays, etc.
Shortcuts: Identify IP | Add Network Printer | Configure Network Printer
In the Linux world, you know you haven’t gotten it right if all you’re offered is the dreaded CUPS printer. Why? Because CUPS is Common Unix Printing System and it means that the system has decided it’s a generic printer with no features or advanced capabilities. If you have a $90 printer from the local office supply store, that might be sufficient for your text printouts, but most modern printers have a lot more to offer than 70’s era ASCII text printing.
I recently needed to add an HP network printer to my own Ubuntu Linux system, and saw that the Linux system simply didn’t see it so couldn’t add it. Let me show you how I proceeded…
IDENTIFY NETWORK PRINTER IP ADDRESS
The first step doesn’t involve your computer at all, actually, just your printer. All network printers have a screen with settings and configuration information that can typically be printed out onto a test sheet. That’s exactly what I did with my HP, which produced the following:
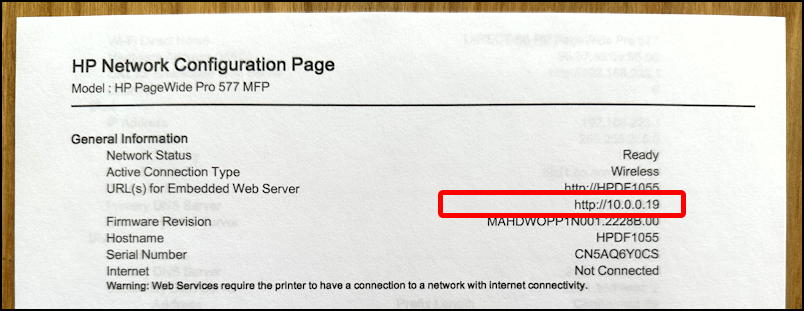
I’ve highlighted the key information, which is the Internet Protocol (IP) address of the printer. Armed with this information, I can have any device or computer on my network communicate directly with the printer, including a Linux system.
If you’re lucky, you won’t need to identify this and your printer will be immediately recognized when the Linux system scans for printers, but that did not work in my case, so knowing how to obtain the information is definitely helpful. Now, let’s switch to the Linux system.
HOW TO ADD A PRINTER TO A LINUX SYSTEM
Make sure you’re logged in to your administrative account on the Linux system so you have permissions to add new devices and go to Settings. On the left side, near the bottom, is “Printers“. Click on it. Here’s what I see:
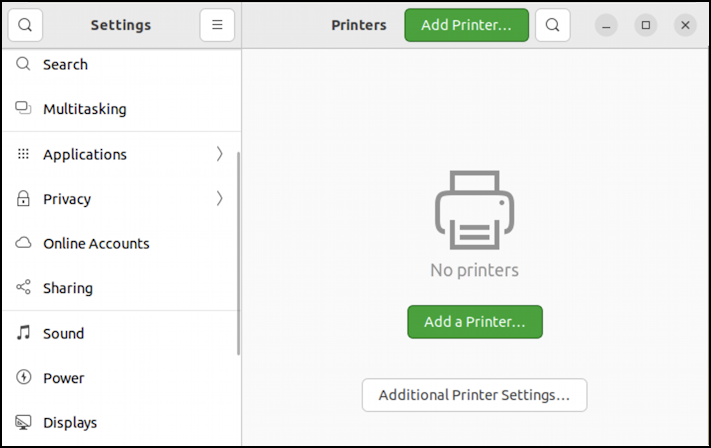
No printers. To fix it, no surprise, click on the green “Add a Printer…” button. It will scan for both printers that are plugged directly into the computer and those that are visible on the local area network. In my case, nada. Just that CUPS printer service:
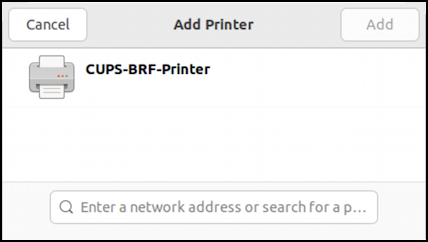
Definitely not useful in this instance. Instead, it’s time to enter the IP address of the printer gleaned from the settings printout. In my case, 10.0.0.19:
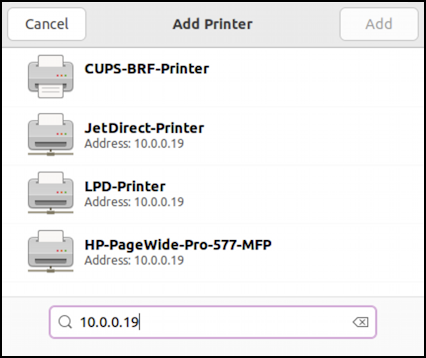
My HP printer works with a variety of protocols and advertises as a LPD (line printer daemon, a very rudimentary Linux and Unix printing service), a JetDirect printer (HP’s own network printing protocol), and as itself, the HP PageWide Pro 577 MFP. I’ll choose the latter by clicking on it.
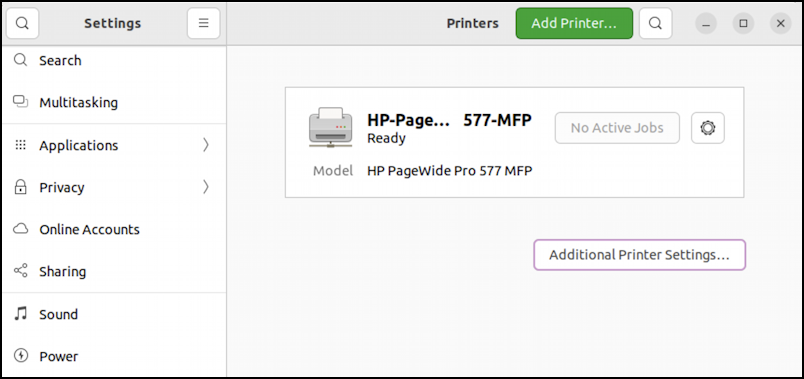
That’s it. Printer added. Not too bad once you know how to dig up that IP address (and where to enter it in the add printer window).
HOW TO CHECK PRINTER SETTINGS IN LINUX
Once the printer’s added, click on the tiny gear icon adjacent to check its configuration:
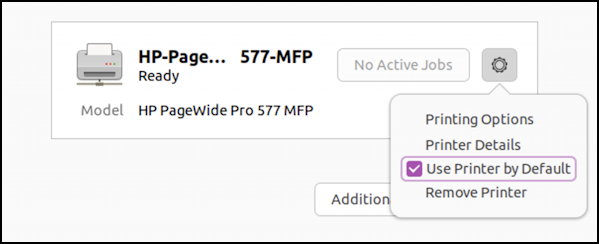
I’m going to mark it as the default printer for new print jobs by checking “Use Printer by Default”. Let’s also have a look at both Printing Options and Printer Details, starting with Printing Options:
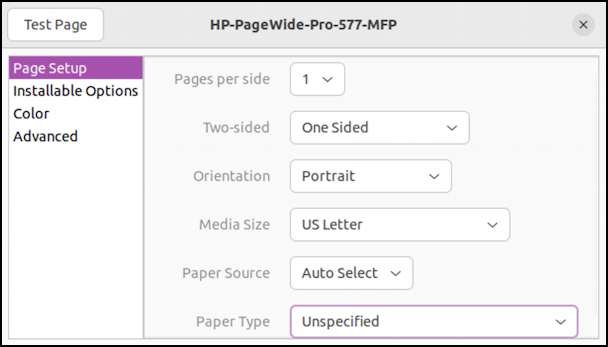
The Linux system has definitely found the correct driver as it’s offering a lot of settings and features specific to the HP PageWide Pro 577 MFP, including two-sided printing and multiple paper sources (trays). If you want to use the printer for printing on photo paper, you can specify that in “Paper Type” on this window. While you’re at it, a good first step is to click on “Test Page” on the top left too. Does it print?
Printer Details offers some additional settings, including the ability to rename the printer for everyone:
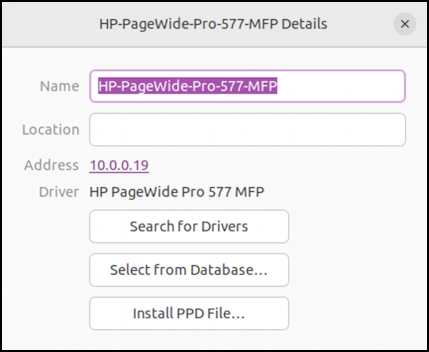
Most importantly, notice that it’s picked the correct HP PageWide Pro 577 MFP driver. If your Linux system has chosen the wrong one for your printer, try a test page (it might work!) or use “Search for Drivers” to match it up correctly. If it’s the right brand, by the way, the wrong model usually means that there are one or two features that might not be accessible, but it should work for most simple printouts.
PRINTING TO A NETWORK PRINTER IN LINUX
With everything set up and that test page working properly, it’s time to try a printout from a typical Linux application. I’ll use Firefox and choose “Print” from the three dash link on the top right. It displays a printer dialog window:
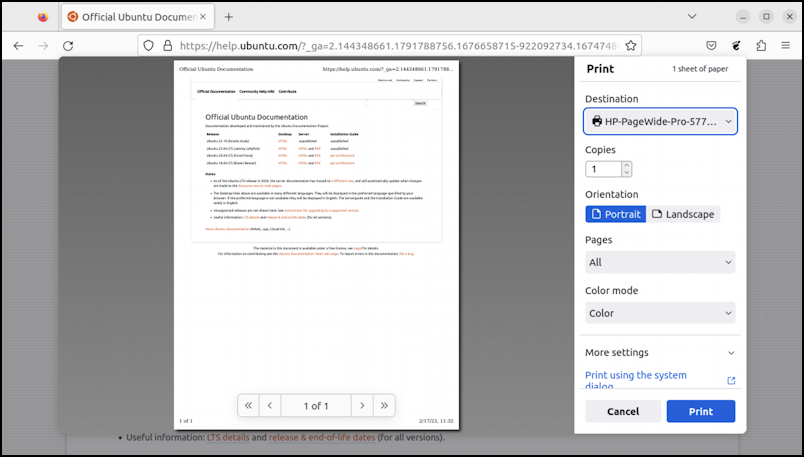
Looks good and it’s offering up key options like color vs black & white and has the printer listed by name as the default. Good. A click on “Print‘ and a few seconds later the Official Ubuntu Documentation Web page is indeed printed and looks clean and crisp. Mission accomplished.
Pro Tip: I’ve been writing about Linux since the dawn of the operating system, and Unix before that. Please check out my extensive Linux help area and Linux shell script programming area for lots of additional tutorial content while you’re visiting. Thanks!
