
I post a lot of images and content on my company’s LinkedIn account and am wondering if I can do basic editing tasks like cropping, rotation, and color correction within LinkedIn? I currently edit all the photos in a separate program, then share them on LI, and it’s tedious!
Social media sites are starting to recognize that we users want more control over our posts, from identifying location to tagging companies, adding popular hashtags to, yes, editing an image prior to posting. Some sites give you very little control over image editing, assuming you’ll have already done all the editing you want in a photo editor, while others offer a surprisingly robust set of tools convenient within the browser window. Surprisingly, perhaps, LinkedIn is at the head of the pack with its sophisticated image editing tools.
These don’t eliminate the need to have good source material in the first place, so your best first step is always to use the best camera you can. Don’t rely on the intern with their iPhone 6 to get those critical photos you want to utilize to promote your latest product! Once you have a photo ready to edit and post, however, it’s pretty easy to use the editing capabilities LinkedIn offers. I’ll demonstrate by using the LI Web interface; the mobile app is a different experience, of course.
FACEBOOK’S BUILT-IN PHOTO EDITOR
But first, let’s have a peek at what Facebook offers if you want to edit your photo before posting:
It lets you crop and rotate, but otherwise, you’re left out in the cold if you want to do any other edits to your image. Not so good. Fortunately, LinkedIn’s quite a bit more sophisticated…
ACCESSING THE LINKEDIN PHOTO EDITOR
Start a new post on LinkedIn and you’ll undoubtedly see something like this:
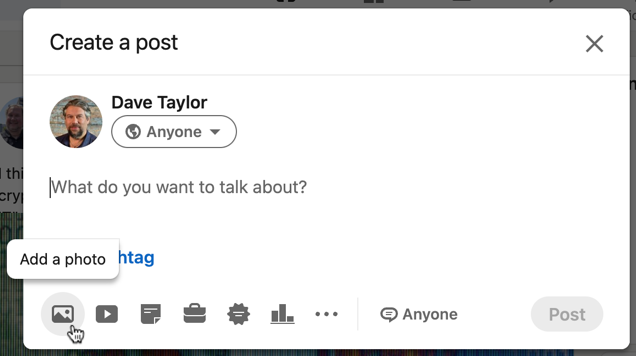
Click on the tiny photo icon – which you already know, I’m sure – and you can select the file from your computer. You’ll then be presented with a view of your just chosen photo like this:
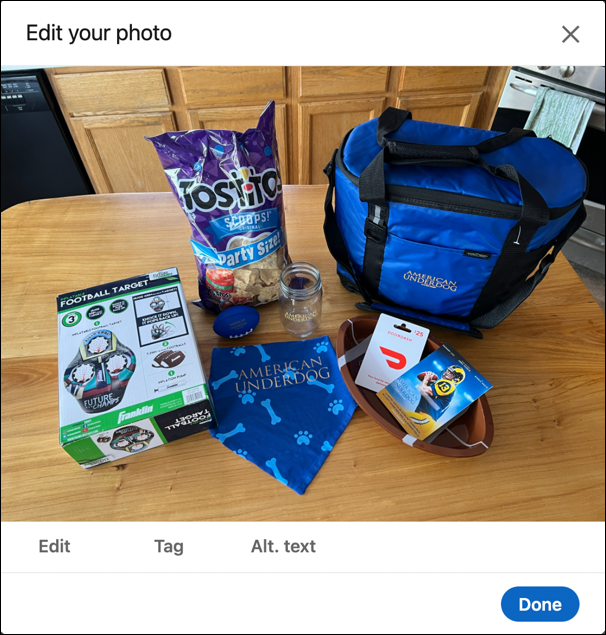
Most likely you’ve trained yourself to click on “Done” and get back to editing your post, but the Edit feature is accessible right there, from the “Edit” button. First, though, click on “Alt. text”.
You’ll be given this prompt:
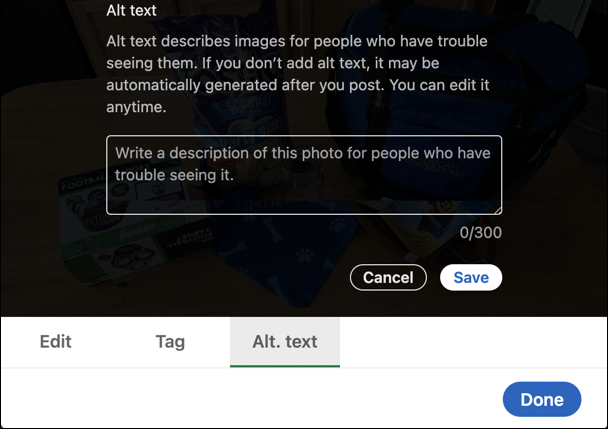
As it says, “Alt text describes images for people who have trouble seeing them. If you don’t add alt text, it may be automatically generated after you post. You can edit it anytime.” Long and short: Your posts become more accessible if you spend the few seconds entering a few words into this box. Do so, then click “Save“.
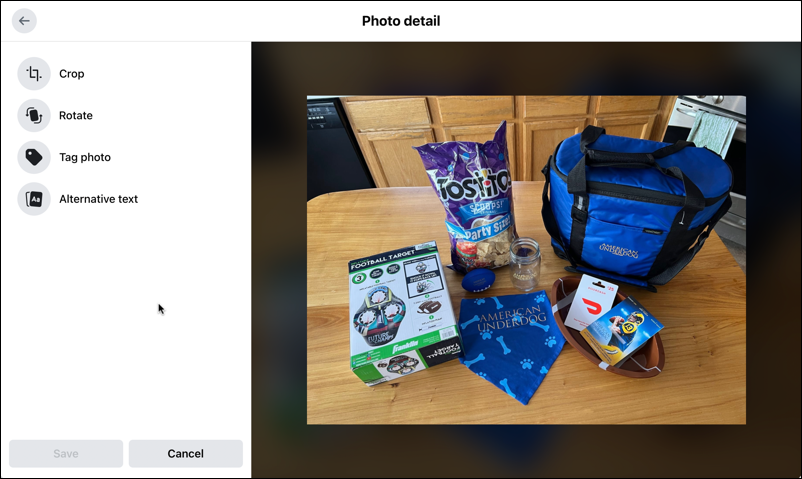
HOW TO EDIT A PHOTO ON LINKEDIN
Once you’ve saved your alt text for your image, click on the “Edit” link on the lower portion of this pop-up window.
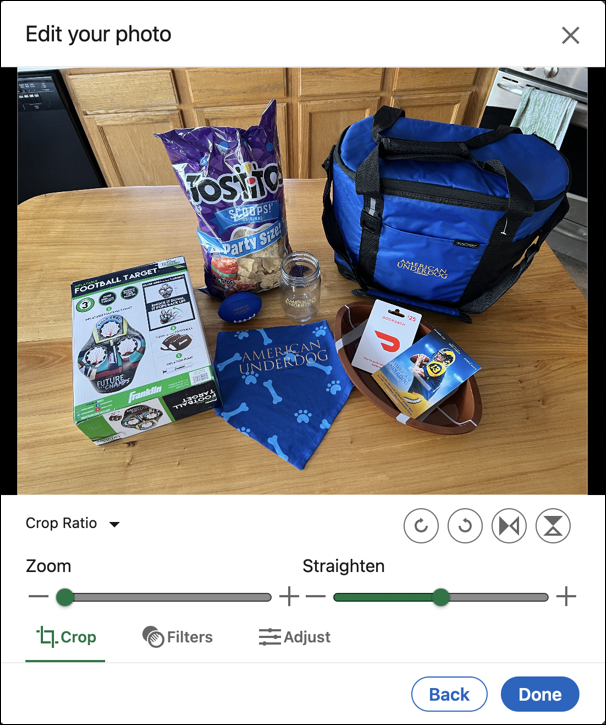
LinkedIn has implemented Crop as a zoom feature, which is a bit confusing though it ultimately does the same thing. Use the sliders to adjust the horizon (“straighten”) and zoom in as you desire. Want to rotate the image? That’s what the four circle buttons are on the right: rotate left, rotate right, mirror horizontally (if your image is backwards) and mirror vertically.
You can also apply one of a range of preset photo filters. Click on “Filters” to see your options:
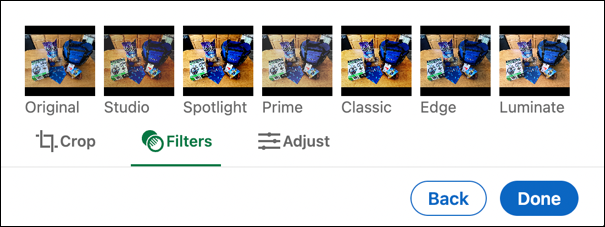
I like “Spotlight” for my images as it can help isolate the individual person or item you think is most important.
Click on “Adjust” if you want to get into the nitty-gritty of photo settings:
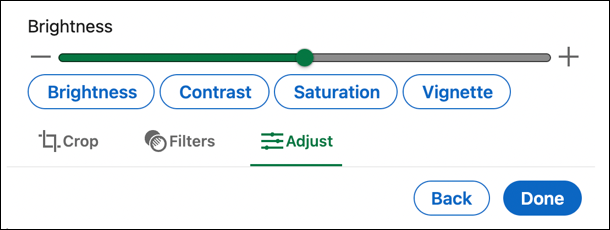
I cropped my image a bit, adjusted the brightness, reduced the saturation just a little bit, then clicked and repositioned the image within the zoom box to ensure that it remained centered. Finall, I’m done. So, logically, I click on “Done“.
BACK TO THE LINKEDIN POST EDITOR
Now it’s back to the main LinkedIn post editor, where I can quickly add some text, tag a couple of companies, and even add some hashtags:
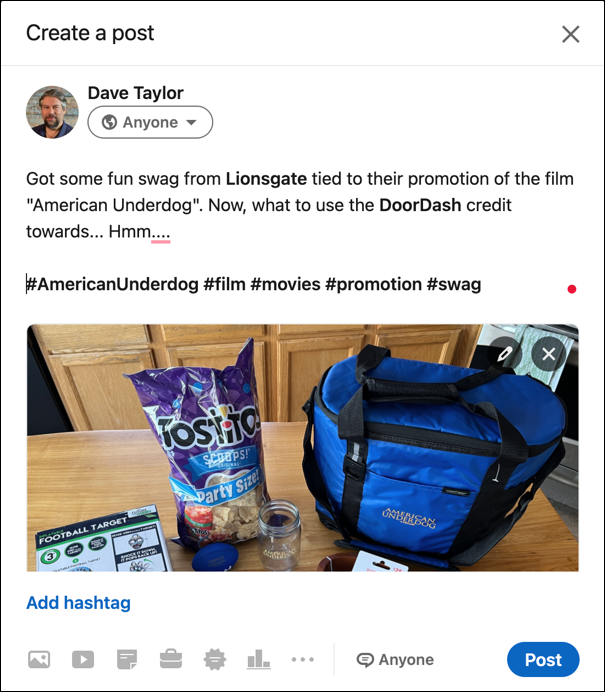
Looks great! I’ll Post it and see how it all formatted:

Compare this image to the first one shown earlier and you’ll be able to see the (relatively subtle) changes I applied. A nice post, and notice that since I included a blank line between the main text and the row of hashtags, they are hidden from default view, which I think makes it all look neater too.
Mission accomplished. Now it’s your turn to give the LinkedIn Photo Editor a try and see how it can work for you!
Pro Tip: I’ve been writing about LinkedIn since the launch of the popular professional networking site. Please do check out my extensive LinkedIn help area for lots more tutorials while you’re here!