
Just because you have a Chromebook doesn’t mean you can’t work with external drives and other storage devices! Here’s a primer on how to access external drives and, as needed, how to reformat them too.
The original vision of ChromeOS was to have a super inexpensive device that had no local storage at all. It would be always connected and thereby not only offer infinite storage, but also keep the devices very low cost. Early Chromebooks were in the $200-$300 range, a helpful alternative to the $1000+ PC laptops and $1500+ Mac laptops of the time. ChromeOS hasn’t stayed still, however, and as the system has evolved through over 100 different updates, it’s sought more and more local capabilities. RAM, CPU, graphics rendering, and storage. Just about all Chromebooks you can buy nowadays have at least 256GB of local storage for files, folders, photos, and data.
Shortcuts: Using an External Drive | Drive Settings | Reformatting a Drive
It turns out that it is useful to have local storage! This has trickled through the entire ChromeOS system too, and it now features (mostly) robust support for external drives in typical Windows file formats too. Generally speaking, just plug one in and you’re good to go. You can even reformat the drive to start afresh if you prefer, as I’ll demonstrate.
WORKING WITH AN EXTERNAL DRIVE IN CHROMEOS
I have a Lenovo Chromebook running a recent version of ChromeOS and a handy Western Digital My Passport external SSD storage device. When I plug it in, the system recognizes the drive and pops up this notification:
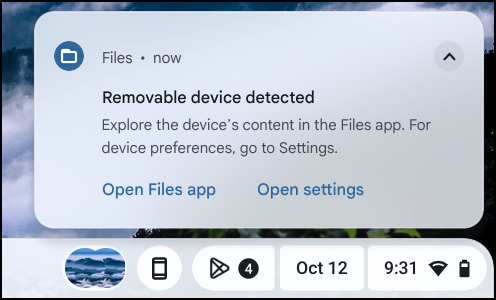
As shown, you can choose to “Open Files app” or to “Open settings”. Let’s get right to it by opening up the Files app with the first option.

I have quite a bit on this drive, including seven subfolders and a bunch of videos and photos. What’s not easy to ascertain, however, are basic drive specs like how big it is and what percentage of free space is available. We’ll stumble across some of that information later, but a “Show Info” would be quite helpful here!
That’s how easy it is to work with an external drive in ChromeOS, however. You can copy files and folders from the drive to the computer, copy them onto the drive, even access files and data on the drive directly from ChromeOS apps and utilities. Ready to unplug it? Make sure to click on the upward triangle to eject it first, and you’re good to grab and go.
CHANGING CHROMEOS EXTERNAL DRIVE SETTINGS
What if you’d clicked on “Open settings” instead? Well, you probably missed that option so let’s find the exact same spot in Settings with a simple search for “external”:
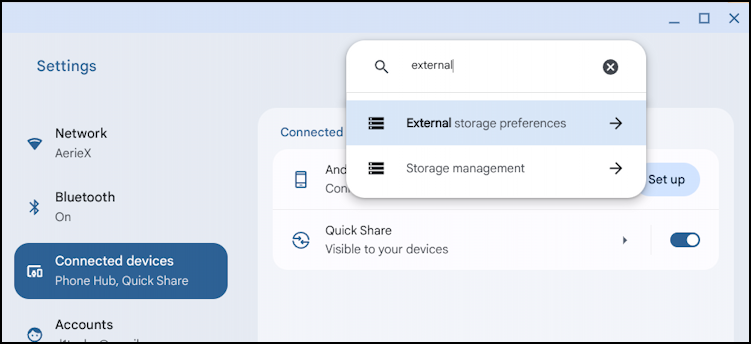
There are two options that match: External storage preferences and Storage management. The former is what we seek, so click or tap on “External storage preferences“.

This is where it’s a bit odd: The on/off slider is supposed to enable or hide the specified drive, but as far as I could tell, it does nothing; My default setting was “off” for the WD My Passport drive, but it worked just fine. A work in progress? Something that will someday let you set it as a read-only device? I have no clue.
Suffice to say, there’s not much to see here in Settings, so just close up the window.
REFORMATTING A DRIVE IN CHROMEOS
Looking at the contents of the SSD, I realize that all of the content on this particular drive is obsolete and unnecessary. I could delete it all, but it’s a good idea to reformat a drive if you’re truly ready to get rid of everything. That can be done by right-clicking on the drive in the Files app:

Double check you’re selecting the correct drive then choose “Format device“. A window pops up with some basic options:

Wait a few seconds, however, and it’ll add a line indicating how much data is on the drive about to be erased and reformatted. You can also click on “FAT32” to see the formatting options:

The My Passport drive has almost 250GB of files and data. Okay, none of it’s critical.
The bigger question is about which disk format to choose: FAT32, exFAT, or NTFS. FAT is the File Access Table, if you’re curious, and exFAT is extended FAT format. NTFS is New Technology File System. FAT32 is the oldest and can’t handle files larger than 4GB, a big limitation. exFAT is the more modern version of FAT32 and can handle enormous files. It’s also very compatible with Windows, MacOS, Linux, and ChromeOS. NTFS offers more features, including encryption, and compression, but might be less compatible across platforms.
Conclusion: exFAT is the best choice. That’s what I’ll select, then click on “Erase and Format”.
No bueno:
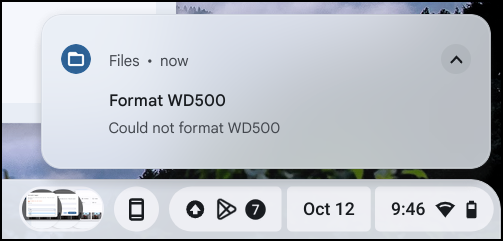
Not sure why this happened, but I restarted my Chromebook – it had a pending update too, perhaps the cause? – and when I tried a second time, success!

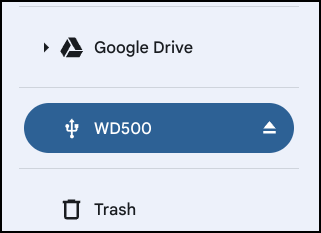
Sure enough, checking it in Files reveals that it’s empty:
It also reveals that the bottom of the “•••” menu (the button’s on the top right) actually can show drive capacity and usage:
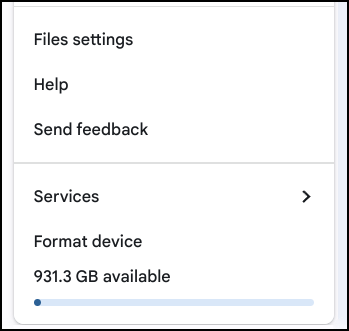
Why that’s not more obvious is hard to say, and it still leaves questions in the user’s mind like what is the total capacity of the drive then? Easy to calculate now, but what about when I had 241GB of data and it would just list 690 GB available? Perhaps this will be enhanced in the next ChromeOS update!
Pro Tip: I’ve been writing about ChromeOS for a while now. You can find a lot more useful tutorials in my Chrome OS and Chromebook help library here on the site too. Why not check it out while you’re visiting?