
Every time I “check for updates” on my old Windows 10 computer, it seems to take forever to determine if I’m up to date or need to install patches and updates. Is there any way to speed that process up?
Because of how Windows is structured internally, there is an inherent amount of work that the system has to do to create an accurate profile of everything you have installed, every option, and, of course, every version number. Once it’s done that, it then queries the Microsoft version server to ascertain which elements, if any, are outdated. Once that list is built, it can then ascertain which of the update packages you need to download and install, and in what order too! In other words, it is rather a lot of work behind the scenes.
Still, I know what you’re talking about and there are definitely times when five or ten minutes after clicking on “Check for Updates” I’m still watching the system sit and spin. Frustrating, no question. There are a number of causes that can slow down your system update, however, so let’s just look at the two most popular solutions, starting with everyone’s favorite, Microsoft Troubleshooter.
Start out by giving Windows Update a whirl. You’ll see something like this:
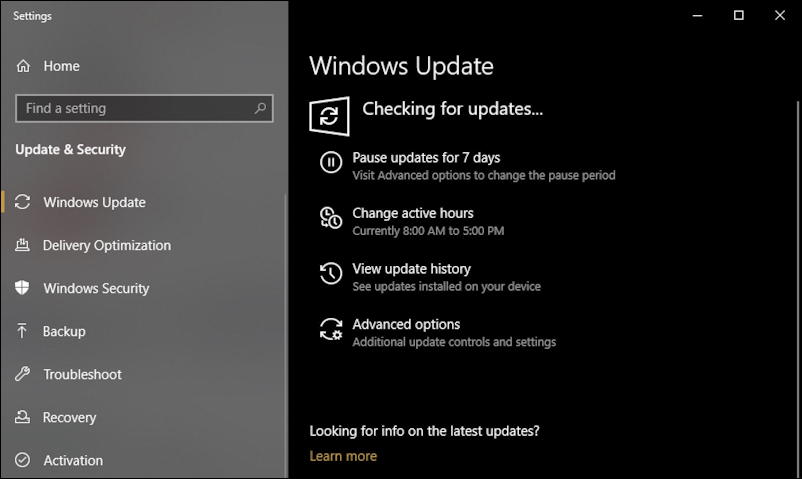
Did it work any faster? No? Okay, let’s start with the Troubleshooter. Search on the Win10 toolbar for ‘troubleshooter’ and you’ll be able to jum pdirectly to this Control Panel:
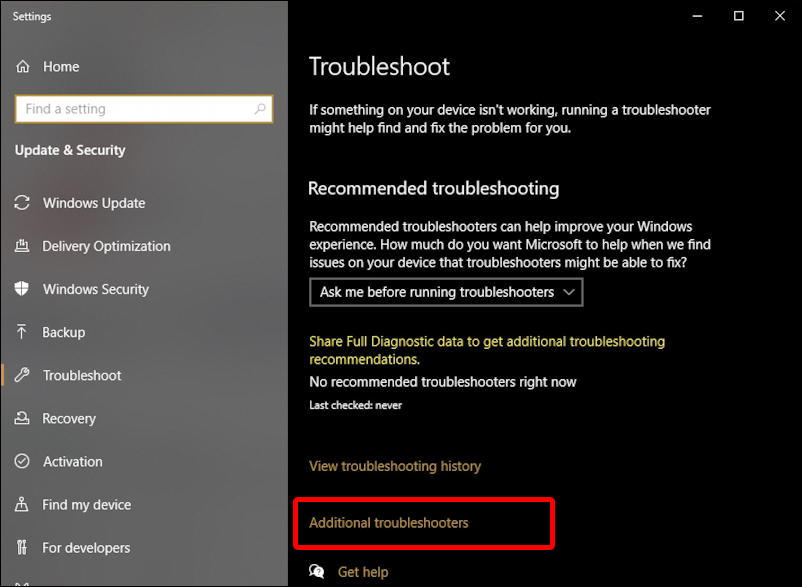
Troubleshooter is a bit confusing because there’s not really a “go” button if you just launch it directly. No worries, click or tap on “Additional troubleshooters” as highlighted above. The result is a list of useful tools, actually:
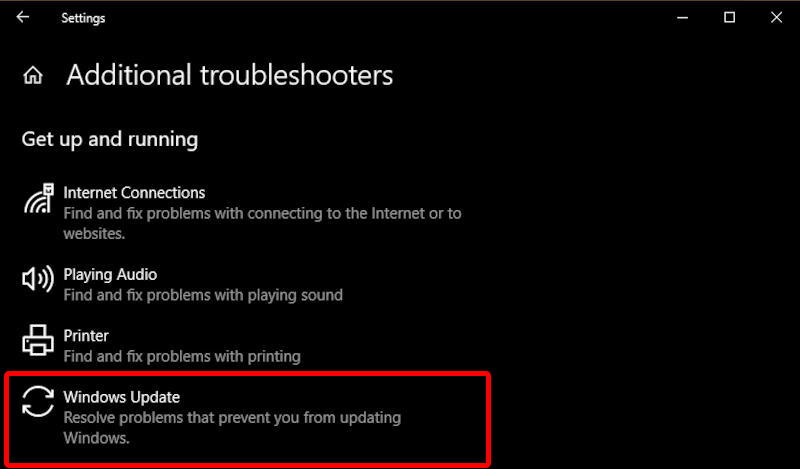
For this task, you want to choose “Windows Update” to launch the Windows Update Troubleshooter utility. It doesn’t take long to check the internal package ID information and confirm you’re good or highlight what might be wrong and offer a way to fix it:
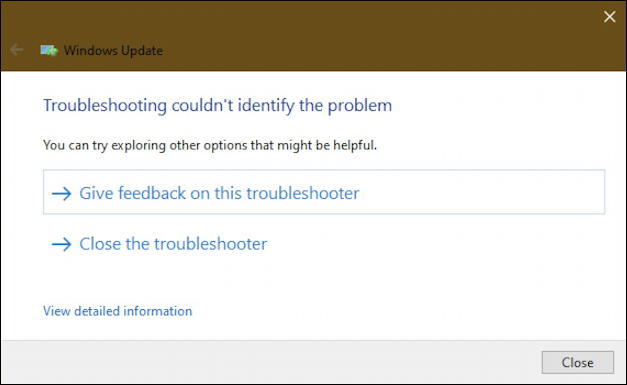
That didn’t work. Hmm… One more thing to check, the Deployment Image Service and Management Tool, also known as DISM. This manages all the update files and can fix things if you have somehow ended up with a corrupted update file on your system. It’s a bit tricky to use, however, because it’s only available from the command line as an administrator.
Launch it by firing up a Command Prompt from the Win10 search. Search for, logically enough, “command prompt”:

You don’t want to just click on the icon, however, you need to run the DISM program as an administrator, so click on “Run as administrator“. You’ll then be prompted to confirm you want the program to have atypically strong admin-fu:

You do want to proceed so click “Yes” to this query.
Now you’ll have a command line prompt. Not very glamorous, I admit:
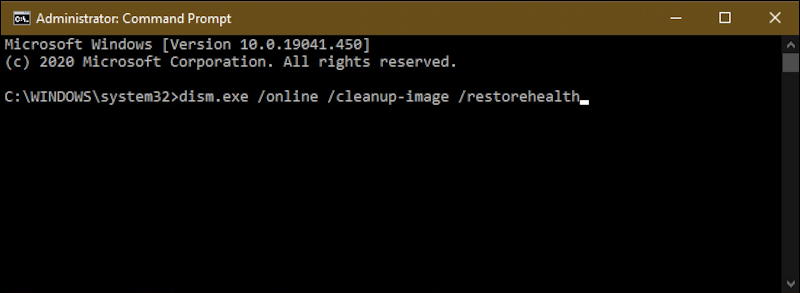
As shown, you want to carefully type in exactly as shown below (or copy and paste):
dism.exe /online /cleanup-image /restorehealth
When you’re sure it’s exactly as shown, press Return or Enter and it’ll start working. The process takes about five minutes or so, but there is a primitive progress bar:

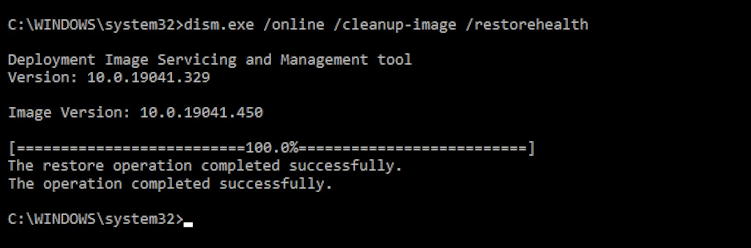
Eventually – and don’t be surprised if it seems to get stuck at around 50% – you’ll have DISM wrap up its work:
That’s it. Those are the two most common ways to speed up your check for updates cycle on your Windows PC. Hopefully one of them will help. If not, your next step is to check for outdated drivers, and that’s a whole ‘nother task…
Pro Tip: I’ve been writing about Windows since the early days. Please check out my Windows help area for lots more tutorials and if you can’t find an answer to your question, why not ask me via my contact form?