
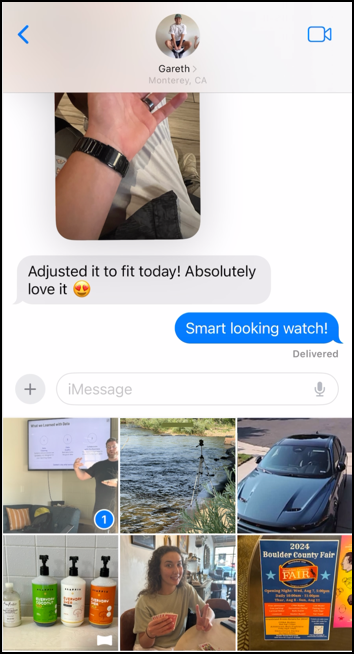
I’m sure this has happened to you: You see something amazing, take a photo of it and share that with a friend via text Messages. They respond “what?” and you have to tell them what to spot in the image. Don’t explain, mark up the image itself! Here’s how…
As smartphone cameras have gotten better and better, we’re all sharing photos of what we experience with each other at a commensurate rate too. My friends and family are constantly sending pictures from events they attend, amusing poses their pets manage, even interesting posters and advertisements they encounter. It’s great and a fun way to share our lives, but more often than not, I’m left puzzled at what they’ve sent or wonder why I have to zoom in to see what they’re so excited about.
With an iPhone – and Android, though the approach is different than what I share in this tutorial – there are some excellent tools available to let you manipulate and improve your photo before you send it. Why not utilize these to show that you’re a budding photojournalist rather than just another snapshot sharer? In particular, cropping is your friend, but there’s more you can do too. Let’s step through the process…
TAKE THE PHOTO WITHIN MESSAGES
The first step to better results with the least effort is to switch from taking photos with the Camera app and take the photos from with Messages. It’s easy; you’ve pulled up someone you want to share the image with in the Messages app, so you’re looking at an empty white box:
In this instance, I’m looking at photos I did take with the Camera (they’re on the Camera Roll) but notice the empty white box with the faint “iMessage” within the box. You know it, you’ve tapped it a thousand times! Instead, tap on the adjacent “+” button. A menu appears:

Here’s how you can get to that Camera Roll if you want to share some photos you’ve already taken, but this time tap on “Camera” instead. Turns out that choosing the Camera from within Messages offers different options with the image you capture, as we’ll see momentarily.
I was attending a lecture in Boulder, CO when I captured this sequence, so the image I’ll use is of the lecturer presenting some of his research on integrating AI features into shipping products:
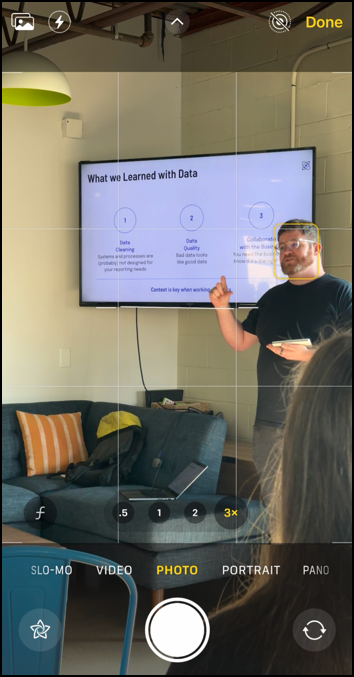
Notice the handy grid overlay to help capture a properly aligned image and, of course, all the Camera app options along the bottom with Slo-Mo, Video, Photo, Portrait, Pano[rama], etc. You can take the time to zoom in and frame things but often that’s annoying to others or might be almost impossible. Instead, just tap on the white circle and capture the image. We’ll fix it “in post”, as they say in Hollywood. 🙂
CROPPING YOUR PHOTO
Now’s the part that I really wish more people did; cropping of the image. Unless you have an ancient smartphone, it’s captured quite a lot of data, enough that you can focus on a subset and still have it look crisp and clean. The captured image offers a few options along the bottom:
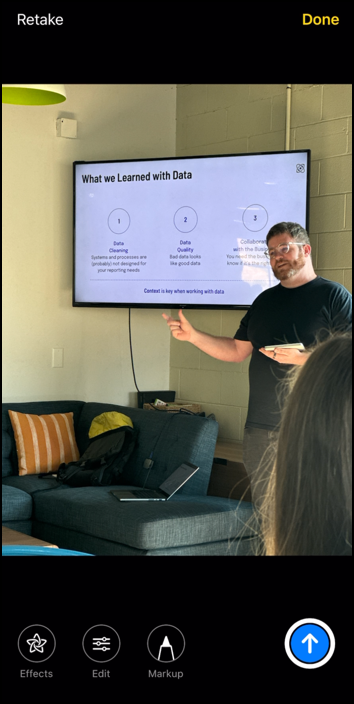
Effects allow you to change color palettes (black & white, anyone?), while Edit allows you to improve the image and Markup lets you overlay it with notes and doodles. We’ll demonstrate both of the latter two, starting with Edit. Tap on the “Edit” button along the bottom.
Used to just tapping on that blue “share” button so your friend can see it? Yeah, that’s what most of us do. But there’s a better way, as you’re about to see!
Edit opens up a whole world of photo editing tools, quite sophisticated options that surprise most people:
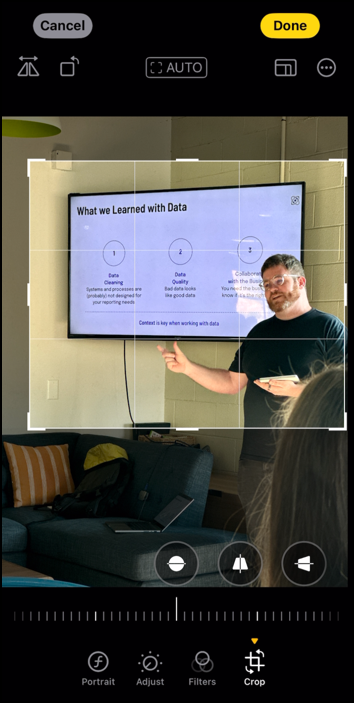
As shown along the bottom, there are four main categories of edit tools: Portrait changes, image Adjustments you can make to colors, brightness, etc, Filters to make it more wacky or thematic, and the Crop tool. I’ve chosen the Crop tool, which allows me to tap and drag the corners of the active portion of the image and thereby eliminate all the furniture and other irrelevant portions of the image. As a bonus, the display screen will be bigger in the final image too, as will the speaker.
The tickmark line along the bottom of the image allows you to easily zoom in or out for the perfect crop; try it! You can also adjust the skew and try to make a distorted image more rectilinear with the buttons on the bottom of the image itself.
The top of the Crop area offers a lot of slick tools too, including the easy ability to rotate the image (how often have you received images that were incorrectly oriented? It’s easy to fix before you send ’em!). If you’re poised to share the image on social media, you can also get preset height/width ratios by tapping on the nested boxes icon on the top too. Notice the options along the bottom of the image when I do so:
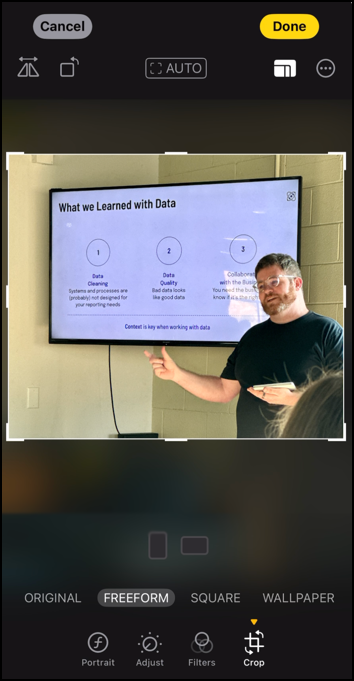
It lists Original, Freeform, Square, Wallpaper, and, not shown, things like 16:9, 5:4, 7:5, and 3:2, depending on your preferences. You can also try “AUTO” cropping, though I find that I can do a better job manually.
This looks good, though, so I’m going to tap on “Done” on the top right.

Before I send this image, I want to do one more thing…
MARKUP A PHOTO BEFORE SENDING
Since it’s step #1 of the three steps that are illustrated on the presentation slide that I want to emphasize, I’m going to use the Markup tool to circle it. That’s easy to do too; tap on “Markup” along the bottom and the markup tools appear:
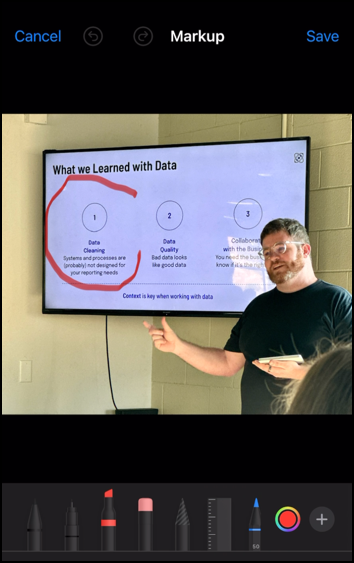
The images are a bit outdated, but Apple has a very good tutorial that explains all of the many Markup tools and features if you’re curious: Get Started with Markup. For my uses, the default of the felt pen and the default color of red work great; as you can see in the above image, I’ve tapped and dragged my finger in a circle around the first step to create that rather rough red line.
Now I’m ready to share it. A tap on “Save” on the top right and I’ll go back to Edit mode, but with the markup now included on the tightly cropped image:

That’s looking great. One more step: finally, tap on the blue arrow!

Compare that with the original image and you’ll agree that this is so much more effective at clearly conveying what caught my attention in the image rather than just sending a photo with all the miscellaneous stuff in the image.
Now, you try doing this with the next image you’re going to share from your iPhone or iPad. Your friends and colleagues will be most appreciative!
Pro Tip: I’ve been writing tutorials for the Apple iPhone and the Mac since they were first released. Please check out my extensive iPhone help area and Mac help area for oodles of useful content.