
I’ve been using Mac systems since the very first version of the operating system (Mac System 1.0, if you’re curious) and have spent thousands of hours customizing Mac systems to create the most productive setup possible. One area of endless focus: The Dock. Here’s how I’ve customized mine to make it work for me…
I won’t say I’ve been an Apple customer and fan for a long time, but I did start out with an Apple ][ before they even had the idea of the Mac operating system. That came significantly out of research at Xerox Palo Alto Research Center (PARC) and its extraordinary Alto visual operating system. In many ways, however, it was the original 128K Mac device that brought windowing operating systems to the masses. Almost two years later Microsoft jumped on the GUI bandwagon with Windows 1.0, with tiled (not overlapping) windows.
We’ve come a long, long way since those early days! Not unreasonably, a lot’s changed and improved in 41 years of graphical user interface development. One of the most important elements in both Windows and MacOS has always been the bar along the bottom of the screen. Called the Taskbar in Windows, Dock in MacOS, Shelf in ChromeOS, and various names in Linux depending on distro, it ends up being the control center for most users. No wonder people want to optimize it!
Shortcuts: Dock Basics | Dock Folders | Dock Options | Dock Settings | Hack The Dock!
With my decades of experience with Mac systems – I’ve never not had a Mac since my first Mac 512K! – I’ve come up with many shortcuts of my own to make the Dock really work for me. Let me give you a tour…
MACOS DOCK BASICS
The Dock can hold shortcut icons for both apps you use frequently and those that you are currently running. In fact, you probably have both on your Dock right now. The difference? Running apps have a tiny dot below their icons, as you can see:

The Finder’s running (the leftmost icon), I have Microsoft Edge as my default Web browser, and I have Kiwi running, a Gmail app. The next three icons, left to right, are for apps that aren’t running, but are only a click away: Apple Mail, Calendar, and Music.
Where this is a bit more interesting is the right side of the above. Notice the lightning bolt on the printer icon? That means there’s something in the queue, but it can’t print. No worries, I routinely queue up printouts while I’m away from the office, and when I reconnect, they automatically print. Easy.
The vertical bar separates apps from files, folders, and special apps like the Trash. The leftmost of those is a shortcut to my Applications folder and is the #1 best customization you can apply: Just open up the Finder so you can see the Applications folder, then drag it to the Dock. You’ll see why it’s so helpful momentarily.
The more mundane folder icon is my Downloads folder. Same idea, I just dragged it to the Dock and now have a convenient shortcut to access whatever I’ve downloaded. Finally, the Trash, which can easily be searched (click on it) or emptied (Control-click on it, choose “Empty Trash”).
FOLDERS IN YOUR DOCK? HECK YEAH.
If I click on the Downloads icon in the Dock, you can see how it opens up a simple grid view to show me the contents of the folder:
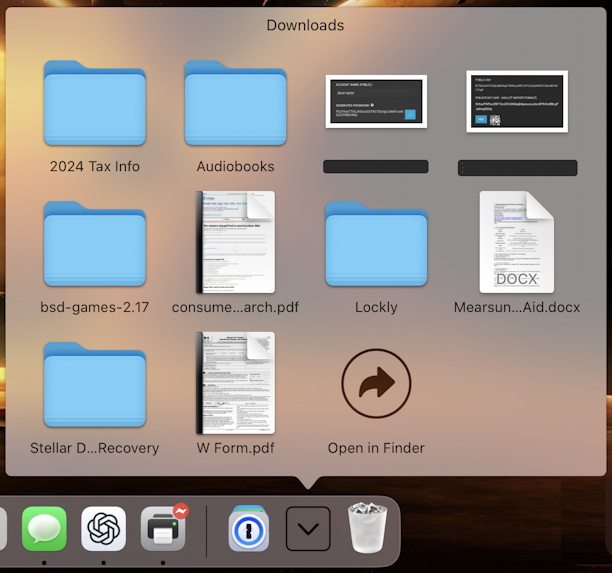
Folders, files, pictures, documents, even PDFs, all with convenient shortcuts. To open the folder in the Finder, the arrow shortcut is also quite convenient. This is shown in the “grid” folder format, by the way, but you can also opt for “fan” or “list” if you want to check out the various options.
Applications is a bigger folder, check out how it’s displayed:
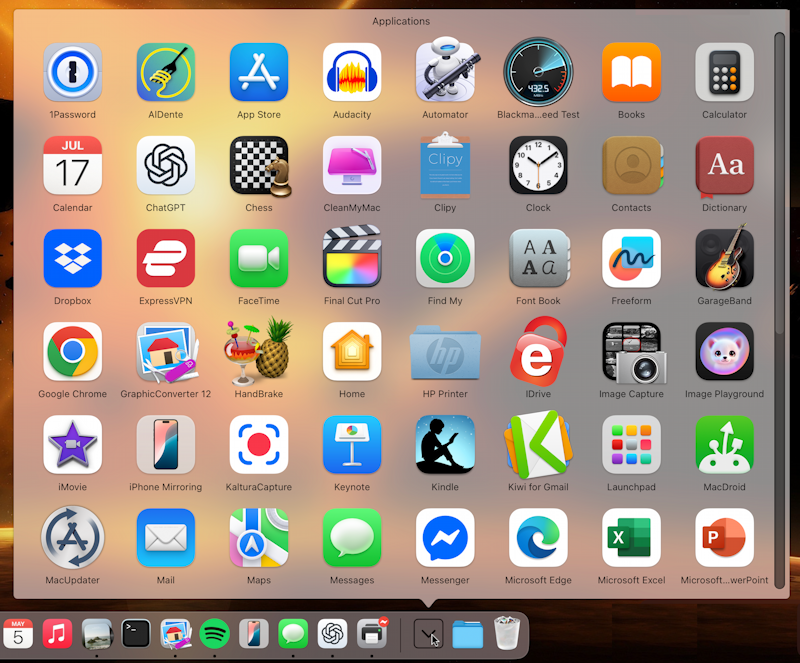
This is, by far, the easiest way to access all of the applications installed on your Mac system, and each is but a single click away from this grid view. Since there are more than can be shown, it’s also scrollable to view the bottom portion, where you’ll see the “Utilities” folder. Click on that and it opens to its own grid view, making it super easy to get to Activity Monitor, Terminal, Disk Utility, and more.
When I use Mac systems that don’t have this Applications shortcut in the Dock, I add it. A game changer!
DOCK SETTINGS AND OPTIONS
The Dock is an app in its own right and has various settings you can tweak and change. One change that many people like is the ability to make it taller or shorter, depending on preference. The easiest way to do that is to move the cursor over the vertical bar, which will cause the cursor to change from an arrow to a two-headed arrow:
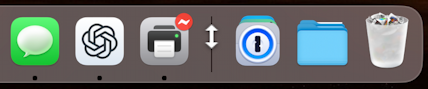
Simply click and drag up or down to see it get bigger or smaller. I like mine to be fairly big, but that’s because I have “Hiding” enabled, so the Dock vanishes when I’m not using it, ready to pop back up if I move the cursor to the bottom of the screen.
Instead of click-dragging, simply click on the up/down arrow. A menu will pop up with more settings:
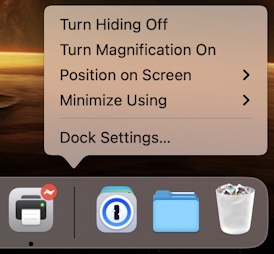
Hiding has the Dock vanish when not in use. Magnification is how many people work with a tiny Dock: It makes the spot where the cursor is located bigger, sort of like an ocean wave swell running onto the shore. I’m not a fan of Magnification, but you might be. Try it!
Didja know it can move from the bottom of your screen?
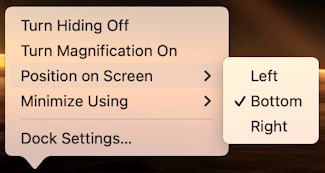
You can’t choose top because the Menubar is already there, so it’d be confusing. I have seen some folk who move the Dock to the left side of the screen, make it narrow, and find it a great shortcut to controlling their Mac experience.
You can also choose different Minimization animation:
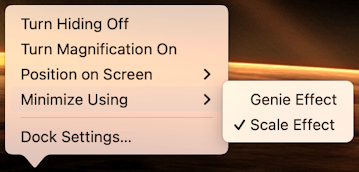
The “Genie effect” is like a Genie being sucked back into its magic lamp, while the Scale effect is a more standard size change visual. They’re entirely cosmetic; experiment to find your favorite.
DOCK SETTINGS…
The final entry is “Dock Settings…” which offers a more traditional pane of options within System Settings:
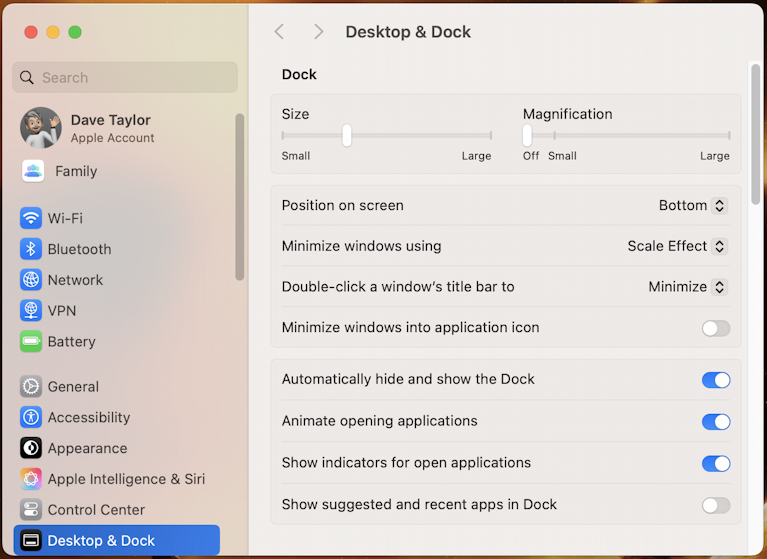
Basically everything we’ve already explored you can set and change from this one spot if you’re more of an old school Mac interface fan. The only additional options here that are useful are the ability to determine what happens if you double-click on a window’s title bar (I have mine set to Minimize) and what Minimize means (I have it set to show up as a separate tiny window on the Dock. The alternative is for the window to vanish “into” the app itself, revealed by clicking on the app icon in the Dock).
Oh! One more: If you want to know which of the apps in your Dock are running, choose “Show indicators for open applications”.
HACKING THE DOCK
There are a few ways you can further update your Dock that people have found, and I’ll share one: If you’d like to have an empty space on the Dock you can slide around to help group apps, you can do just that by going into Terminal (that’s Applications > Utilities > Terminal) and typing in exactly the following:
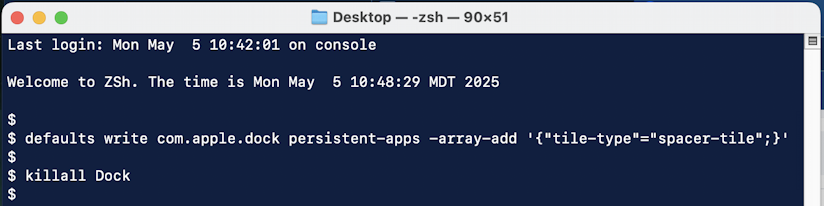
Here’s the text if you want to just copy and paste:
defaults write com.apple.dock persistent-apps -array-add '{"tile-type"="spacer-tile";}'
Once you’ve done that, you need to restart your Dock so the change is reflected. You can simply Restart your Mac or just kill the Dock and let it restart automatically with the “killall Dock” command.
I do that and, voila! a space:

You can click and drag to move it left or right, or click and drag it to the center of your display (until the word “Remove” appears) and release the button for it to vanish. Easy!
Try some of these tweaks and mods, and you’ll be a Dock pro in no time.
Pro Tip: I’ve been writing about MacOS since the first release and have hundreds of helpful tutorials here on the site. Please check out my Mac help library for lots more useful content while you’re here!