
If you send a lot of email like I do, it’s darn useful to have a signature that’s autoatically added to all of your email in Outlook. But if you’ve had it for a while, it’s easy to forget how to update your signature when you need to make a change. Not to worry, here’s a tutorial…
Like many professionals, I have a number of different identities that I use when interacting with clients, customers, colleagues and friends in the online world. For some, I’m a film critic or auto writer, while others know me as the person behind AskDaveTaylor. Another group know me as a teacher: I’m a professor at the University of Denver in Colorado. Different email addresses sometimes, but different signatures for each message.
I even use multiple email systems too, with Gmail my email client of choice except for my work at the University, where we are a Microsoft shop. For DU it’s all about Outlook online, just one part of our suite of office software, all accessible through any Web browser.
And so, when the University made a change to the name of the college where I teach, I realized that I needed to update my signature. But how? Here’s how I updated things, going from “University College” to our newly minted name, the “College of Professional Studies”…
FIRST, THE OLD SIGNATURE
I was in the middle of emailing a colleague when I looked at the signature and realized I had the old name for the college. The horror!

Can you see where it says “University College”? Time for an update.
SIGNATURE IN SETTINGS
Outlook has a beautifully designed settings area, far better than Gmail’s crude set of screens. In Outlook, a click on the gear icon on the top right reveals this:
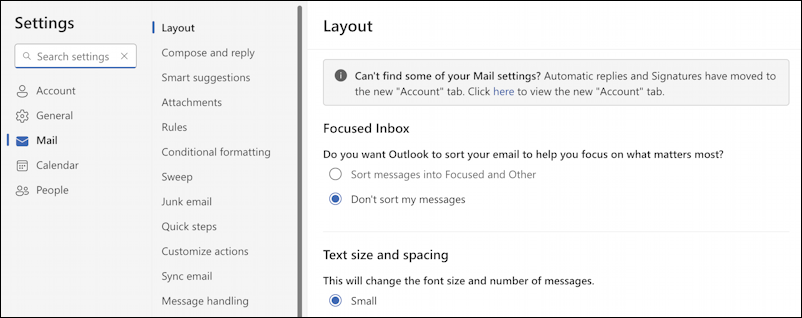
I can step you through the menu system to find signature, but there’s a Settings search box, so the smart move is to tap that instead:
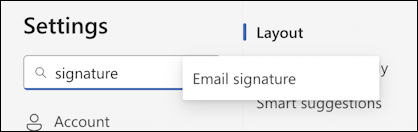
A click on “Email signature” and it takes me directly to the correct spot:
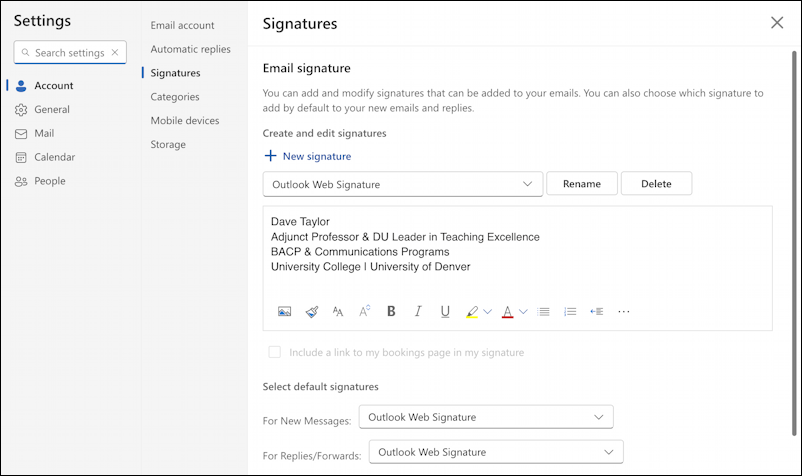
Now we’re getting somewhere; I can see the old signature, but it’s in an edit box.
UPDATING YOUR OUTLOOK SIGNATURE
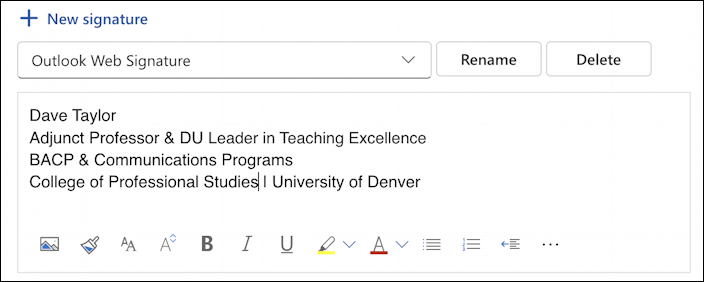
From this point, it’s easy enough to update the signature to reference the correct name for our college…
Notice that there are a variety of formating options, including font color, background color, bold, you can even insert a picture or photo into your signature if you want. I like to keep mine pretty simple to ensure it formats correctly on every email client so the above works fine for me.
Note also the “+ New signature” option; If you want, you can actually have more than one signature within Outlook and choose the one you prefer on a message-by-message basis.
A click on “Save” at the bottom and it’s set. Mission accomplished. To check, I’ll just open up a New Message window to check the signature:
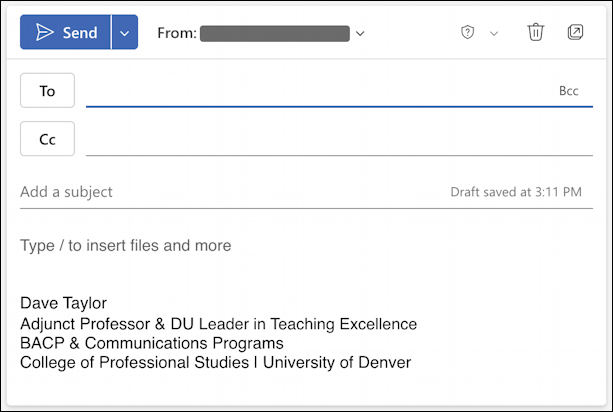
Perfect. Done. Now, to get to the email from my students!
Pro Tip: I’ve been using and writing about Microsoft’s Office Suite for many years. Please check out my Outlook help library for plenty of useful tutorials, as well as additional Office 365 help pages! Thanks.