
I want to grant temporary access to my MacBook Pro to a colleague and then be able to easily revoke it. The intent is for her to be logged in as me, but I don’t want to share my password. Is there another possible solution in MacOS?
That’s an interesting scenario because modern operating systems are designed to have multiple user accounts, not multiple users using a single account. In fact, when families have an iMac or similar where everyone shares the computer, things tend to get messy, with one person accidentally deleting someone else’s files, and so on. You can do it – and most easily by simply removing your account password, but unless it’s a test machine, I’d have a conversation about acceptable uses too. Oh, and make a good backup of all your key files too, just in case.
Multiple people can share an account on a Mac system. You can remove the password, share your regular password, share a temporary password only used for the duration of the project, or, my favorite, add their fingerprint to your account. The benefit of #2 and #4 is that they are easily revoked when you’re done; change the password back to your normal one, or simply delete their fingerprint.
Note: If they get sneaky and try to delete your fingerprint, they won’t be able to because you need the password to make changes to login options! Even if they did, you’d still know the account password, so could still easily log in to your account.
Anyway, best case scenario, let me show you how easy it is to add a different user’s fingerprint data to your MacOS account.
LOGIN ACCEPTS KNOWN FINGERPRINTS
Log out of your computer or have it time out and the login prompt will usually indicate if a fingerprint is an acceptable form of identification or not:
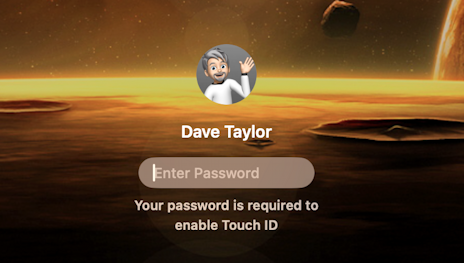
When you see a message like the above, it’s usually due to a system restart rather than just a logout. It’s also the only situation where an additional fingerprint might not work, but if they’re at the next desk, it’s easy for you to lean over and type in the password, after which their fingerprint will work just fine until the next restart.
If you don’t see the “Your password is required” message, any known fingerprint will be sufficient to unlock and log in.
TOUCH ID SETTINGS AND OPTIONS
To add a fingerprint for login purposes, the account will already need a password (otherwise, why bother? 😉 ). Go into System Settings… off the menu on the top left and search for “fingerprint”. Either of the two matches – “Touch ID & Password” or “Touch ID” – will get you to the right place:
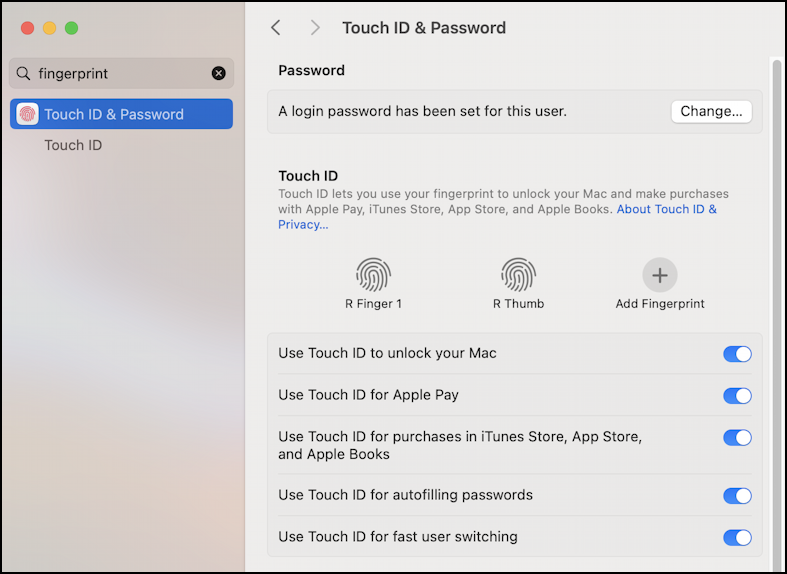
You can see here that I have actually scanned two of my fingers, my right index finger and my right thumb. If I injure one, I can still log in without typing a password. This actually occurred due a food prep injury and was darn helpful! Now, however, I want to add someone else’s fingerprint to the Touch ID dataset.
Fortunately, MacOS has no way of knowing if multiple fingerprints are from the same hand or even same person, so it’s easily added. Before we go there, however, notice all the different areas where you can enable or disable Touch ID as a confirmation method. You might disable Touch ID for purchases, for example, or autofilling passwords, but leave it for easy unlocking.
ADDING A NEW FINGERPRINT
Ready? The other person is available and their hand’s nice and clean? Click on “+ Add Fingerprint”.
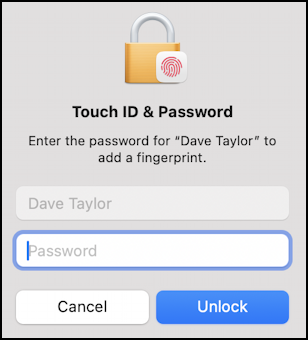
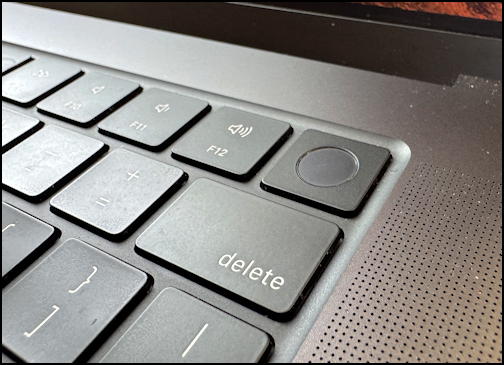
You’ll have to confirm your authorization again. This is quite useful so your sneaky kids don’t add their fingerprint to your account while you have your computer unlocked and unattended! Once you’ve unlocked it again, it’s time for the fingerprint scanner to be utilized. On a modern MacBook Pro, it’s the unlabeled key on the top right, but other Mac devices might have the scanner in other locations. My MBP has this key:
The prompt on screen will look like this:
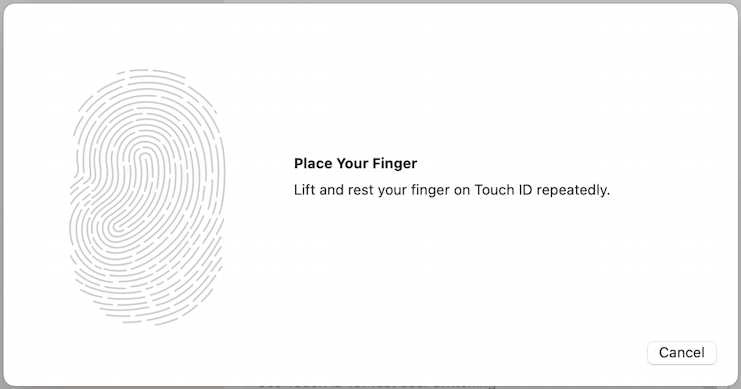
Now it’s just a matter of resting the finger on the sensor for a second or two in as many different angles as possible. As you proceed the swirls will gradually fill in red as a progress indicator:
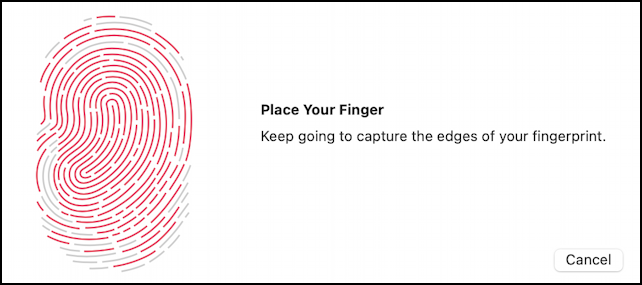
Don’t forget to have them methodically do all the edges of their finger too. Maybe 45-60 seconds into the process, you should finally see:
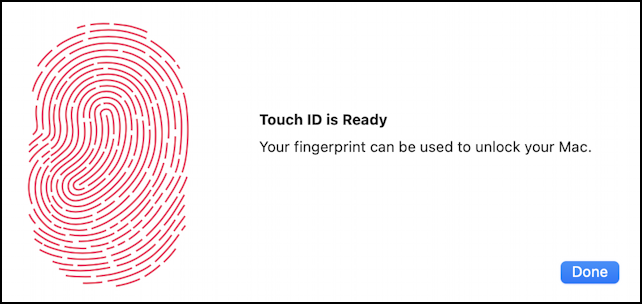
That’s it. Ready to go. Done.
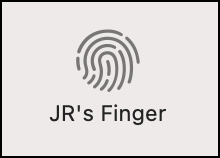
As a handy tip, click on the label immediately below the new fingerprint and type in an appropriate name:
Mission accomplished. When you want to remove the fingerprint access, move the cursor over the graphic in System Settings > Touch ID and a tiny “x” will appear. Click on it and the fingerprint’s removed.
DOES MACOS STORE YOUR FINGERPRINT?
Apple explains: “MacOS does not store your fingerprint image when you use Touch ID on a Mac. Instead, it converts your fingerprint into a mathematical representation and stores it securely in the Secure Enclave, a dedicated security chip separate from the main processor. This data never leaves the device, is not accessible to macOS or applications, and cannot be reverse-engineered to recreate your fingerprint.”
Good luck with your shared account. I hope it works out well.
Pro Tip: I’ve been writing about MacOS since the first release and have hundreds of helpful tutorials here on the site. Please check out my Mac help library for lots more useful content while you’re here!