
When I share photos with friends on my Apple iPhone, they always complain that the images are huge. They’ve shown me, they ARE huge. How can I resize or shrink the images so that they’re not so darn big (and upload faster too)?
As smartphone camera resolution has increased, the resolution and size of resultant images have increased too. Makes sense, really; you can’t have a 2436 x 1125 image with 458 pixels per inch on your iPhone XS – or 2688 x 1242 at 458 ppi on an iPhone 11 Pro Max – without the photographic file itself being, well, big. On my iPhone 11 Pro, photos are routinely 8MB in size or larger, which is pretty darn big if I just want to share a glimpse of what I saw, rather than a ready-for-wall-poster size image.
My daughter is taking an online class and she has a similar challenge because homework is done by uploading photos of the work she does on graph paper or similar. Each image is at least a couple of MB and she can submit a dozen or more images per assignment. The result: uploads can take quite a while on a slower wifi network.
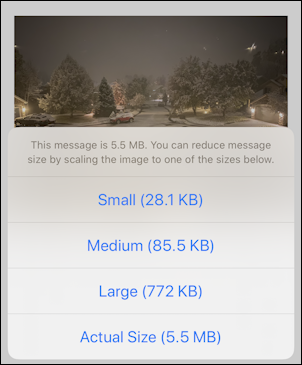
Apple knows this is a problem and if you go to share a photo through the Apple Mail program, it’ll give you the option of sharing a small / medium / large / original size, with an indication of how big each will be:
No surprise, some people email themselves photos so that the Mail program can shrink or reduce the file size, then save that and share the smaller version with their friends (or social media). Clunky, at best, and really, why doesn’t Apple just have a simple program where you can shrink down images?
Fortunately there’s a better workaround that lets you reduce your images quickly, easily, and with remarkable benefits: cropped screenshots. To start, I will tell you that the image I used from my Apple iPhone 11 Pro started out at 8MB and was able to be reduced down to 1MB without any visible difference in its appearance on the phone. Here’s a command line file listing so you can see exactly file size change:

The big version is 8,044,924 bytes, while the smaller version is 1,033,435 bytes. That’s a savings of 87% which is impressive!
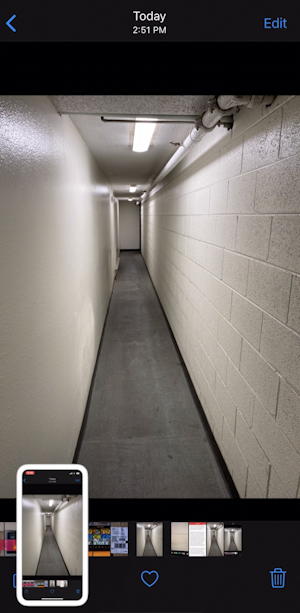
Here’s my original photo (reduced to be included in the article, or it’d be massive!)
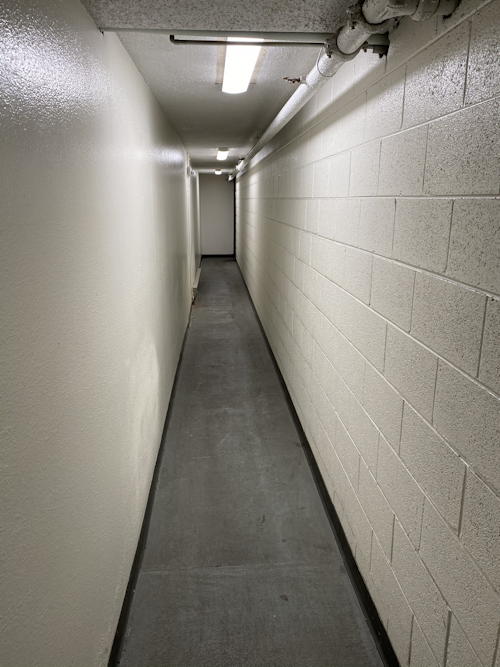
A long, depressing hallway, yup. Not a lot of detail going on, so definitely not needing an 8MB image file.
To resize / reduce it, the first step is to go into Photos on your phone and find the starting image…
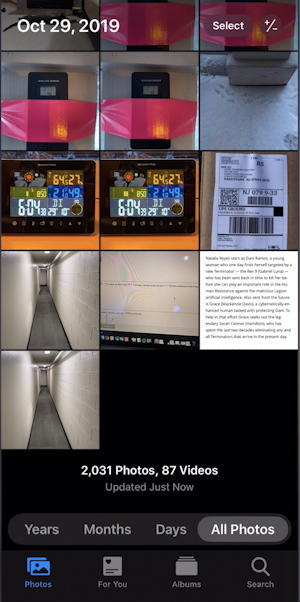
I took two photos of it, actually, but it’s the first one I want to use. A tap and I see it like this:
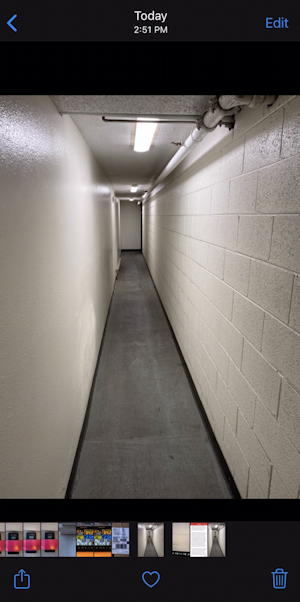
Since my goal is to shrink this as much as possible, I’m going to stay at this view where it’s already shrunk down to be less than the full size of my screen. To have it reduce a bit less and come out as a somewhat larger, but still significantly reduced image, you could tap on the image to make it full screen here.
Now take a screenshot of what’s on the display, including the photo strip along the bottom. Easily done with volume up + power pressed simultaneously for about 1 second, and released together. You’ll get a tiny thumbnail on the lower left:
Tap on the thumbnail before it vanishes and you’ll be in the (relatively new to iOS) screen capture editor:
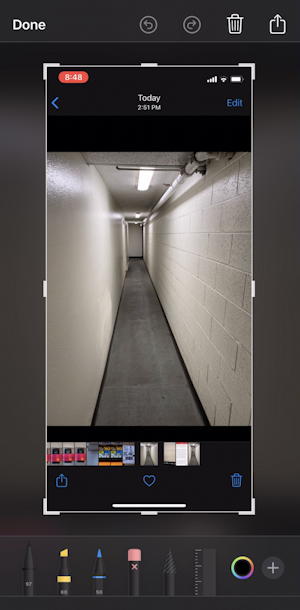
Almost done, believe it or not.
Now just tap and drag the corners of the cropping box so that you exclude all the non-photo elements…
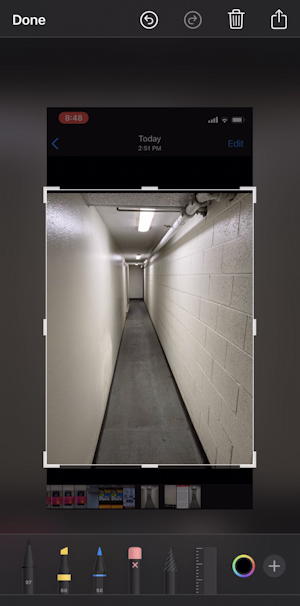
Don’t forget to drag the crop box from the top to get rid of that material too.
Pause for a second or two once you’re done and it’ll show you the cropped image. Mine looks like this:
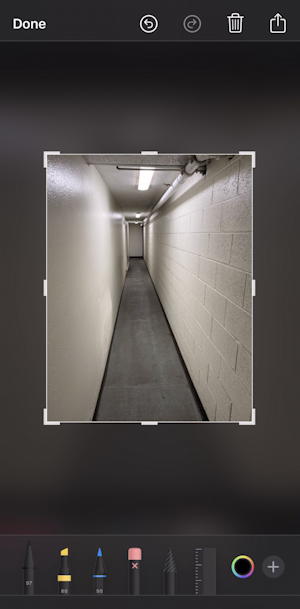
Looks good. I can annotate it, adjust color, etc, but we’re just shrinking it down so all that’s unnecessary.
At this point a tap on “Done” on the top left corner and you’ll have a chance to save it or discard the resultant cropped image:
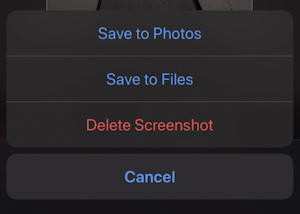
Choose “Save to Photos” and you’re done. Now when you go to share the image with your friends, upload it to social media, etc, make sure you choose the more recent of the two versions of your image and it’ll be the reduced version! With practice, you’ll find you can do this in 5-10 seconds total and that few seconds spent will be well worth the effort in much faster – and smaller – uploads and shares.
Pro Tip: I’ve been writing about how to get stuff done on an iPhone since the iPhone 1 was released. Please check out my iPhone and iOS Help Library for tons more content and tutorials!