
Dave, I bought a network printer but am a bit stymied how to add it as an available printer to my new Windows 11 computer. I mostly print from my Web browser, not Windows itself (not sure if that matters). How can I set things up?
Printers that live on the network are so much easier to work with than those that have to be plugged into a specific system, but you do need to get everything correctly connected and configured first. Most networked printers are easy to set up once you get them on the right network, fortunately, because they all include a configuration and setup wizard to assist. It sounds like you’ve already used your printer with other devices, so I’m going to focus on adding a networked printer to a specific Windows PC.
For this tutorial, I’m working with my rather old HP PageWide Pro 577 printer that has been an absolute workhorse across thousands of pages of print jobs across many years. It’s a corporate office-style printer so it’s probably larger than what you have in your home or office, but the network tech itself is basically the same. I have mine hooked up via wi-fi, so all that needs to happen is that the printer and the device that wants to print must be on the same wireless network. That might be step zero: Make sure your computer’s on the same wireless network as your printer.
PRINTING FROM WITHIN EDGE
I spend much of my time in Gmail within Microsoft Edge, and Gmail has a handy print button on every message you view. This isn’t a Gmail print, however, it’s an Edge print, so it uses the Edge interface rather than the standard Windows printer interface. Not a big deal, but if you try printing, say, the contents of a Folder from File Explorer, the dialog box might look different.
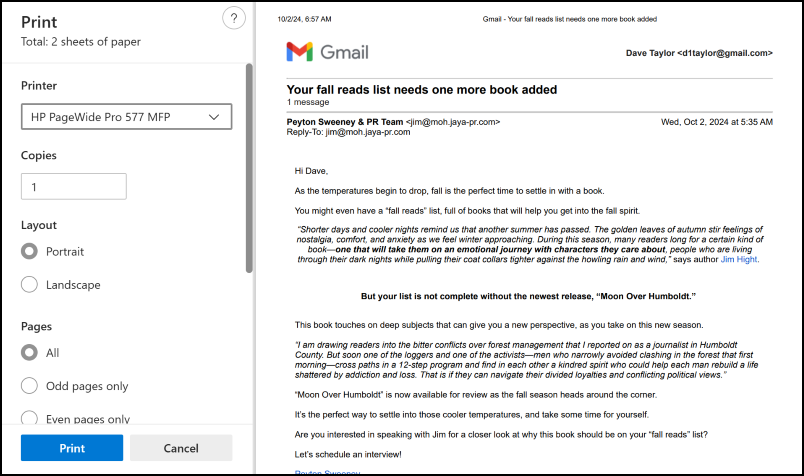
The email message I want to print is about an upcoming book that sounds mighty interesting, Moon Over Humbolt. When I click on the print icon within Gmail, this is the box that pops up:

A nice big preview window on the right, and the most general print settings on the left. By default, my PC wants to “Save as PDF”, but if I click on that menu, a list of options are shown:
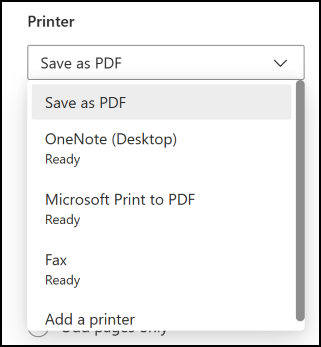
Plenty of choices, but none are actually a printer! To remedy that, I’m going to click on “Add a printer”…
HOW TO ADD A NETWORKED PRINTER
This moves me into Settings > Bluetooth & devices > Printers & scanners:
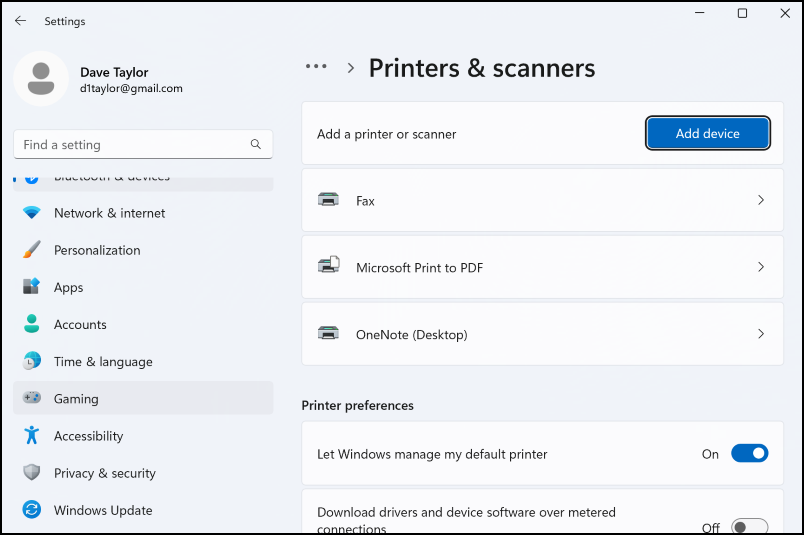
If you’re thinking that the big, blue Add device button seems promising, it is! I’ll click on “Add device” to begin the process of adding my network printer.
If the printer is set up correctly, on the same Wi-Fi network as your computer, it should just show up, as my HP printer does in this window:
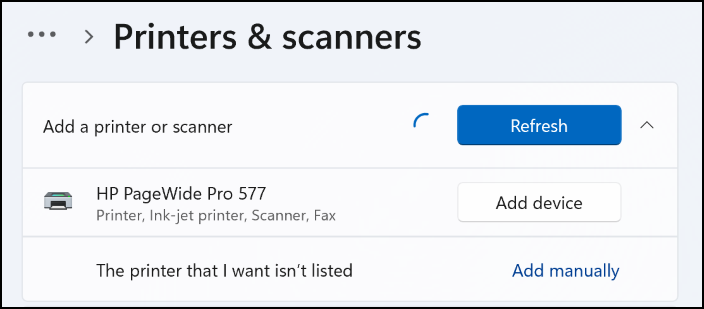
You can see that it offers printing, scanning, and fax capabilities, though I haven’t ever tried a fax. Does anyone still use fax machines at this point?
A click on “Add device” moves the process forward…

Once it’s connected it will download and install any required drivers…

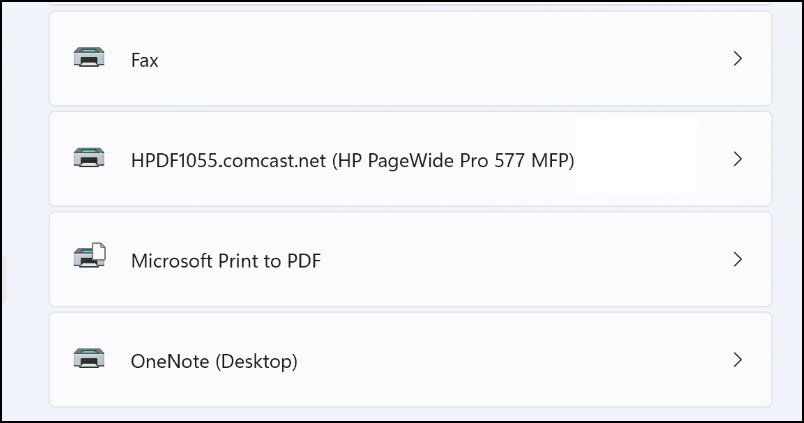
and, after no more than a few seconds, it’s ready to use and shows up on the print output options list…
You can immediately begin sending print jobs, but let’s have a quick look at some of the configuration choices and fix that ugly printer name while we’re at it.
CHECKING & FIXING DEFAULT SETTINGS
Click on the printer’s name in the list and a window with lots of info about the device appears:
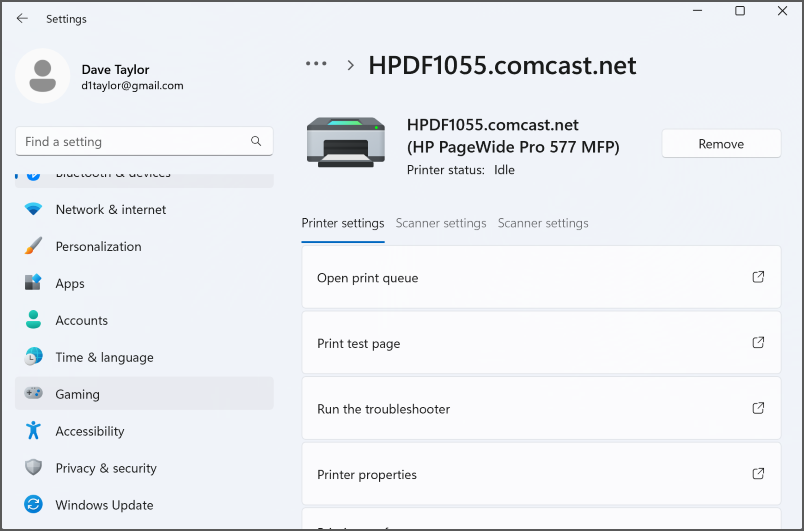
As a first step, let’s fix that clumsy name that was automatically generated. That can easily be done by clicking on “Printer properties“.
It brings up an old-style Windows configuration window (still, in 2024!), as shown:
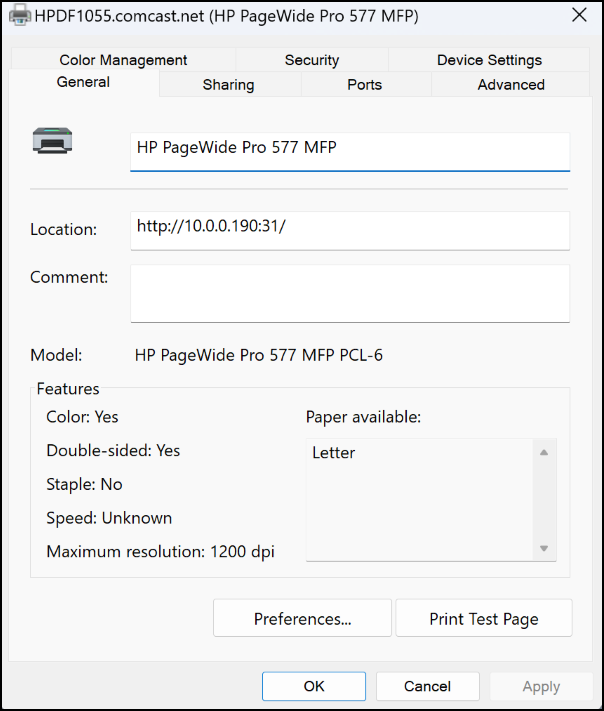
As you can see, I’ve already cleaned up and simplified the name to “HP PageWide Pro 577 MFP”. Looks good, so I’ll click on “OK“.
Scroll down in the previous window and you’ll find a link “Printing preferences”. With the HP printer, it hands it off to an HP utility with tons of settings:
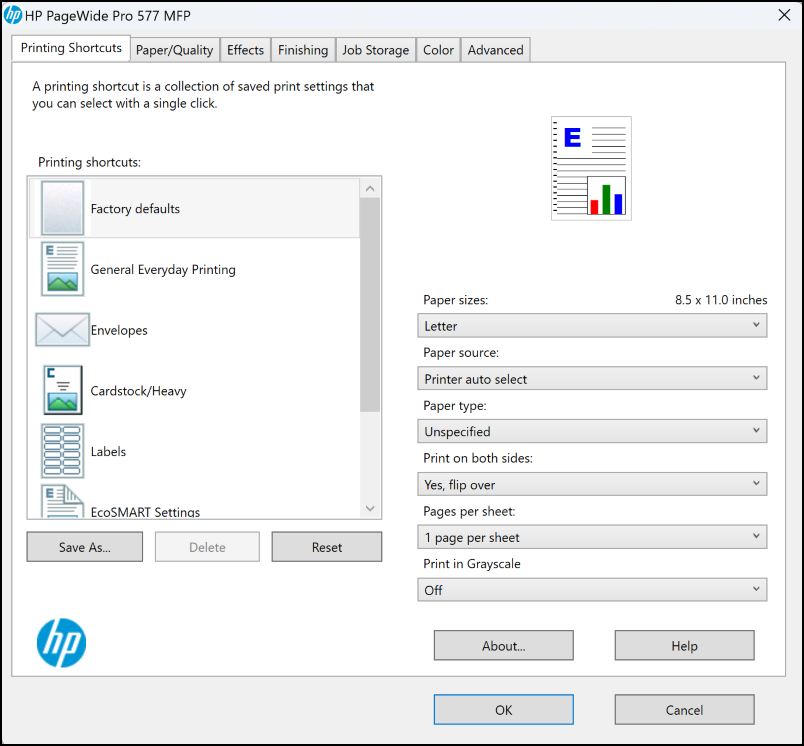
Lots of very useful settings and options, the ability to check ink levels, run tests of various sorts, etc. Helpful. Your printer might hvae a similar vendor-centric preferences window or might be more generic Windows. Either way, go through this carefully and change anything desired.
FINALLY, THE PRINTOUT
With all that done and the “OK” button clicked enough times to close all the preference pages, your printout requests from within Microsoft Edge should now list a new output device:
That’s all there is to it. I hope your printer setup process is just as smooth.
Pro tip: I’ve been writing about Windows for many years. Please check out my Windows help area for lots more useful tutorials while you’re visiting the site!