
I have two things I want to change on my Windows 10 computer: first, the screen saver comes up way too fast for me – sometimes when I’m in the middle of reading an email! – and second, when I return from the screen saver, I would like to have it prompt for my password each time. That way I can ensure my wife isn’t poking around in my account.
Unless you’re working in a high security facility, it’s hard to imagine why Microsoft lets you set a timeout for the screen saver to 1 minute. Honestly, does anyone in the world really need their screen saver to kick on that darn fast? Then again, since it is just a setting, I suppose they might just have it be 1..infinity (but not beyond, of course, since that wouldn’t make any sense 🙂 )
Having your screen saver set incorrectly can still prove a big frustration and one that you face every hour that you’re using your Win10 computer. So I’ll show you how to fix that and set it exactly how you want. In addition, it’s at the very same spot that you can click a checkbox and enable a password prompt on wake. Better, when that prompt shows up, it’s also super easy to switch to a different account, which is what I assume you’d prefer your wife do rather than hack your account!
Righto, let’s jump in. First off, here’s my screen saver, ain’t it pretty?

I click a button, move the mouse, do just about anything and it’ll wake up. That’s good, that’s what we want. Except my wake from screen saver setting has it go immediately right back to the Desktop and what I was in the middle of:

That’s useful if your goal is to just stop screen burn-in from the image if you wander off for the day, but that’s not really much of an issue with modern screens and monitors anyway (at least, not unless you don’t touch your computer for a few months!). From a security perspective, there’s a false sense of security about having the screen saver kick in, so let’s change things so your password will be required upon wake.
To do that, use the Windows 10 / Cortana search box and enter “screen saver“. Easy enough, right?
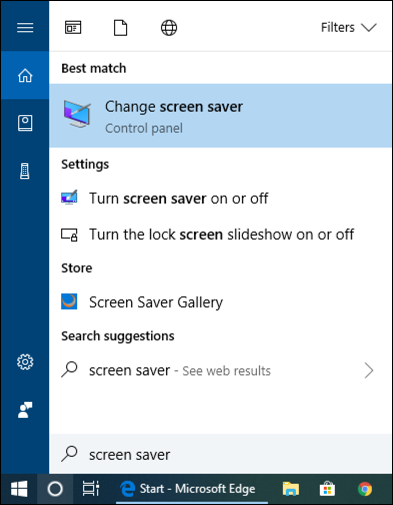
Confusingly, there are two ways you can change the screen saver settings, one of which is in the newer Win10 Control Panel interface, but doesn’t offer the features we want. So choose “Turn screen saver on or off” and a small, old-school Win95 sort of window will pop up. It looks like this:
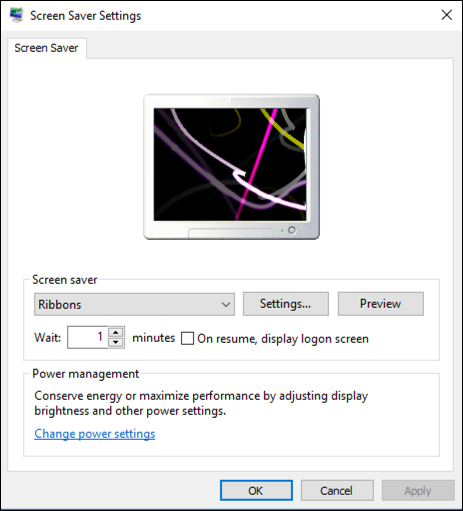
You can easily change which screen saver will be used – mine is “Ribbons” and is very retro 90’s – but more importantly immediately below the screen saver option is the “wait” time setting and that all-important checkbox that lets you set “on resume, display logon screen”. Bump your wait time up to 5-10 minutes (you can tweak it later after trying a setting for a few days) and then check the on resume, display logon screen box. It’ll look like this:
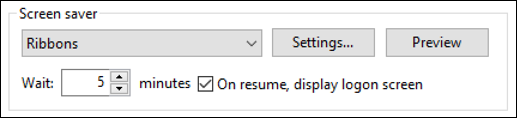
Easy enough and now once you “Apply” and “OK” the changes, you’ll find that your screen saver shows up a lot more slowly and when you return from saving your screen, you get this glorious screen instead of just dropping back to your Desktop:
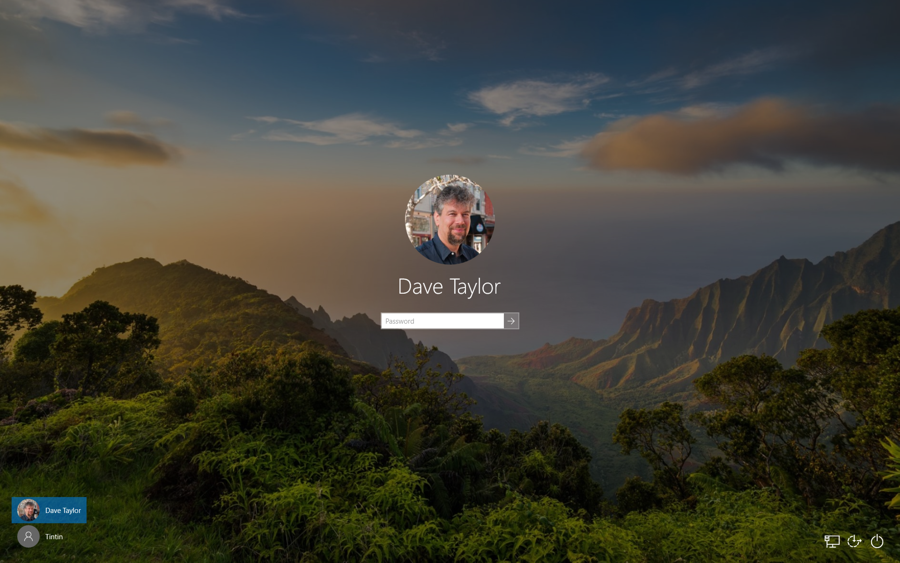
That’s it. And notice on the lower left it shows various account choices: If your wife has her account shown there, it’s a single tap or click for her to log in to her account. Problem solved.
Pro Tip: While you’re here, please check out our extensive Windows Help Library. It’s bound to help you get more out of your PC!
Why have a screen saver? I have my monitor going to sleep after 10 minutes of inactivity. This saves a small amount of electricity.