
My MacBook Air just warned me that I’m running out of disk space. But I don’t have anything very big on the computer. How can I figure out where the disk space is being consumed and fix it? Running MacOS X 10.12.1.
With the rise of cloud storage, you’d think that your computer could automatically just push files you haven’t used for a while into the cloud and make sure that whatever you have locally on your hard drive (or SSD drive) are the files you’re actively using so that you’d never run out of disk space. Actually, you can do that, but most users wisely recognize that there are security issues with your files wafting off to the cloud and the local copy being deleted, so there’s a significant barrier to that being fully implemented and invisible.
In the meantime, we still have to do some basic disk management, whether you have a 256GB SSD drive, a 512GB or even a terabyte or more. Files, movies, songs, video clips, spreadsheets, photos of loved ones, they all take up space and all stick around until you manually do something about it!
You’re by no means the first person to be surprised to find that they’re running out of disk space either! Sometimes it’s a huge file or two that you know needs to be deleted, like a motion picture AVI or MP4, and other times it’s just some basic housekeeping required, like compressing a virtual machine image from Parallels or VMWare Fusion.
The basic strategy for finding these big files is to use the Mac Finder. Start by opening up a Finder window. Here’s what I get by default:

Look on the very top to see what’s being displayed. In this case, I’m looking at my Desktop. Problem is, I want to “move up” a directory so that I’m in the account’s home directory and can see Applications, Pictures, Music, Documents, etc.
The sneaky shortcut way to do that is to hold down the Control key on your keyboard and click on the current directory name in the title bar. A little menu pops up that shows you the exact path from the top of the file system to that directory:
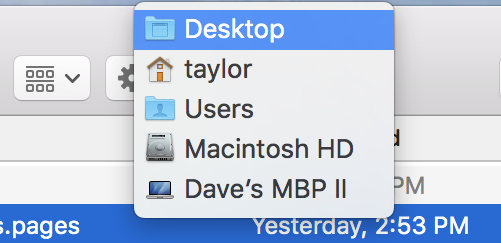
What most people don’t realize is that you can easily click and choose any of those directories, so I’ll click on “taylor” and move up a level to my account’s home directory. Now the Finder window looks like this:
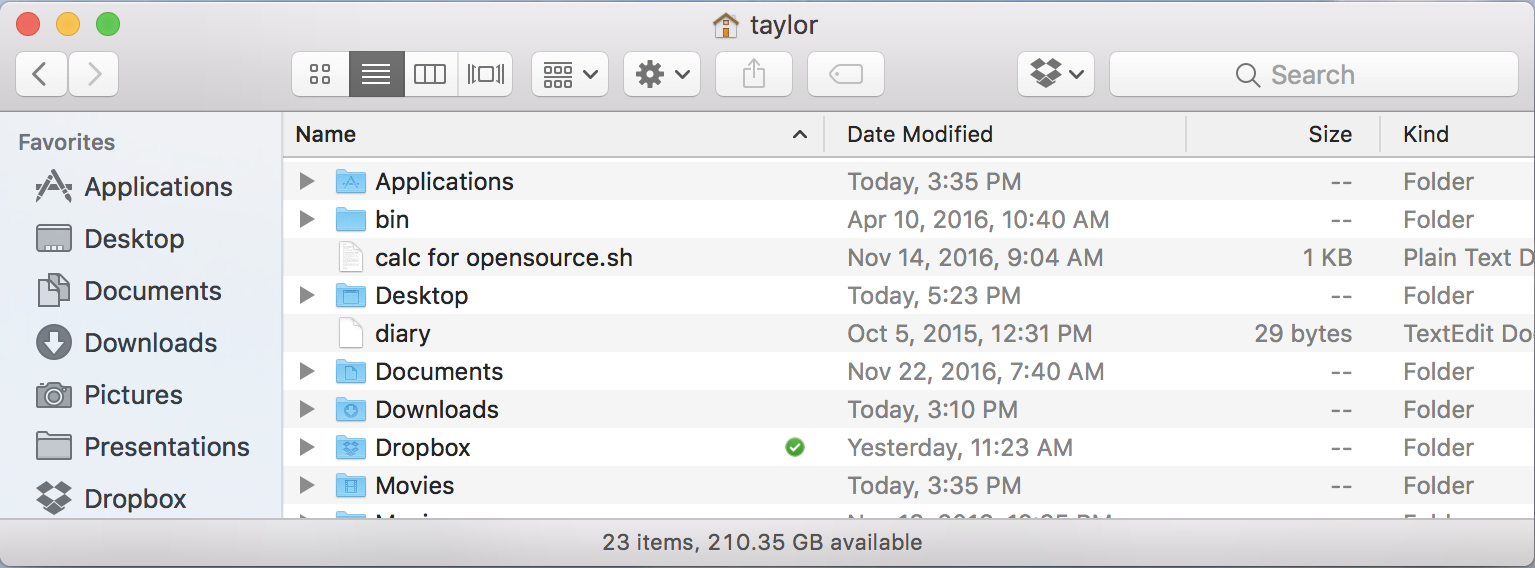
The problem is that by default the size of folders aren’t calculated and shown, so if you look closely at Applications on the top line, for example, you’ll see that its entry in the “Size” column is just two dashes. Let’s fix that and have the Finder calculate all these sizes so we can figure out which directories contain all those pesky files that are eating up all the disk space.
That’s done by choosing “Show View Options” from the View menu or simply pressing Command-J. A skinny little window pops up:
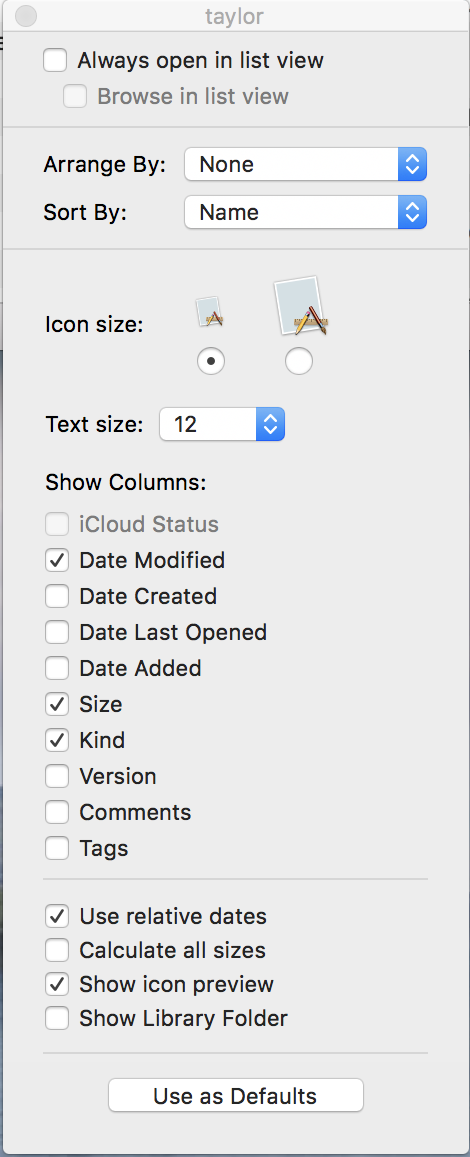
There are lots of options to explore here, including which data is shown in list view, but what we want for this task is near the bottom. Look for “Calculate all sizes“, and check it, then close the View Options window (click on the tiny circle on the top left edge of the window).
Now it might take a second or three for the Mac to actually figure out all the sizes, but the Finder window will begin to show the sum size of everything in the different directories. Click on the column title “Size” and it’ll even be sorted by biggest to smallest:
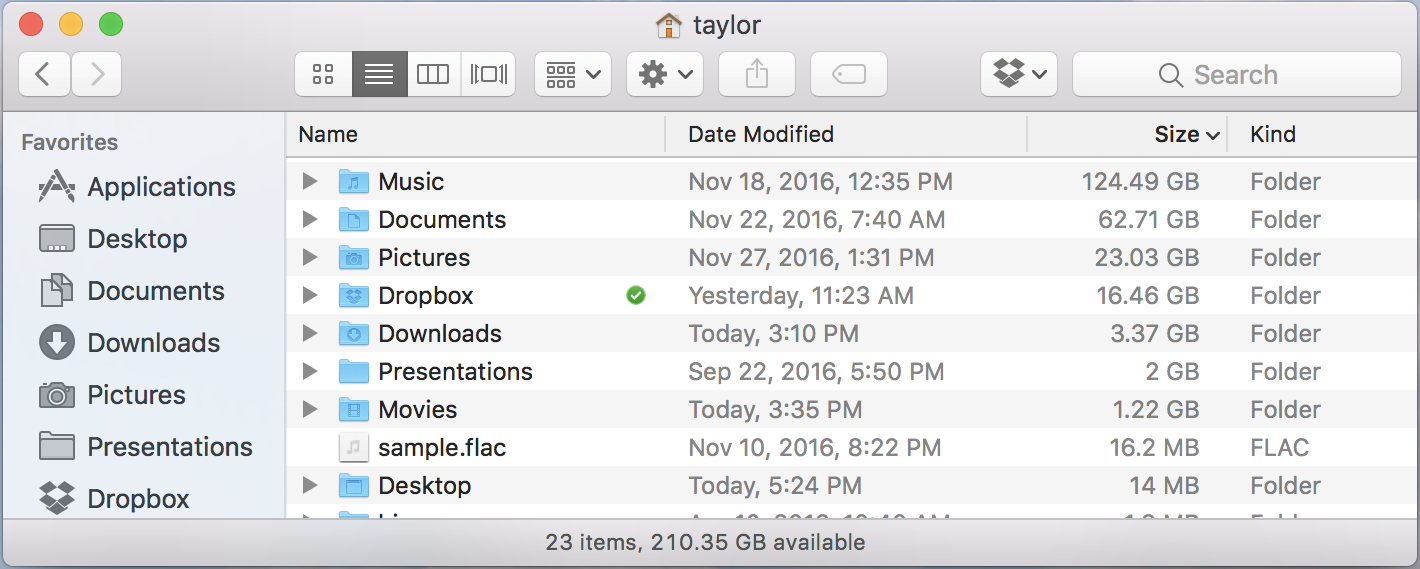
You can see that my biggest folder, by far, is my Music folder. 124GB of music on this particular computer. Next biggest is Documents, with 62GB worth of content. This will get you started tracking down the disk space hogs and remember you can do this in any folder at any level of your Mac system, so I could easily go into Documents, repeat the steps, and figure out what’s eating up 62GB of space too!
Good luck!
I also like http://grandperspectiv.sourceforge.net/
Definitely lots of tools to help isolate big files and directories. I wanted to highlight how to do so with just MacOS itself 🙂
Hi Dave.
Thanks for this article.
Have you worked with the app DaisyDisk?
It generates a graphical display indicating where your Mac resources are being utilized so you can take care of “space wasters.”
Cindy
There are a lot of third party app like what you mention, Cindy. I was just trying to show how you could explore your disk with just built-in Mac tools!