
I just purchased an external disk drive so I can back up important files from my PC. What’s the easiest software to have reliable, scheduled backups in Windows?
There are a lot of choices for backup software on your Windows system, including software from Microsoft itself. The problem with most of them is that they’re not particularly intuitive to use, and if you can’t get it set up exactly as you want, it’s basically useless. Remember, the only time you really test your backup software is when something horrible has happened, like a hard drive failure, and you need to recover or restore files. That’s a horrible time to learn you weren’t backing up what you wanted, as frequently as you expected!
A brief story: One of the first AskDaveTaylor website servers was hacked and its drives were wiped clean by nefarious software and a malicious hacker. No worries, I figured, I was paying the colocation site for full daily backups. Until they tried to restore and realized that the backups had been corrupted for months, to the point that they effected did not have any way to restore my lost server. Not a pretty moment, needless to say.
The good news is that you shouldn’t have to experience a digital meltdown to get set up and properly configured with your backup solution. For this article, I’m going to actually demonstrate a commercial program called EaseUS Todo Backup. For just a few dollars per month, you can use the software to automate backups onto your own drive or even utilize some of its enormous cloud storage space. In fact, I’ll show both in this article so you can see just how easy it is to back up files to cloud storage even if you don’t have any disk space left locally.
FIRST BACKUP WITH EASEUS TODO BACKUP FOR WINDOWS
You can grab a copy of the program here: Download Todo Backup 2022. Once installed, set yourself up an account – you can try it for thirty days without paying for a license, if you prefer – then the home screen will look like this:
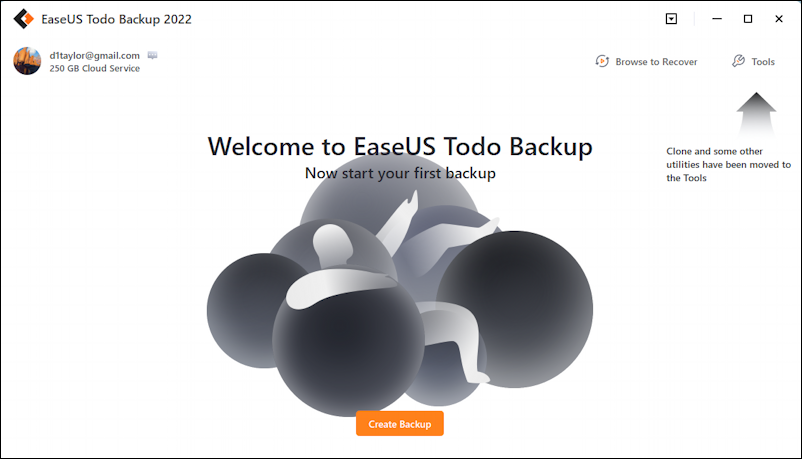
I can’t say I understand the meaning of the big black graphic image, but don’t worry about it, all you need to pay attention to is the big orange “Create Backup” button. A click or tap on that and you’re ready to configure your first backup:
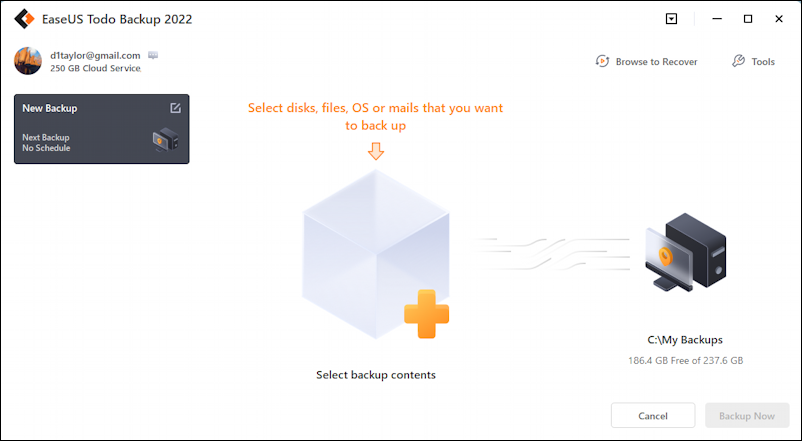
As you can see, the process is pretty darn simple: Choose what you want backed up, then choose where you want it saved, and you’re ready to go. Let’s go through this step by step, however.
Start by clicking on the big orange “+” to choose what you want to have backed up. There are four basic choices:

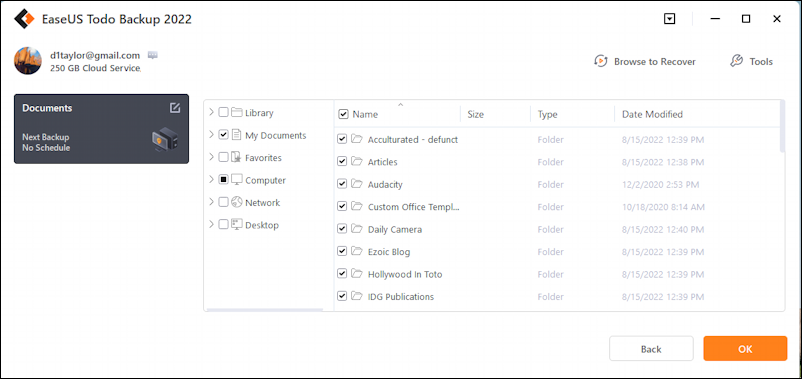
While you can back up an entire disk – or your Windows OS – I suggest that it’s your files and mail that are most important. In fact, I like to back up everything in My Documents, including pictures, etc. I’ll choose “File” then navigate to My Documents, as shown:
Once I’ve picked everything I want to have backed up, a click on “OK” moves to the next stage: Choosing a destination for the backup.
CHOOSING A BACKUP DESTINATION
By default, it will create a folder on your C: drive called “My Backups”, as you can see below:
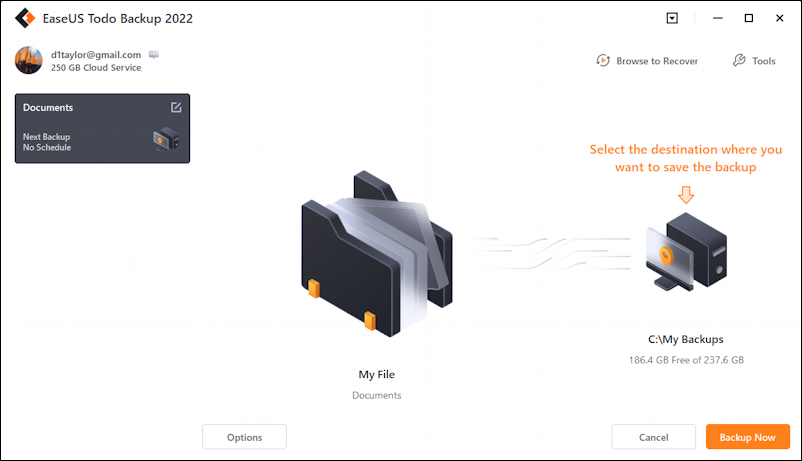
But don’t just go with the default! Click on the cool computer graphic and you’ll find there are a lot of options:
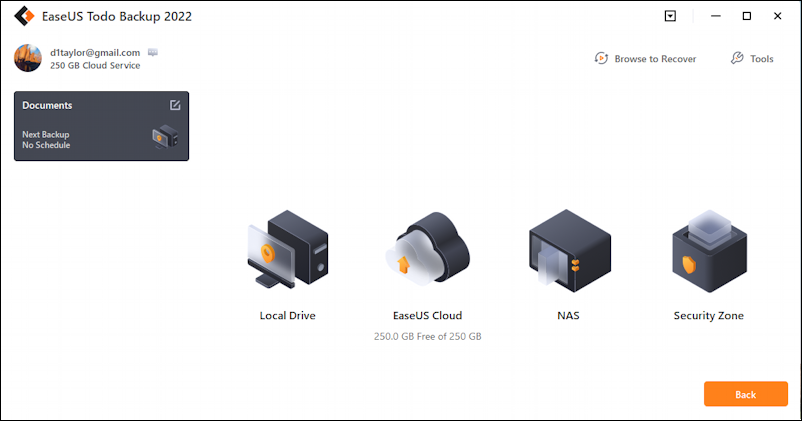
A “NAS” is a network-attached storage system, and a security zone is something your IT department would set up, so probably doesn’t apply to your personal computer backup strategy. “Local Drive” is where you’ll find the new external drive that you’ve hooked up. “EaseUS Cloud” is for cloud backups, but we’ll come back to that in a little bit.
For now, click on “Local Drive“.
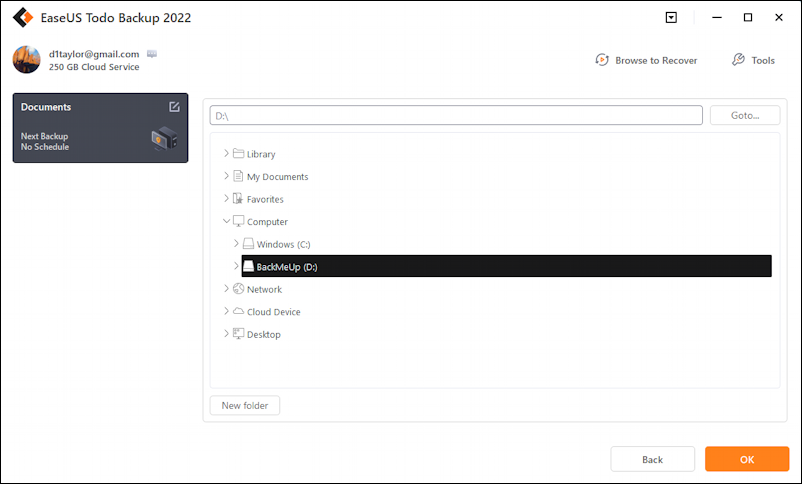
As you can hopefully see above, I named my new drive “BackMeUp” and it’s attached to the PC as the “D” drive. I choose it and click “OK” to proceed. Now EaseUS Todo Backup shows a summary of the backup request:

I’m going to be backing up My Files to D: and the destination drive has a healthy 446.9 GB of available space, plenty for the files, documents, and photos I want to backup.
To start the backup, simply click on “Backup Now“. It starts immediately, then shows its progress on the small grey box on the left side:

You can see that it’s backed up 36% of my files and folders and that’s taken a lightning fast 26 seconds. With a fast external drive, these backups are startlingly quick nowadays!
Once the backup is complete, a notification window pops up with a really important button:
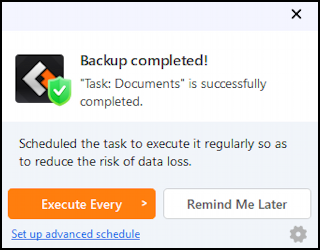
You can guess which button is important since it’s in orange. Click on “Execute Every” and you’ll be able to customize your exact backup schedule, whether you want it to happen hourly, daily, weekly, or at the beginning of each month.
There’s also the option of “incremental” versus “full” and that difference is really important: An incremental backup only adds files that are new or have changed since the previous backup, whereas a full backup saves a copy of everything, whether the file’s a year old or was created last night. A typical strategy is to have incremental backups during the week, then once weekly have a full backup.
BACKING UP TO THE EASEUS CLOUD
What if you don’t have an external drive and don’t want to take up space on your C: drive with backed-up copies of your files and folders? No problem, that’s where the EaseUS cloud storage comes into play. A basic account includes 250GB of space, which is plenty for most people. Notice in the earlier windows it’s shown me how much space I have on the top left too: 250GB.
Let’s set up a backup of my Pictures folder in the cloud. Easily done, actually. I choose “Create Backup”, choose my “Pictures” folder, then choose “EaseUS Cloud” as the destination. A click on “Start Backup” and it’ll get the process started:
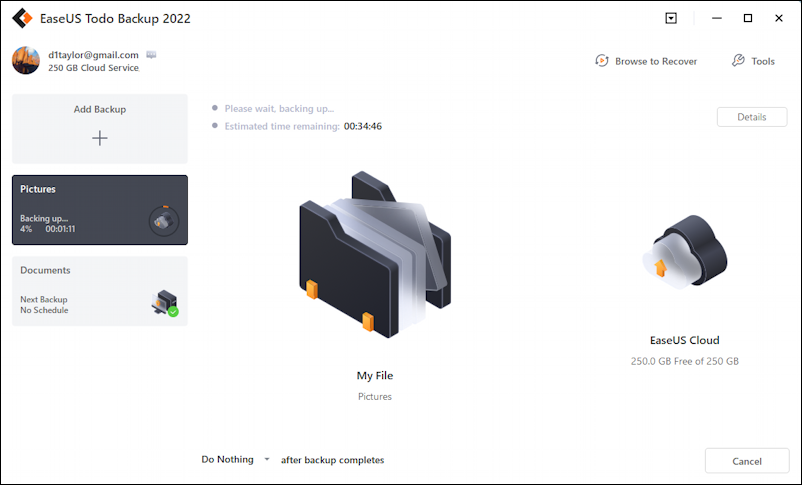
Even if you have a screaming fast Internet connection, backing up to the cloud is going to be slower than writing files to a local hard disk. Don’t be surprised if this takes as long as overnight or an entire day for a full backup. You can see above that it’s completed 4% in 1:11, suggesting that it will take over a half hour for the entire backup, many times slower than the “D:” drive.
Once it’s done and I’ve scheduled the My Documents backup, notice that the top left shows the schedule of each defined backup:
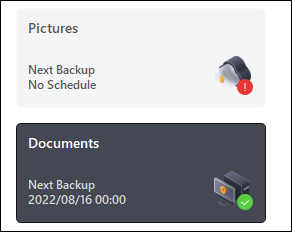
You can see that the Pictures backup has “no schedule” but the Documents backup has its next backup scheduled for 8/16/22 at midnight. Handy!
WHAT ABOUT FILE & FOLDER RECOVERY?
All of these backups are great, but what if you need to recover a file or folder? That’s quite easy to do. Consider below where I am poised to recover a folder called “Daily Camera” from my D: backup:

Notice on the bottom that I can recover to the original location or, smarter, recover to a different folder. I always recommend recovering to a new folder like “Recovery” so you can inspect and confirm it worked before moving it to the final destination.
That’s it. EaseUS Todo Backup for Windows. Fast, easy, flexible, and supports both local and cloud backups and recovery. Whether you choose this or another solution, however, please do implement a regular backup solution so you never have to experience the horror of losing something just to realize there’s no copy for safekeeping either.
Disclaimer: EaseUS sent me a license key so I could explore the featureset of EaseUS Todo Backup. Much appreciated.
Pro Tip: I’ve been writing about Windows since the beginning. While you’re here, please check out my extensive Windows help area for hundreds of other useful tutorials and how-to articles. Thanks!