
A friend shared me a photo he took that was incredibly detailed and close up of his wife’s ring. I try to take closeups on my iPhone and they’re just blurry. What’s his secret?
There are a couple of different ways that you can take macro photos with an Apple iPhone, ranging from adding an actual macro lens (check out olloclip for some great options if you’re curious) and there are apps you can download for your iPhone like Camera Plus that give you macro capabilities. Tap the Accessibility features on your iPhone in iOS 10, however, and you might be surprised what you can do without any new apps or hardware.
If you’re not sure what Accessibility is about, it’s Apple’s suite of changes and modifications you can make to your iPhone’s behavior for auditory, visual and other disabilities. Color blind? Apple’s got you covered. Need to have the phone speak text messages you receive? It can do that. And, of course, if your eyesight requires that you magnify tiny things or small text, iOS has a feature for you too. It’s this very feature that we’re going to utilize for macro photography, actually!
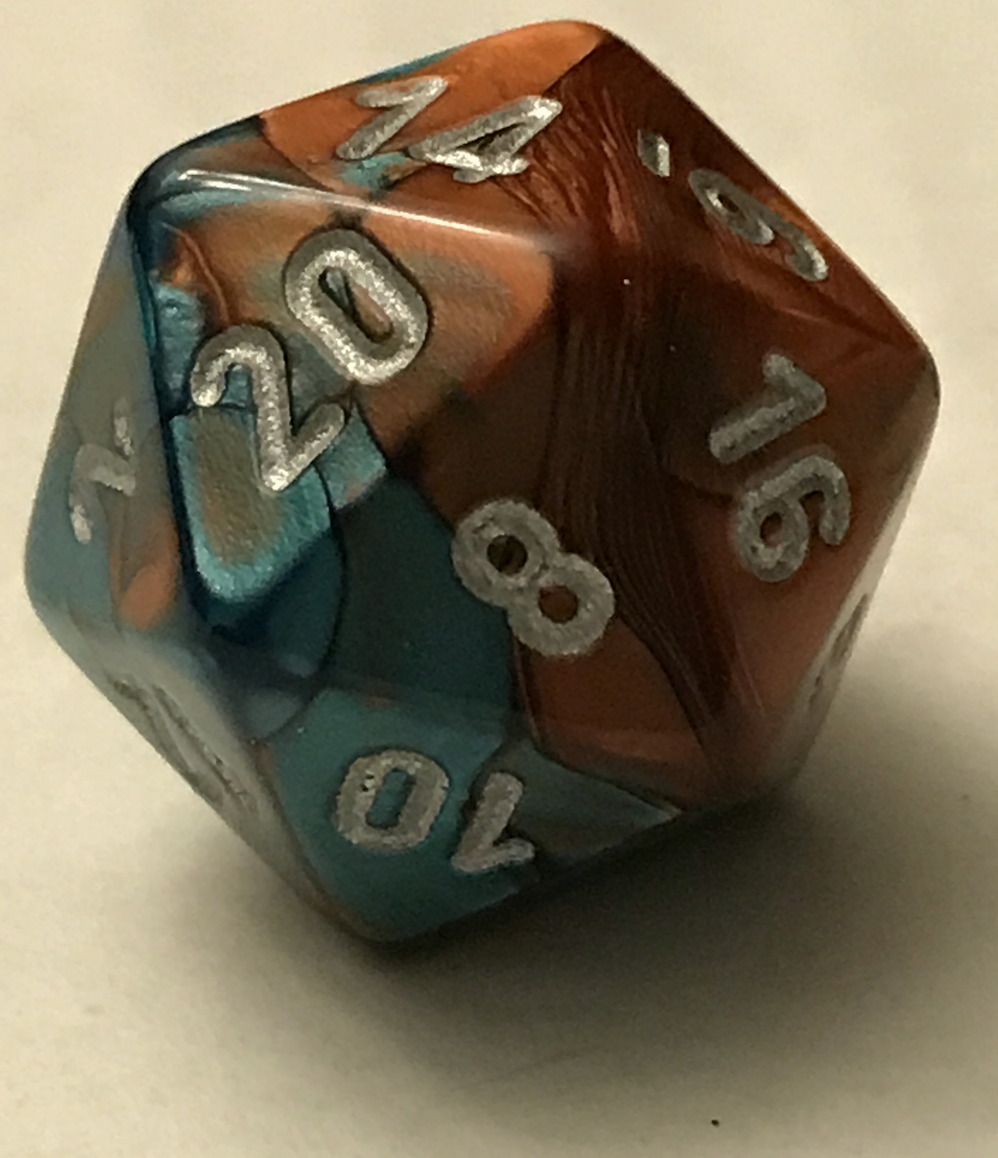
But first, if you light things well and don’t get too close but zoom in, you can indeed take some pretty good macro photographs with just the regular Apple iPhone. For example, this die is about 1″ tall:
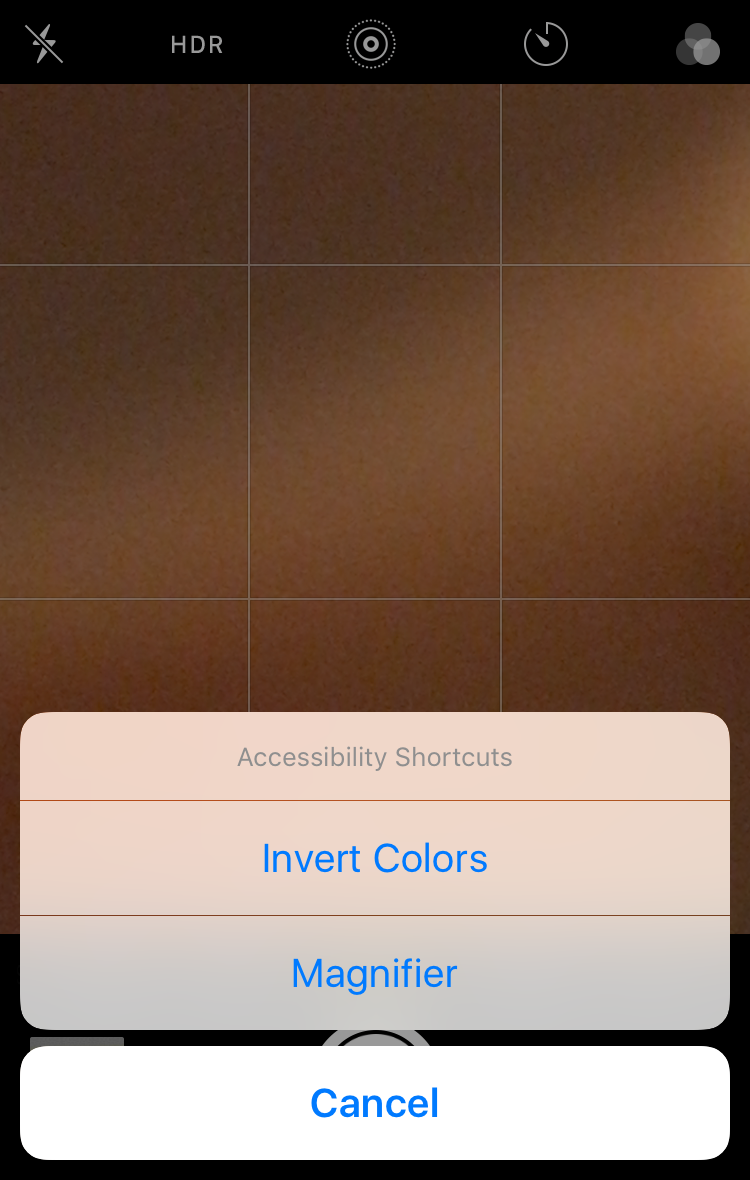
But let’s see what Magnify can do for you, shall we? To access it, you can probably just triple push the home button on your iPhone – even when it’s locked. When I triple tap my iPhone, I actually get two options from the Accessibility area:
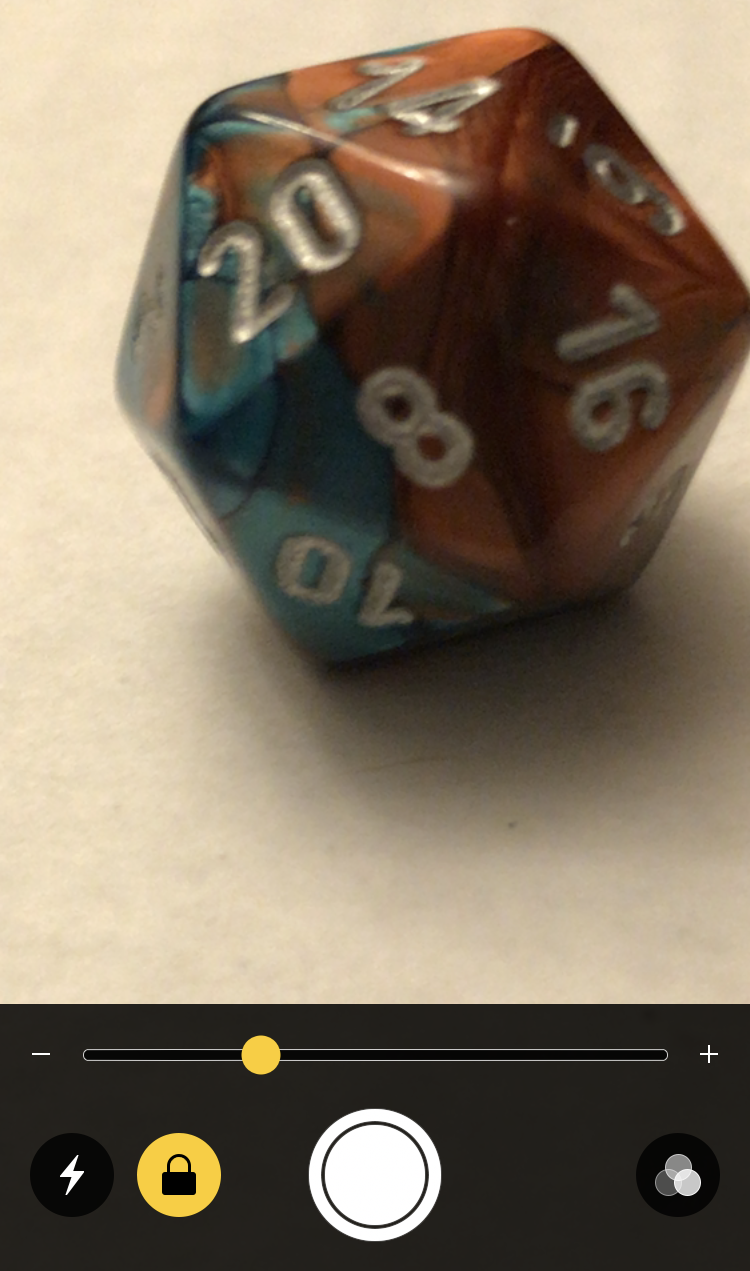
A tap on “Magnifier” and it’s a whole new world we enter, a completely different use of the phone’s camera lens:
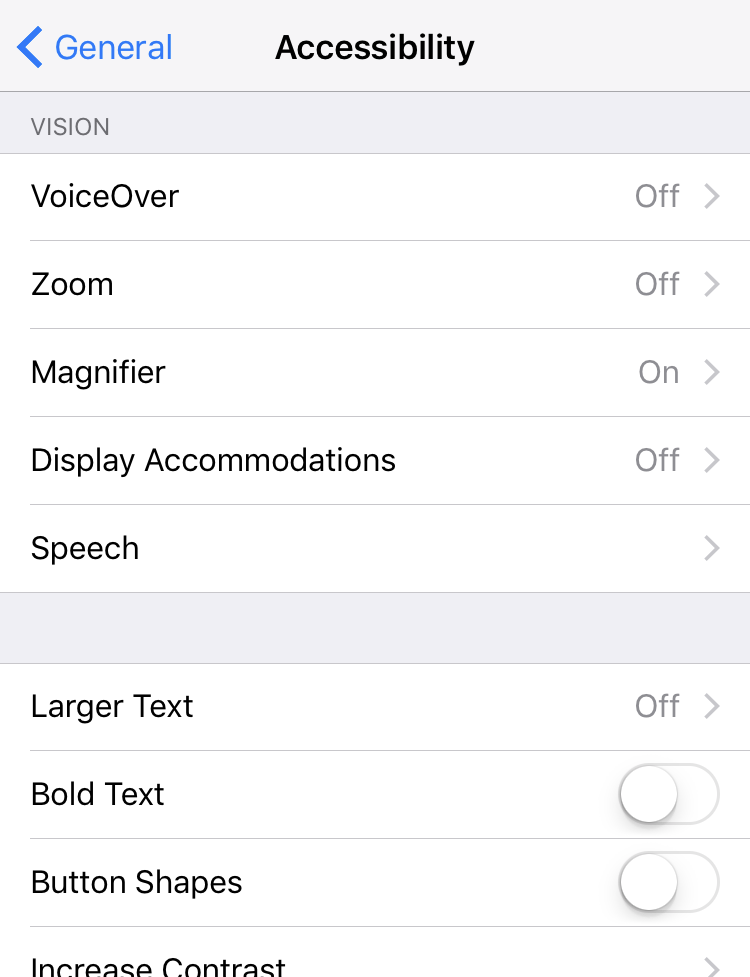
Don’t have Magnifier? No worries, Go to the Accessibility area in Settings and you can find it easily enough:
You can explore other options as you have time, but for now, just enable Magnifier by tapping on it. Nicely done!
Now, back to exploring the Magnifier feature… It basically is a camera all unto itself. Point it at something you want to magnify, tap on the circle at the bottom of the screen and it’s locked in. Here’s that set of controls again:
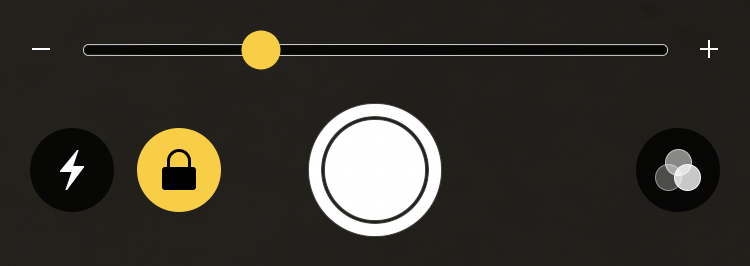
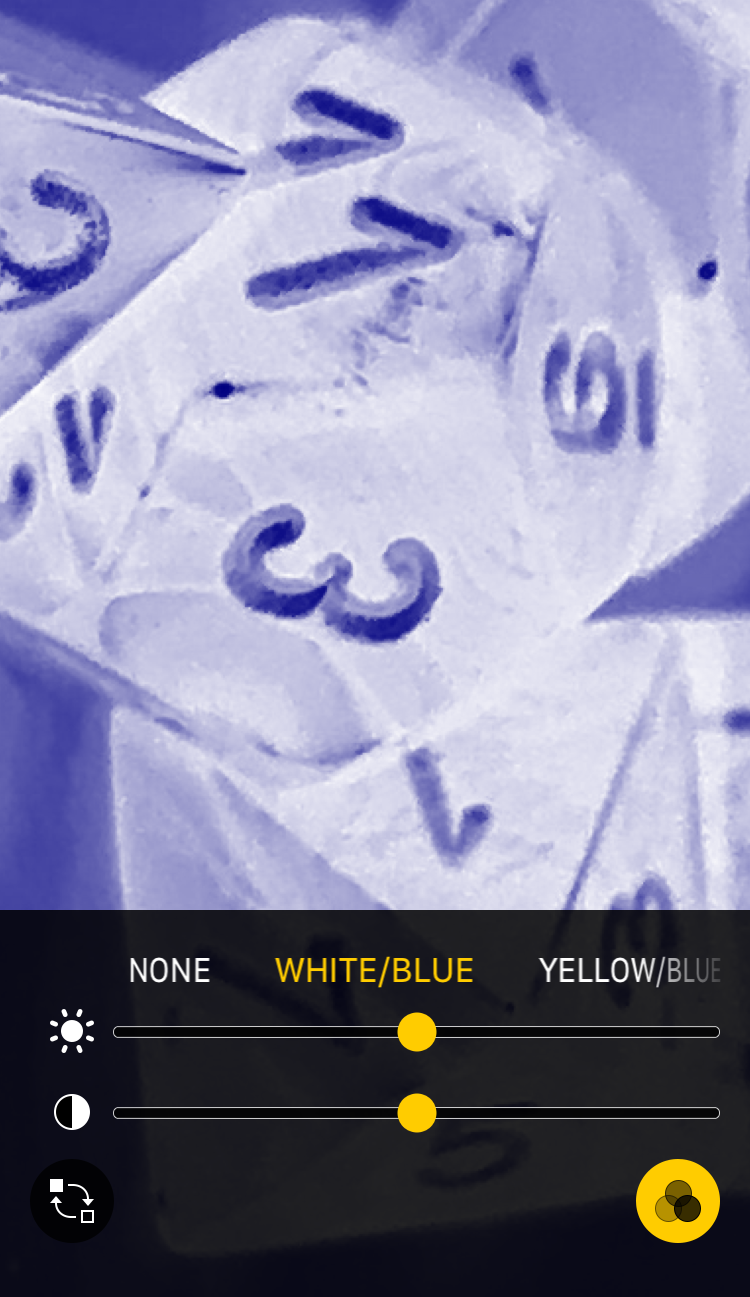
Once you have an image locked in, you can use the slider along the bottom to zoom and zoom and zoom incredibly close. You can also control various other aspects, including the lower left lightning bolt icon that lets you enable/disable flash and the lock icon that locks down an image so you can come back to it later. The three overlapping circles icon offers a different feature, a number of visual filters to help with various color blindness issues.
For example, White/Blue:
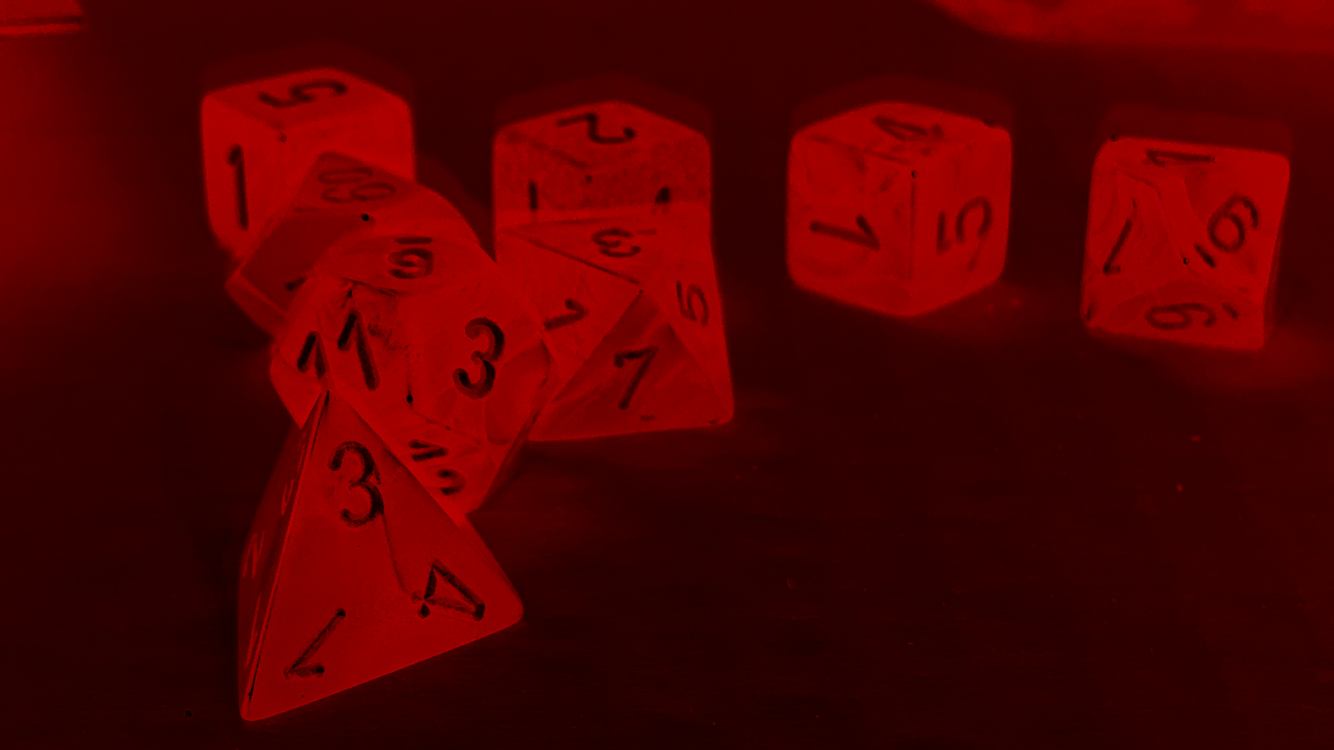
You can also tweak brightness and contrast, but the colors are darn interesting to experiment with whether you have a color deficiency or not. Like this rather ethereal red filter that makes my dice look quite a bit more unusual:
Since the Magnifier feature isn’t intended to be used as a camera add-on, once you get the image exactly as you like, simply take a screen shot to add it to your Camera Roll. How do you take a screen shot? Easy. Push the power button and the home button simultaneously for about two seconds. The entire screen will flash white for a fraction of a second and if your sound is up, you’ll hear a camera shutter click.
And now you’re up to speed and with a bit of practice can take fantastic macro photos to share with your friend too!
Try roadeavour lens for better macro shots!