
I have a friend who seems to be able to log in to a lot of my paid apps and would like to prevent him from utilizing my NordVPN account. Can I set up two-factor authentication or similar?
NordVPN does indeed offer multi-factor authentication (MFA) for accounts, either through an Auth app on your smartphone or a physical security device. But I’m more curious about your friend accessing your accounts. How do you know? Do you use the same password everywhere? Obviously, if it’s the latter, it might well be time to start changing your passwords and using a password manager like 1Password (what I use) to track everything.
Of course, one of the great things about two-factor authentication (2FA) is that even if someone has your account name and password, they cannot log into your account unless they also have access to your mobile device. Odds are that your friend does not have a clone of your phone, so that should stop ’em in their tracks even if they keep guessing your password.
It is a bit tricky to set up the multi-factor authentication with Nord VPN, but if you follow the steps below, you’ll be more secure in no time. Before you start, you’ll want to download an authentication app to your mobile device if you don’t already have one. NordVPN recommends Google Authenticator, Microsoft Authenticator, or Authy. I use Google Authenticator on the iPhone for this tutorial.
FIND MFA ACCOUNT SETTING IN NORDVPN
Easiest is to just start out within the Nord VPN app on your Mac or PC. You’ll see a window like this:
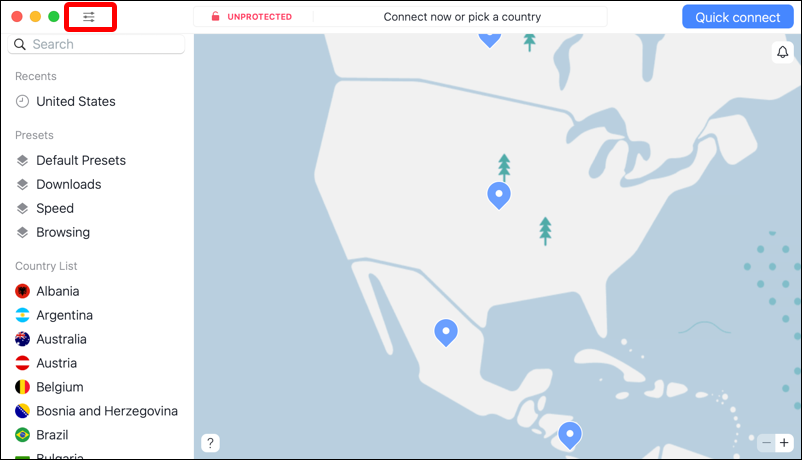
Hopefully, you’re already familiar with the simple Nord VPN interface, or perhaps you just click “Quick connect” and never go any further into the app. All good either way. This time, however, you want to click on the tiny settings icon on the top left. I’ve highlighted it in the above screencap.
This brings you to the Preferences area, which is worth exploring to ensure it’s set up optimally for you. For this task, however, choose “Account” on the lower left…
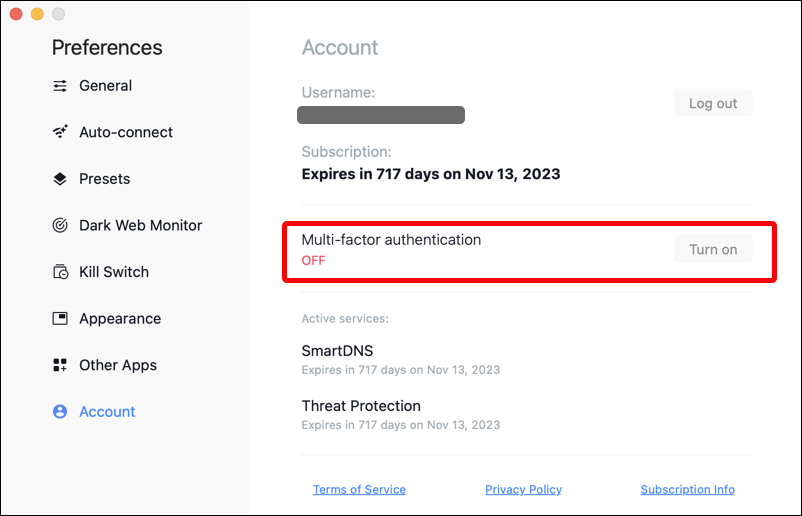
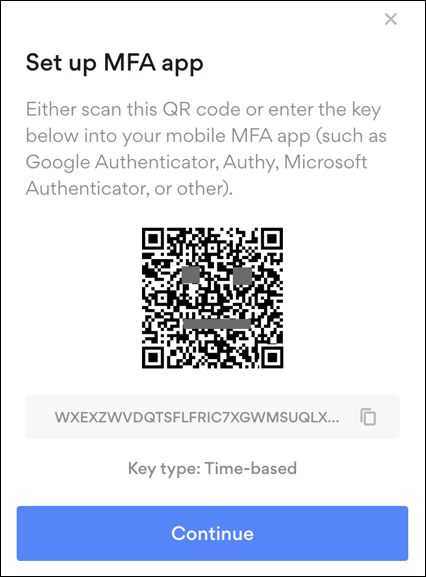
As you can see, there’s a big “Multi-factor authentication” setting in the middle of the window, and it’s marked as OFF. Click on “Turn on” and it’ll open up your Web browser to proceed. Conveniently, it’ll drop you into the exact correct spot to enable MFA, as you can see below:
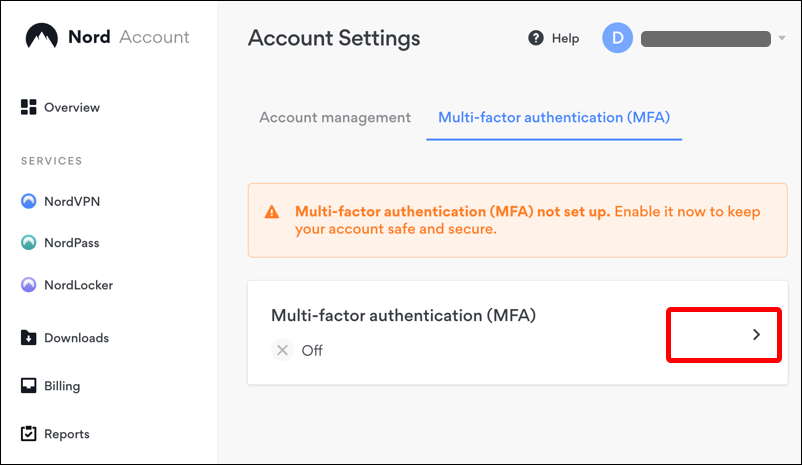
This is a bit harder to understand, but you want to click on the “>” to the right of the pane that shows “Multi-factor authentication (MFA)”, as highlighted.
ENABLE MULTIFACTOR AUTHENTICATION IN NORDVPN
At this point, the big question is how you want to authenticate yourself with that second factor:
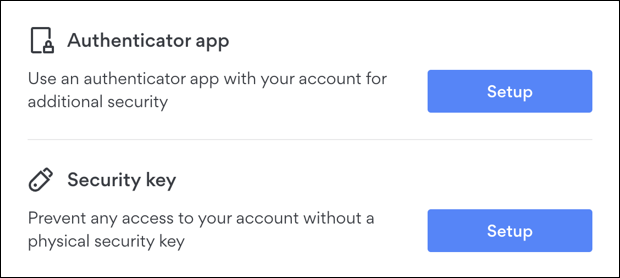
If you don’t know what a security key is then I definitely recommend choosing the Authenticator App. Click on the “Setup” adjacent to that choice and you’ll see this prompt:
At this point you want to switch to your smartphone.
SET UP 2FA (MFA) IN GOOGLE AUTHENTICATOR
Go to your authenticator app – like Google Authenticator [iOS or Android] – and you’ll either see a list of other sites you already work with or a mostly blank screen. I have mine set up for a couple of media sites so my home screen (on the phone) looks like this:
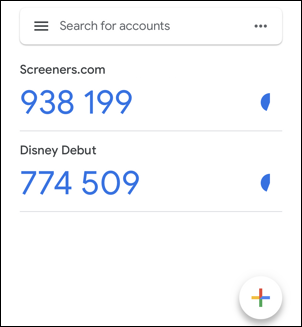
The basic idea of these apps is that every 60 seconds the six-digit code number for the sites changes. Enter it within that time interval and you’re authenticated.
Tip: Think you can guess a 2FA code? Well, maybe. There are only 10**6 possible combinations, or one million! That you have to guess within 60 seconds. Good luck.
To add NordVPN, tap on the “+” on the lower right corner. That brings up this little menu:
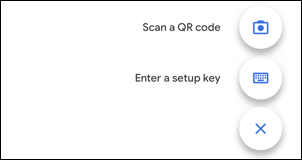
Simply tap on “Scan a QR code” and point the phone’s camera at your computer screen! It takes a second or two, then you’ll see Nord show up as another authentication site:
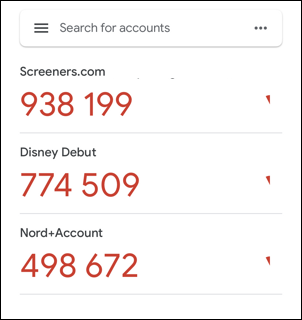
There it is! 498 672. But why are the numbers all red? Because it’s about to produce new codes since almost 60 seconds have transpired since the last time it generated those authentication codes. I just wait until the new codes appear before I proceed. Easy.
FINALIZE MULTIFACTOR AUTHENTICATION ON NORDVPN
Meanwhile, you can now click on the “Continue” button on your Web screen. It’ll prompt you to enter the current code in Google Authenticator (or whichever other authenticator app you chose):
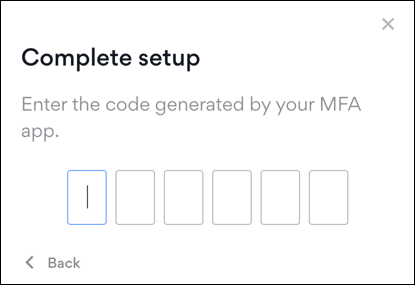
Once you successfully enter it – and remember, if the digits are red, just wait a few seconds for the new code – you’ll be prompted to finish up the setup process. At this point you’ve set up MFA, but you’re not quite done…
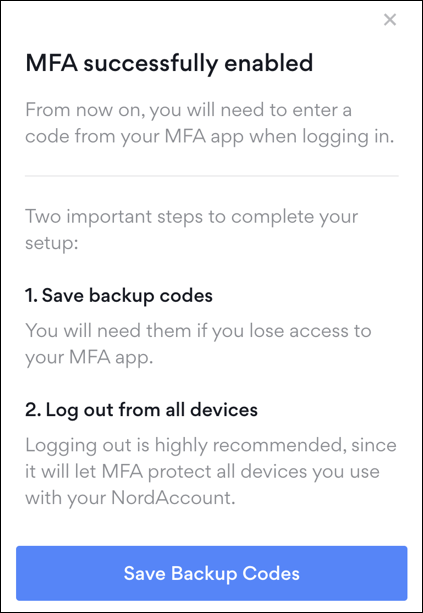
Lost your phone? Without it, remember that you won’t be able to log in to your NordVPN account. That’s why it’s critical to have all your backup codes saved somewhere safe, including for Nord VPN. You can do that by clicking on “Save Backup Codes“. It will show you a dozen or so special alphabetic sequences:
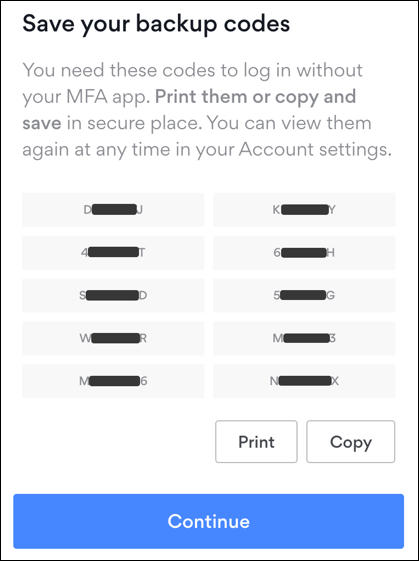
I highly, highly recommend that you save these. A screen capture can do the job.
Note: You thought a million combinations for the numeric code was impressive? This six character emergency backup code can be any of 26**6 or 308 million possibilities!
Just about done. Once you click on “Continue” this one last time, it’ll prompt you to log out of all your Nord VPN instances:
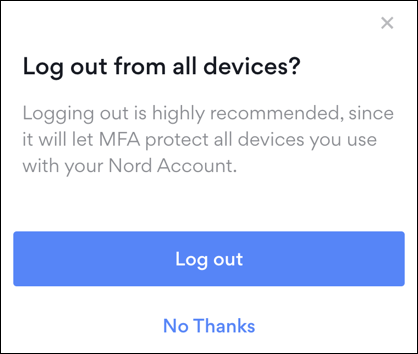
I suggest you click on “Log out” to ensure that everyone – including your suspicious friend! – gets logged out. At this point you’ll need to log in again, but this time after you’ve entered your account and password as usual, you’re prompted with this:
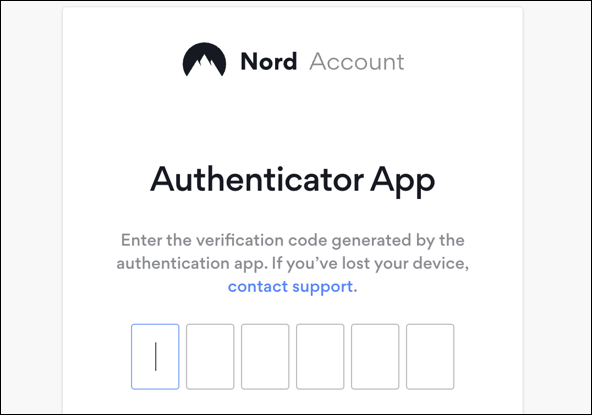
Now you’re a pro, though, so you know to fire up Google Authenticator on your phone and enter that code here. Done. Secured. Authenticated.
Pro Tip: I’ve been writing about security and online safety for many years. Please check out my account security help area for lots more tutorials, including guides on how to add 2-factor authentication to dozens of different accounts online. Thanks!
This is great Dave – thank you for the time to write. I am re logging into everything after updating software-a giant hassle. I have a weird question: maybe, somehow I am logged into a different MFA – it doesn’t look familiar to me but won‘T go away and I have no idea who the company is. It is a purple ball logo with a black Ethernet shaped design in the middle. Does that ring a bell?