
My son sent me a beautiful picture of his family and I’d like to set that as my desktop wallpaper on my Windows PC. What’s the best way to do that?
Whether your desktop is jam packed with icons and files or is empty of anything but the most minimal distraction, there’s something really pleasant about setting your own photo or image as the base image. Whether you call it your desktop image, wallpaper, or something else, the basic concept of setting your own photo is pretty easy. But where it gets tricky is when the photo dimensions are incompatible with the size of your computer screen and, by extension, your wallpaper.
The most common screen size with a Windows PC are 1336 x 768 or 1920 x 1080. Together they account for almost 50% of all Windows PC computers, actually! Both have similar aspect ratios too: 1.7:1. Problem is, lots of photos are square or other aspect ratios. By default Windows will stretch an image to fill the screen, but that can lead to some really bizarre distortions that might leave you a lot less than happy with the results.
So let’s see what options you have! To start, here’s the image I’m going to set as my desktop wallpaper:
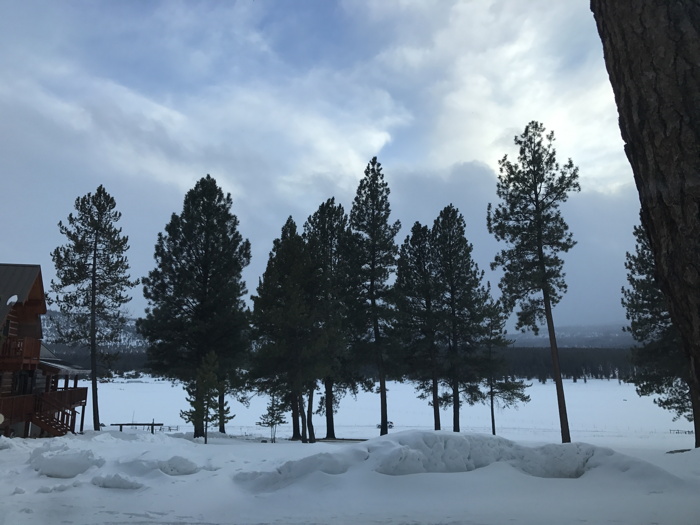
This particular photo is 4032 x 3024, an image aspect ratio of 1.33:1. That’s going to cause trouble, but it’s also not a huge deal if it’s distorted a little bit to fit.
The image file is “tree line in snow.jpg” and a right-click on the image file gives me a lot of options:

The fifth option down is the key: “Set as desktop background“.
Choose that and it’ll stretch to fill the entire desktop:
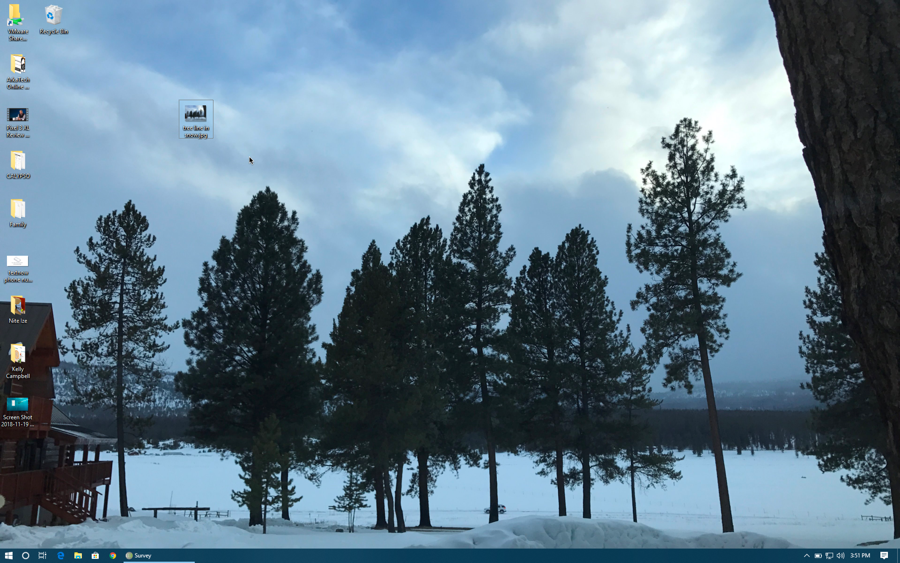
It’s not too bad because Windows has smartly chopped off some of the bottom of the image to make it less distorted. In this case, that works quite well and it’s a nice photo and good option for wallpaper.
But let’s say that it didn’t default to the correct behavior. To get to the full windows desktop settings, you can use the shortcut of right-clicking anywhere that’s blank on the desktop. This menu appears:
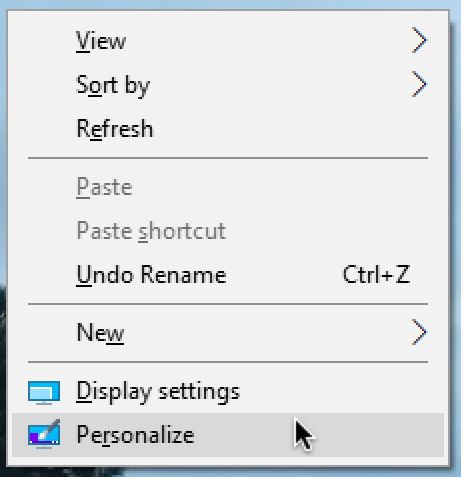
As highlighted, you want to choose “Personalize” and you’ll jump straight to the following preferences window:
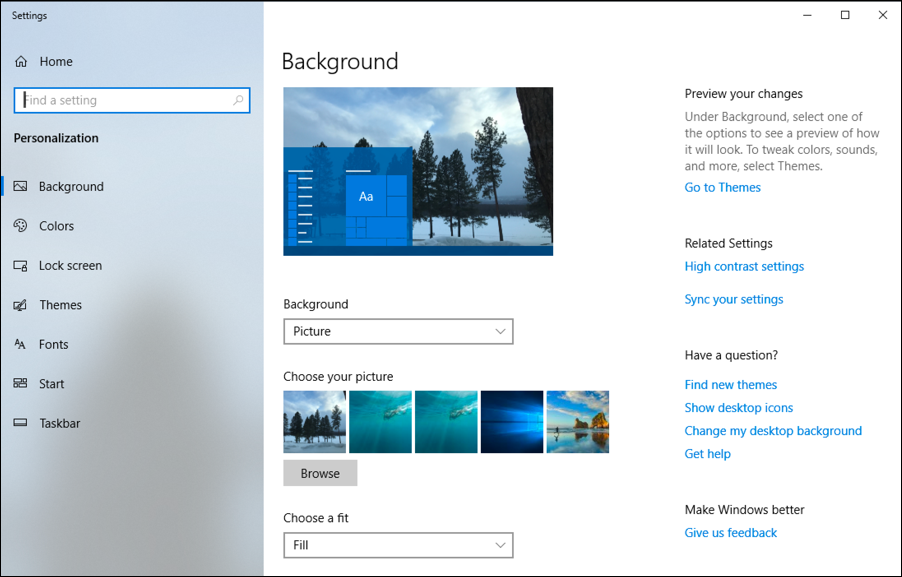
You’ll want to notice the “Browse” button as that’s how you’ll select the photo you want to use, but it’s the “Choose a fit” menu at the very bottom that’s most important. Here are your options:
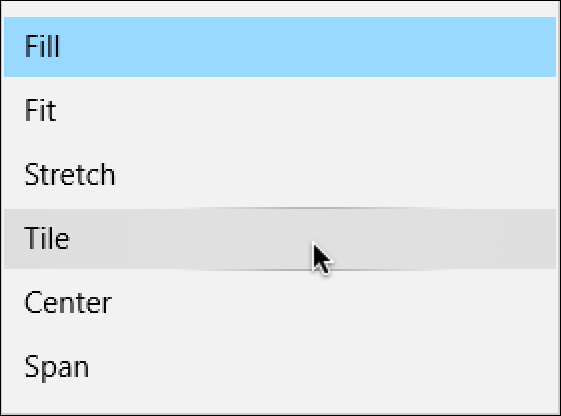
The default is “Fill”, which worked pretty well as shown earlier. But let’s choose “Tile”, which, if the image is smaller than the screen, will cause it to be duplicated to fill everything up. In this case since the image is so darn big, the results are unexpected:
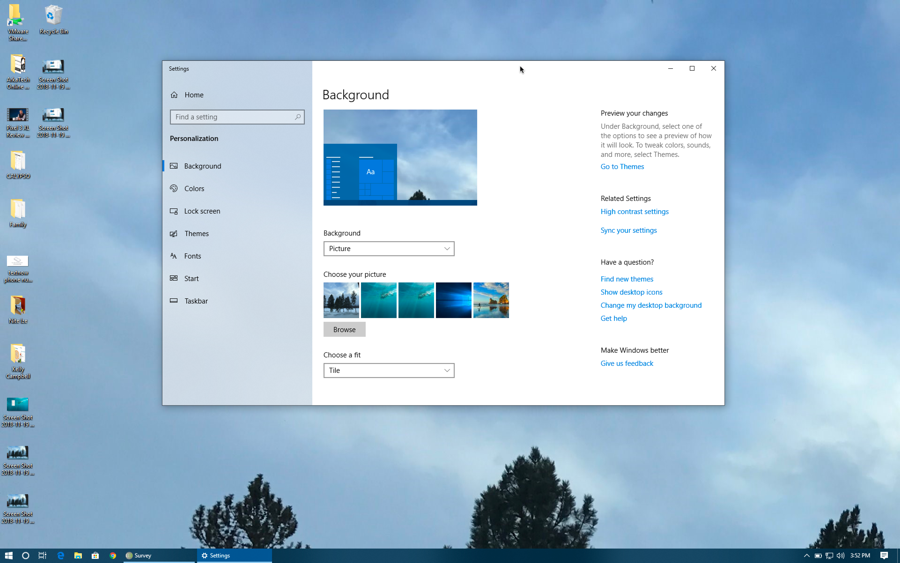
In this case, the tree line has vanished and we’re just staring at the sky.
BORING! 🙂
Let’s try another possibility: “Center”. That offers a different and also less than ideal view:
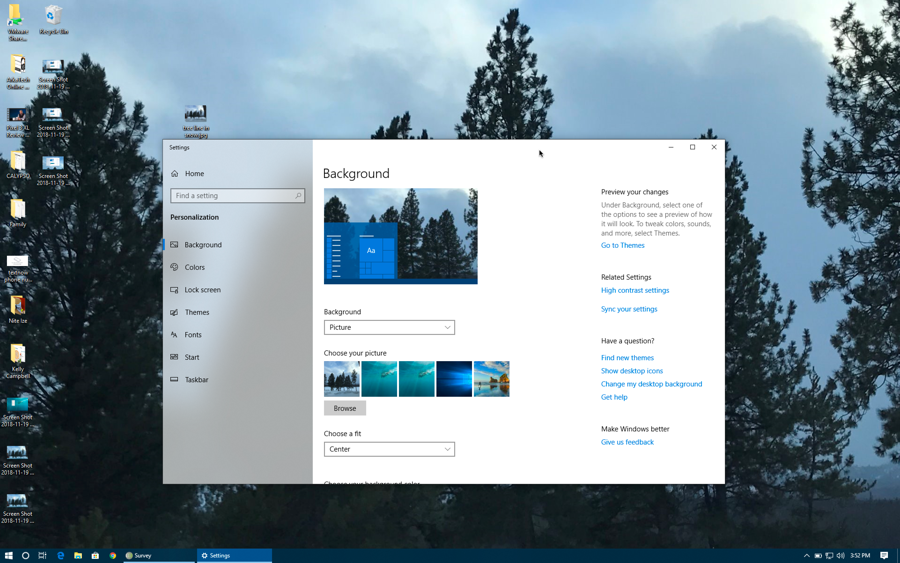
Because the image is so darn big, we just get the middle portion and the building and snow on the ground just vanish.
Okay, one more try. This one’s “Fit”:
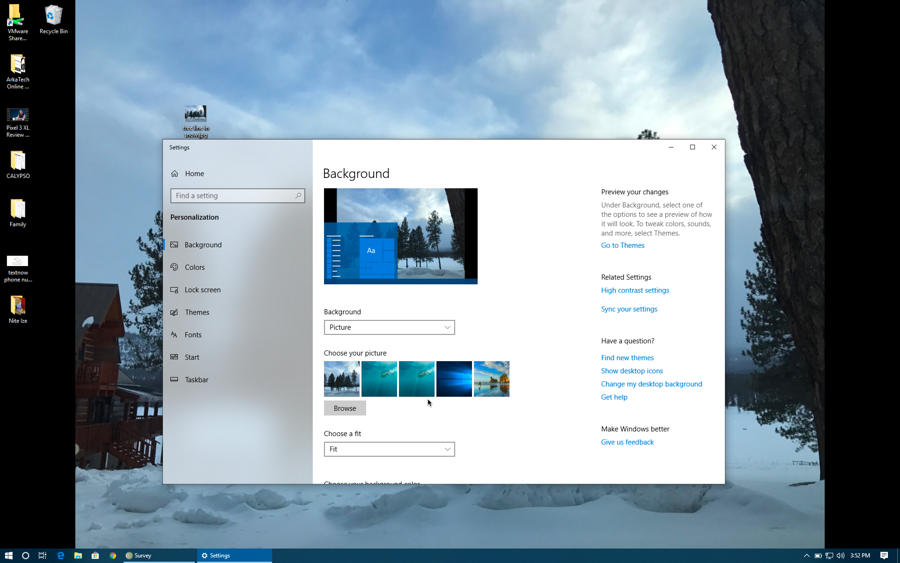
It’s preserved the image aspect ratio of the original photo and ensured that everything is visible, but at the cost of having vertical black bars on both sides of the image. That’s because the screen is a 1.77:1 ratio while the photo is a 1.3:1 ratio.
Ah jeez. In this, case, the best option is actually the default of “Fill”. I’m going to switch back to that and be done.
I hope this helps you get your photo set up and looking great as your Windows PC desktop wallpaper background.
Pro Tip: While you’re here, please take a few minutes to check out our extensive Windows 10 Help area!
How about cropping the original image to the same aspect ratio as the screen? That lets you eliminate as much or the top or bottom as looks beautiful to you and then it will fill the screen perfectly.