
Every time I try to upload and post photos to Facebook it takes forever. My friend said it’s because they’re too big. How can I resize my photos before I upload them?
I bet your friend is exactly right. Modern smartphones and digital cameras work at such high resolutions that the resultant images can be enormous. Your computer is probably running at 1920 pixels of width, for example (a typical “1080p HD” resolution) whereas my Apple iPhone saves photos at 4032 horizontal pixels (and 3024 vertical pixels, a total of 12,192,768 points!) It’s no surprise that a photographic resolution that’s 2-3 times the size of your screen makes for a very attractive image, but might just be a bit more than Facebook and other social networks need.
Some services also have a total file size limitation too, which can get a bit more tricky because images are compressed (depending on file format) based on the complexity of the information in the photo, not just the size. A small picture of the inside of an antique watch might well be a much larger file than a sand dune landscape at twice the dimension. Sometimes you just need to experiment with different dimensions to get the perfect file size.
On the Mac system, there are a number of different programs that can open up images, but one of the very easiest ways to resize a photograph or other file is Preview, a program included with MacOS X. Let’s have a look!
To start, I’m going to use the “Get Info” feature of Finder to see the size and dimensions of my test image file:

You can use the Cmd-I keyboard shortcut to get this information too, or choose “Get Info” from the Ctrl-Click context menu. In the above, notice my photo is 1.7MB in size and is 3409 x 1873 pixels. That’s pretty big!
Notice above that my computer’s configured to open all JPG files with GraphicConverter. Your setting will likely be different but the “Change All…” button below that is how you change the default program for a specific file type in MacOS X.
The context menu you pop up from the Ctrl-click on the trackpad or mouse offers a bunch of good options, but check out “Open with…” as shown below:

Lots of choices, some of which are a bit puzzling (the ColorSync Utility?) but Preview is on the list, and that’s the one I want. Click to select it and the JPG photo will be displayed:
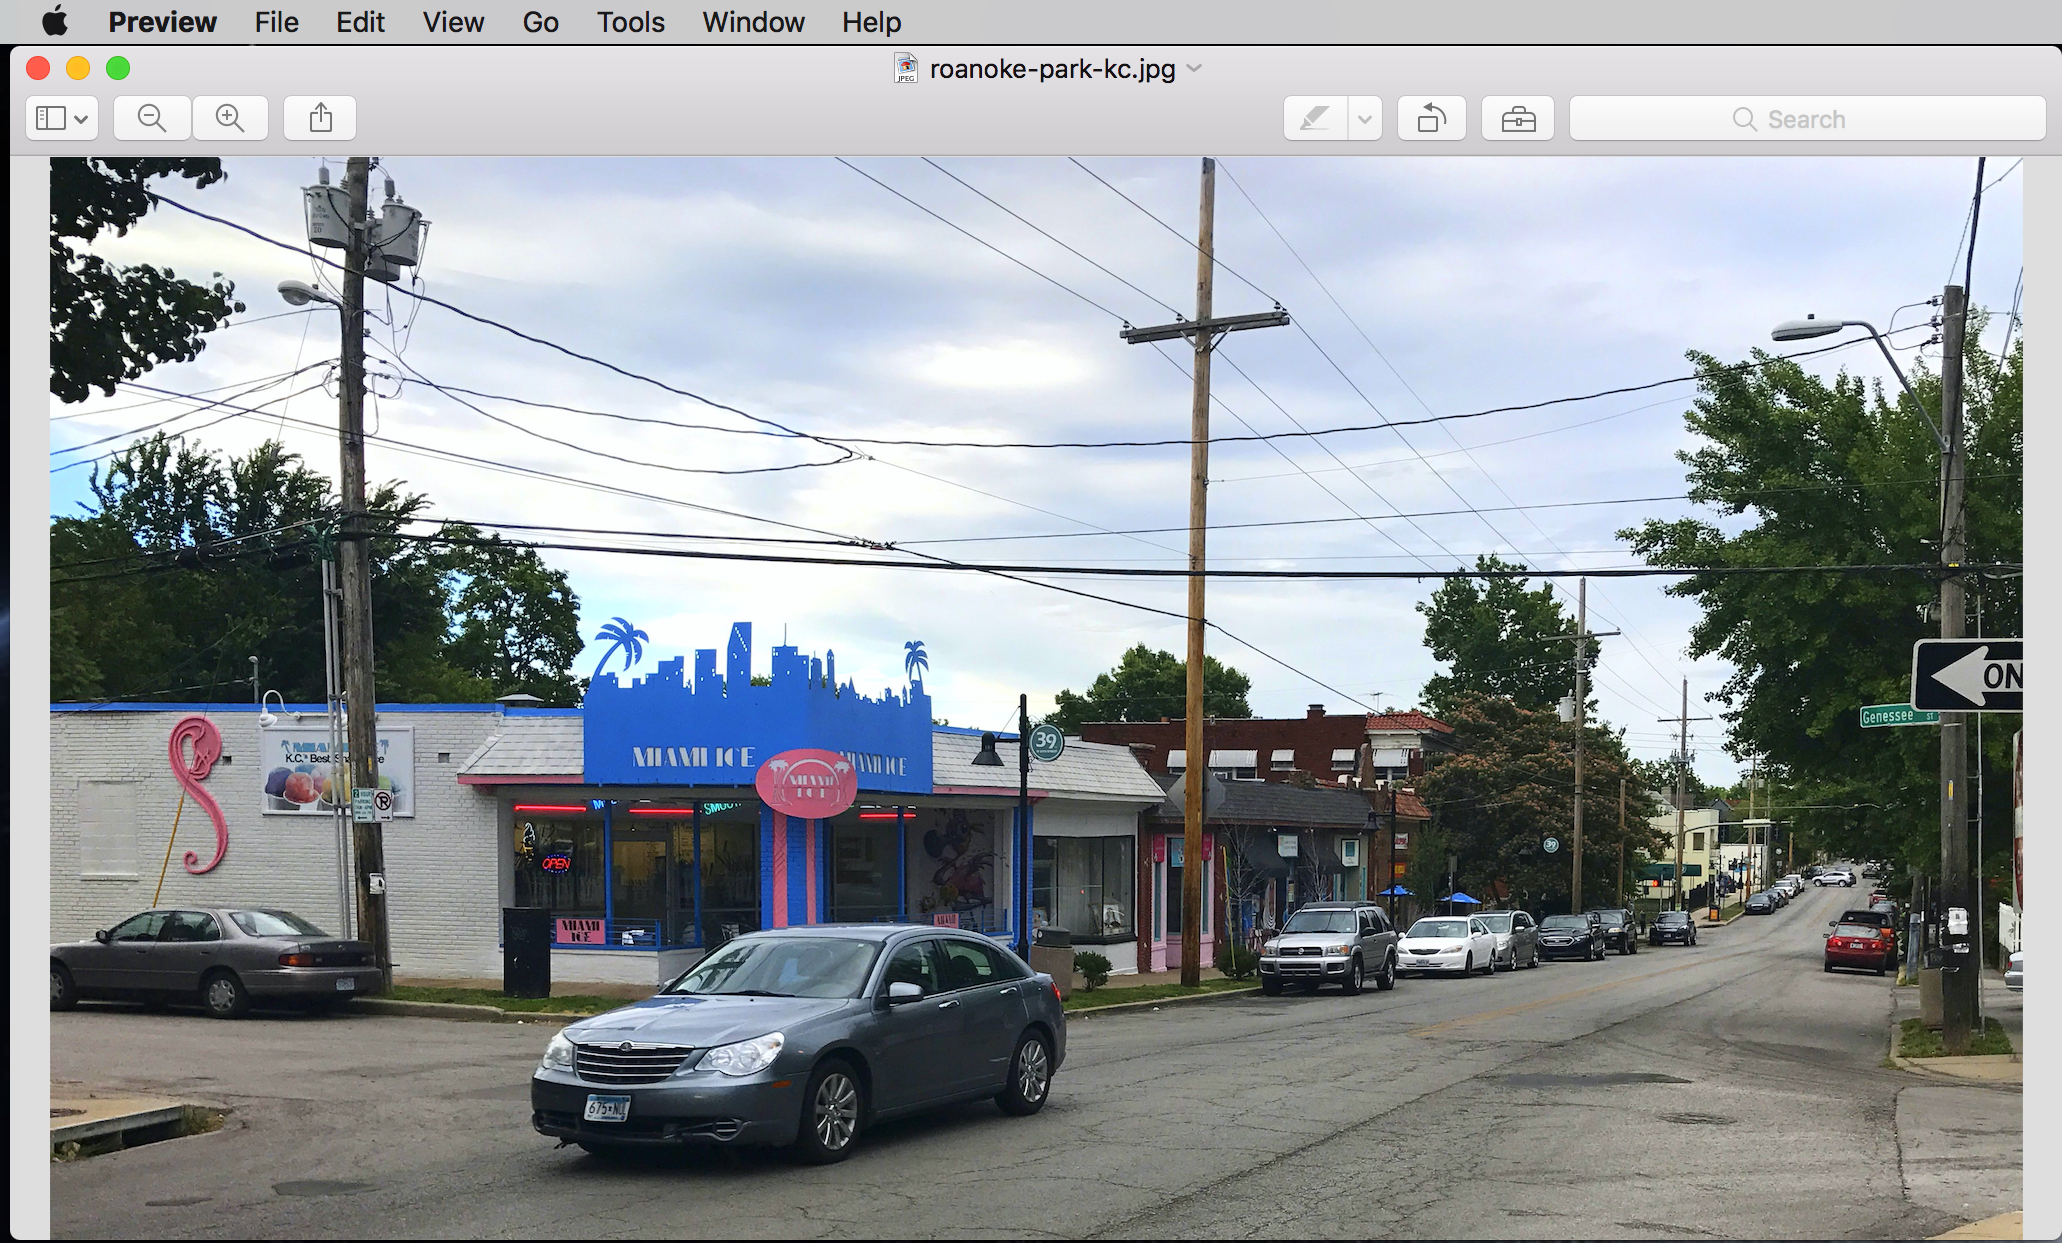
A nice enough urban photo, eh? Let’s stay focused, however. Along the top you’ll want to choose the “Tools” menu, where there are a bunch of edit tools rather hidden:
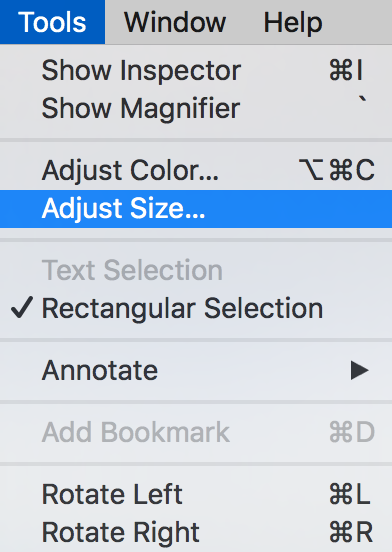
As you can see, some useful capabilities. To resize the image you’ll want to “Adjust Size…” here in Preview, so choose that.
A window pops up that offers a variety of ways to tweak the image:
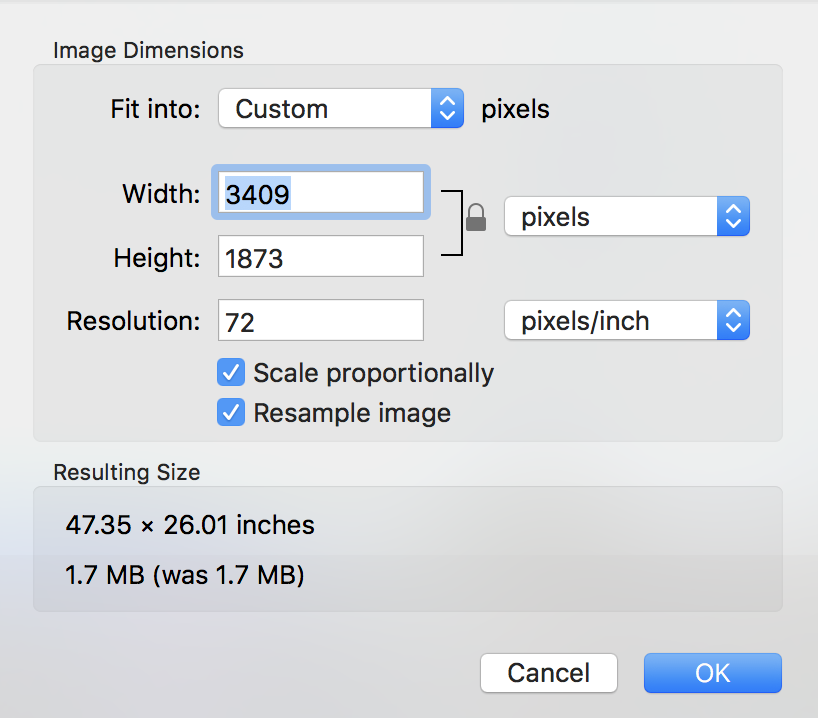
If your version is showing inches or another unit of measure rather than pixels, click and switch to pixels. Notice that “Scale proportionally” is checked. That’s pretty important if you want to resize the image, not skew or distort it. Then simply type in the value you’d like as a max horizontal or vertical dimension:

I’ve selected to resize it down to 800 pixels wide. Preview automatically figures out that 440 pixels of height retains the image dimensions, and if you look along the bottom, you can see that it’s going to reduce the image from 1.7MB to 145KB. That works! Click “OK” and you’ll see a smaller version of the image in the window:
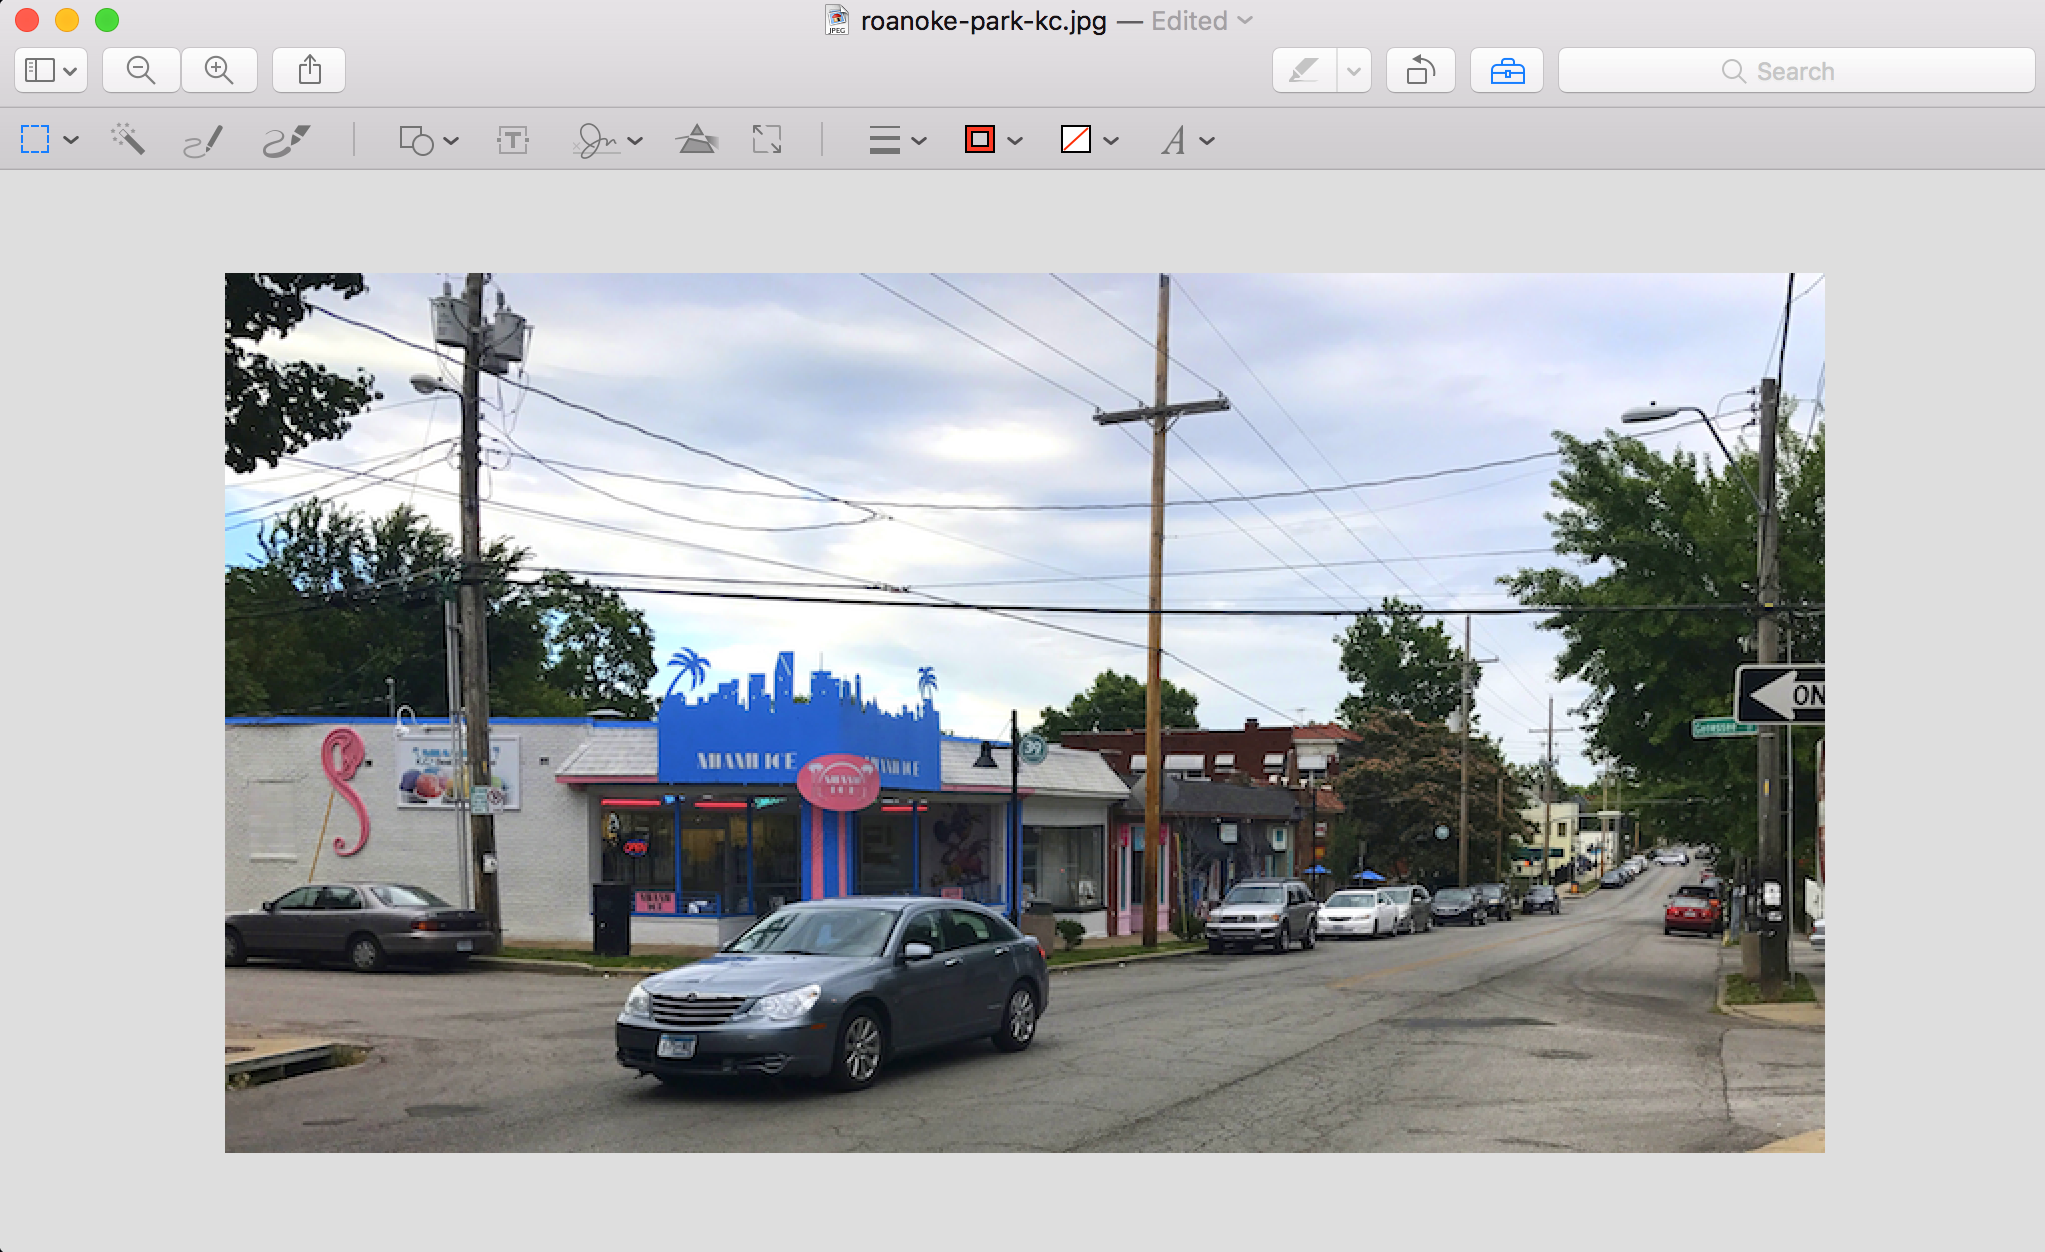
You can click on the “+” and “-” buttons on the top left to zoom in if you want to see the result.
To save it you could just choose File > Save but I like to save the shrunken versions separately in case I ever need a higher resolution image (for example, to make a photographic print). To do that you need to learn a fancy MacOS trick: Control-Clicking Menus.
Hold down the Control button on your keyboard, then click on the File menu and you’ll see new choices show up, notably ‘Save As…’
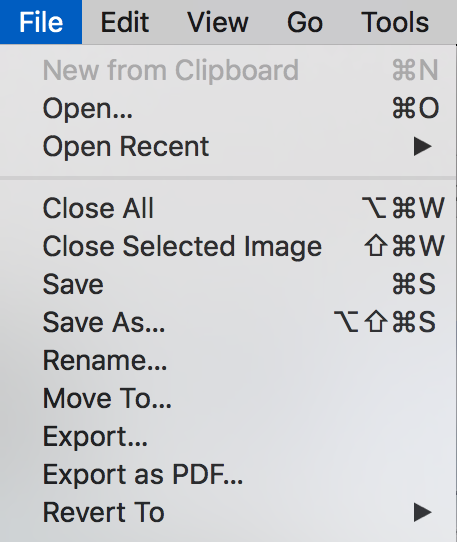
All these additional choices. Just about every Mac app has this capability if you’ve been complaining that you lost the “Save As” option. Try it! In fact, you can click on the menu then tap on Control to see what changes!
Choose “Save As…” and give the image file a new name. Then use Get Info from the Finder to compare results:
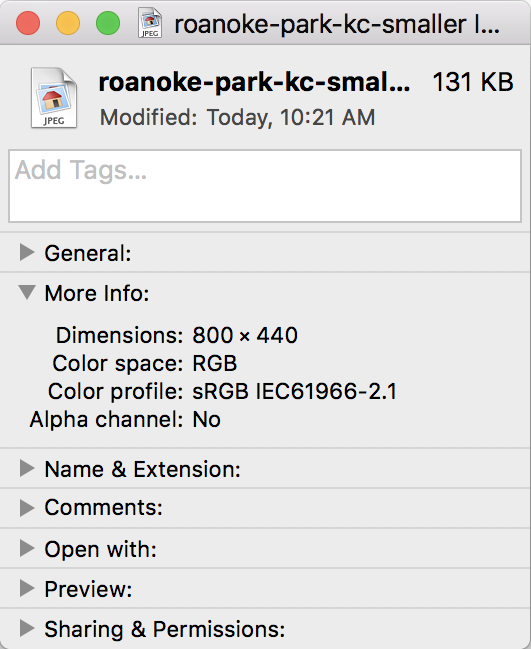
That’s perfect. You can see the new image is a more modest 800×440 and that the image size is 131KB instead of 1.7MB. Solved!
That’s what you need to do with your images and once you get the hang of it, you’ll find it’s a 10-15 second task per upload and will make your digital life so much better, you’ll be astonished! 🙂