
You don’t need a month off to find that an autoreply is helpful in Microsoft Outlook. Even if you’re just taking a day or two off, it’s helpful to let colleagues know you’re not at your computer. Here’s how to set it all up in Outlook.com
Microsoft has done an amazing job duplicating all the functionality of the Outlook app with Outlook.com, its Web-based interface that has become the new standard for most office workers. I am part of the University of Denver and we rely completely on our customized version of Outlook.com, allowing me full access to every online resource whether I’m on campus or 500 miles away relaxing on a beach or enjoying an après ski cocoa.
This also means that colleagues are not only going to be emailing you without knowledge of your schedule, but they might also be scheduling you to join meetings during your break! Fortunately, Outlook.com has that all neatly covered with its autoreply feature. Let’s check it out…
FINDING THE AUTOREPLY SETTINGS IN OUTLOOK
As a first step, log in to your Outlook.com account and click on the gear icon on the top right. A menu appears with some handy theme and setting shortcuts:
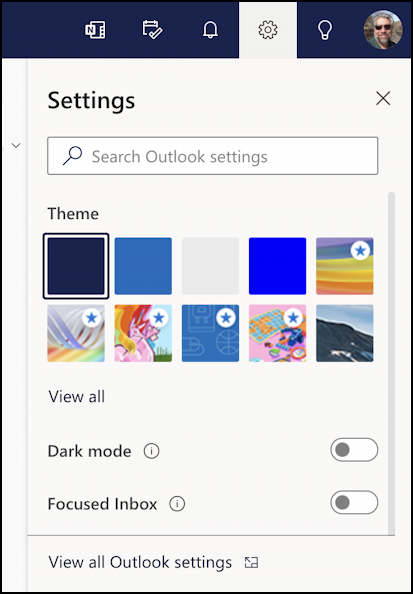
(There are more options, I just chopped the menu down to fit here in this article). The key entry is at the very bottom: “View all Outlook settings“. This will bring up a new window with a rather staggering number of different options and possibilities. Choose Mail > Automatic Replies to get here:
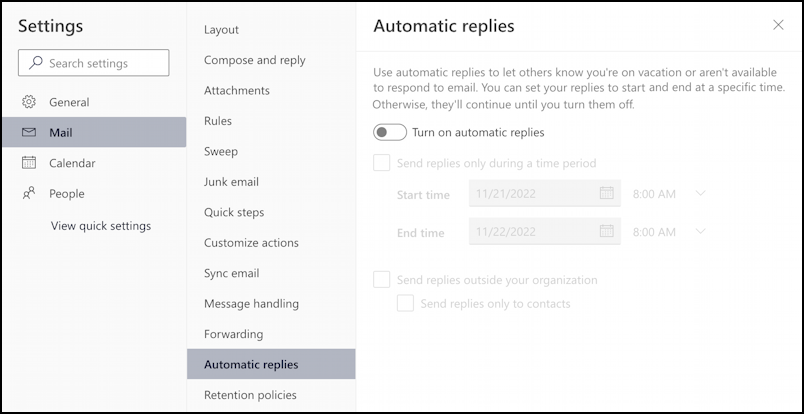
Now we’re ready to set something up…
ENABLE AUTOMATIC REPLIES IN OUTLOOK
Click on the slider control adjacent to “Turn on automatic replies” to enable this feature, at which point lots of more material magically appears on the screen:
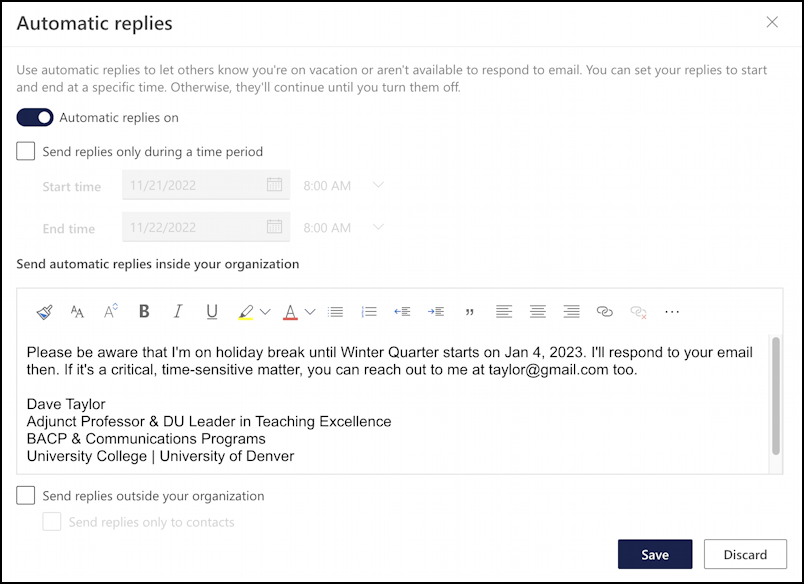
I like to start by composing my automatic reply message, detailing what’s going on, why I’m offline when I’ll return, and how to reach me if there’s an emergency. Many organizations encourage people to share cellphone numbers for emergencies, but I prefer to stick with email. Notice you can format this as desired, add images, links, whatever.
Without any other changes, once the “Save” button is clicked, this email will be sent to everyone who sends an email until the end of time; there’s no end date! You can either leave it that way and remember to disable it when you return or if you want to schedule the on/off dates, click on “Send replies only during a time period“.
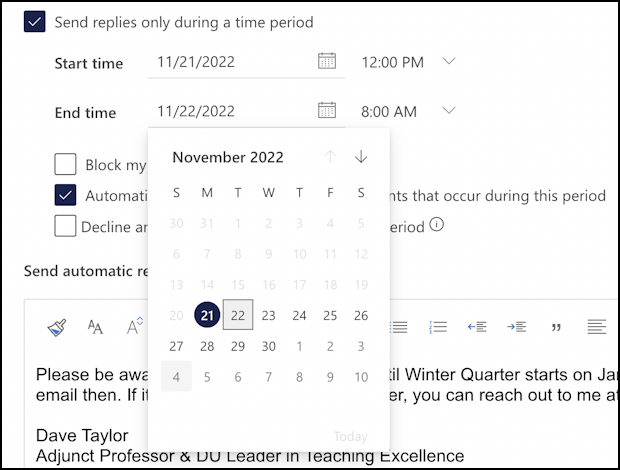
If you do specify a time period, you can choose a start date and time and an end date and time; by default, it’s 24 hours. Way too short for a holiday break, so you can even choose a date a month or longer in the future:
That’s all set up. Now let’s consider a few of the additional options on this screen.
PREVENT BEING ADDED TO MEETINGS IN OUTLOOK
Don’t want to be added to department or organizational meetings while you’re out of the office? There’s a checkbox for that:
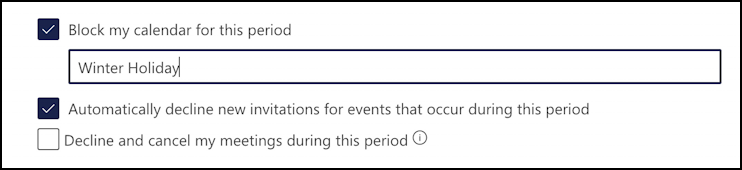
I’m going to block off my calendar completely for winter break and will have the label “Winter Holiday” displayed if someone views my calendar so they know what’s going on. Notice you can also automatically decline new invitations for events during the period specified (very helpful!) and even decline and cancel meetings that might have already been scheduled.
Not only that, but you can set a different autoreply email for people outside your organization too:

This message might omit the name of another contact or a cellphone number in case of emergencies, or just be a one-liner without many details at all, as shown. Notice that you can respond to every message from outside of your organization, but that can be problematic if you’re on mailing lists, so I recommend also choosing “Send replies only to contacts”.
That’s it. Setting all this up is pretty easy. Now, onward to some family time, eggnog, and daft holiday movies…
Pro Tip: I’ve been using and writing about Microsoft’s Office Suite for many years. Please check out my Outlook help library for plenty of useful tutorials, as well as additional Office 365 help pages! Thanks.