
I’ve been using a wired keyboard forever with my PC, but decided to get a wireless Bluetooth keyboard to replace my ancient, broken unit. How do I pair a Bluetooth keyboard with a Windows 10 system? I’m not very tech savvy.
Congratulations on joining the wireless generation with your new keyboard. There are a lot of really excellent wireless keyboards and, of course, they are far more flexible if you want to have the keyboard on your lap or on a separate workspace to the computer! Another dramatic improvement with the latest generation of keyboards is that they have good size batteries and last for months, or sometimes even years without a charge. So handy, and no replacing dead batteries and then not knowing what to do with the old ones.
Once you get them hooked up, that is.
So let’s get that keyboard hooked up with your PC!
PUT YOUR KEYBOARD INTO PAIRING MODE
The first step is to read through the instructions that came with your new keyboard to see how to put it into “pairing” mode, so it’s listening and ready for a connection. On most units, you power on the keyboard, then push and hold the Bluetooth key (or, sometimes, Function+Bluetooth). There’s generally an indicator LED or light that will begin flashing blue to show you it’s ready to pair. On the Seenda Backlit Wireless Keyboard I used for this demo, it can hook up to four different computers simultaneously, so I needed to choose which connection I wanted to use:
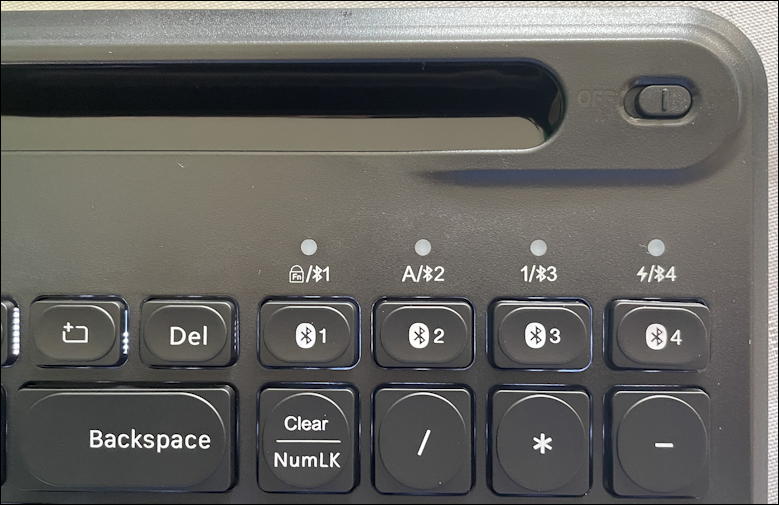
That slider on the top right is the On/Off switch, and you can see that each of the four connections has its own key and LED light too.
Once your keyboard is ready to proceed, switch to your PC.
HOW TO PAIR A WIRELESS KEYBOARD WITH A WINDOWS PC
As always, the first step is to do a quick search on the Taskbar to jump to the correct Settings window. In this case, search for “bluetooth”, simply enough:
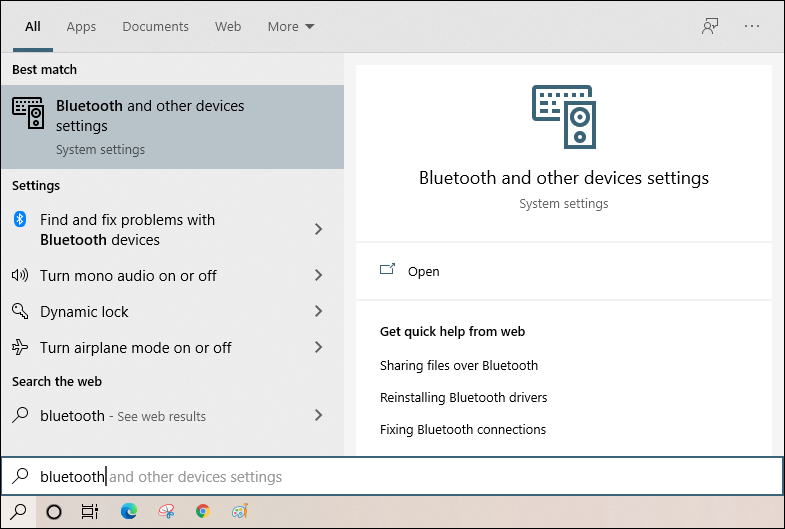
As you can just barely see, Win10 offers up a command completion of “and other devices settings”, but “bluetooth” should do the trick. Click or tap on “Bluetooth and other devices settings” on the top right to launch that system setting window. Here’s what you’ll see:
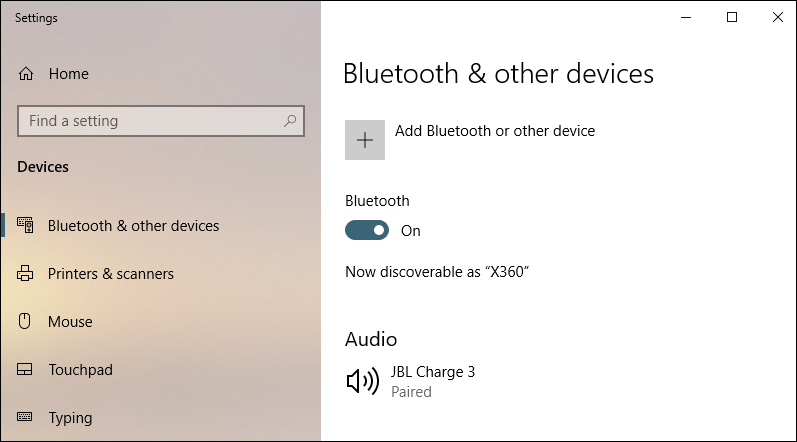
You’ll want to ensure that you have Bluetooth enabled – many users disable it if they don’t have any Bluetooth peripherals – then click or tap on the plus sign adjacent to “Add Bluetooth or other device”.
Yet another window will pop up:
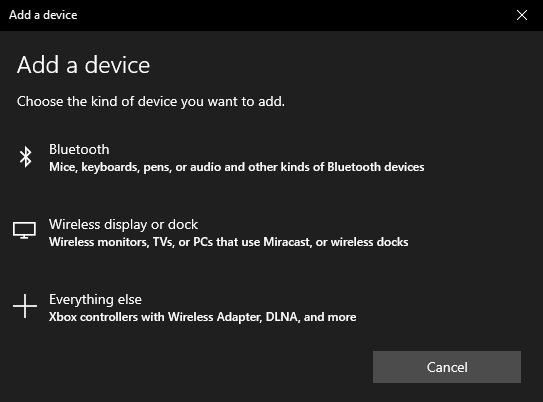
Quite a few options, so it’s easy to get a bit befuddled. No worries, a close read will reveal that “Bluetooth” is your choice and it even lists “keyboards” as one of the possible peripherals that would use this protocol.
Click or tap on “Bluetooth” and it’ll switch and show you a list of every Bluetooth device your PC can detect:
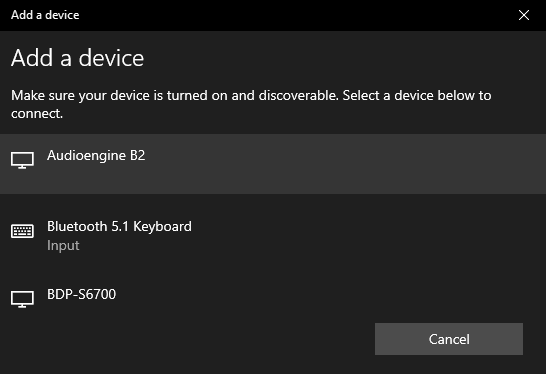
Notice that this Seenda wireless keyboard identifies itself simply as “Bluetooth 5.1 Keyboard”. Okay. Yours might come up with a slightly different name, but it should be easy to figure out which one’s the correct device on your list.
Click on the device and you’ll see a notification:

Not sure who “we” are when it’s your Windows operating system but we’ll let ’em slide on this one! 🙂
After a moment or two, you should see this:
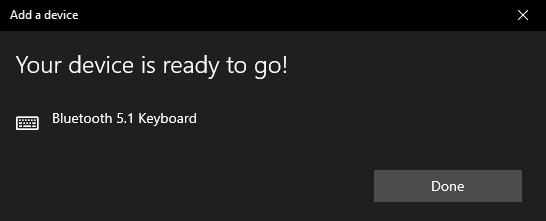
And you’re done!
USING YOUR WIRELESS BLUETOOTH KEYBOARD WITH WINDOWS 10
That’s really all you have to do, actually. Now just go into a document, an email, even the address bar on your Web browser or the Win10 search bar and type on the wireless keyboard. Cool, eh? Some keyboards come with fancy addition utilities to let you map function keys to specific purposes, in which case that should all be explained in the documentation. if not, you are ready to use your new keyboard. Congrats!
Pro Tip: I’ve been writing about Windows 10 for years and have an extensive Windows 10 help library. Please check it out to find lots of additional tutorials and guides while you’re here. Thanks!