
I want to switch from Command Prompt on Windows 10 to the new PowerShell alternative. I’ve heard it’s way better. How can I check to see if it’s installed and switch to using PowerShell on my PC?
Microsoft PowerShell is a definite upgrade to the classic Command Prompt app in Windows 10, no question. It’s a richer command line language with much more sophisticated interaction – and scripting – possible. It’s also different interaction so if you’re an expert on classic CLI like “DIR” in Windows, you might just be surprised how things have changed with PowerShell. The reason? It’s intended to be for system administrators and other power users. I’ll show you a tiny bit of what I mean later in this tutorial, but for now I’ll just note that a lot of versions of Windows 10 seem to include PowerShell, but it’s not automatically the default if you fire up a “command shell” from the TaskBar.
While we’re talking about this, I should also note that neither Command Prompt nor PowerShell are a Linux shell, so it doesn’t just instantly give you a Linux interface to explore within your Windows PC. Were that it was, but that’s not its intention…
HOW TO CHECK – AND INSTALL – WINDOWS POWERSHELL
First things first! Do you have PowerShell already installed? Easy to tell, search for PowerShell in the TaskBar command box:
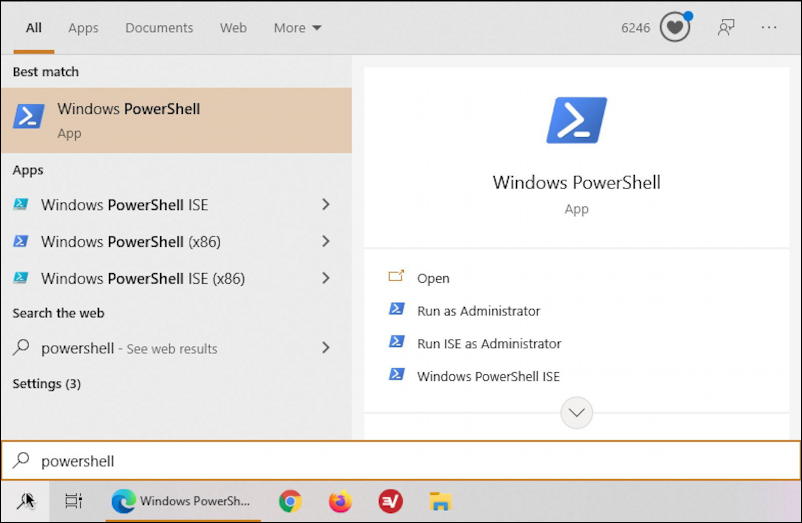
You can see that I already have it on this particular PC, ready to go.
Don’t have it on yours? Microsoft has a very helpful tutorial page that offers a number of different ways you can download and install PowerShell: How to Install PowerShell on Windows. Should take you just a few minutes.
Ready to proceed? Great! Now that you have PowerShell, let’s make it the default command prompt shell too…
SET POWERSHELL AS DEFAULT COMMAND PROMPT IN WIN10
The easiest way to get to the correct settings page is to use that same search feature, but this time search for “taskbar settings“:
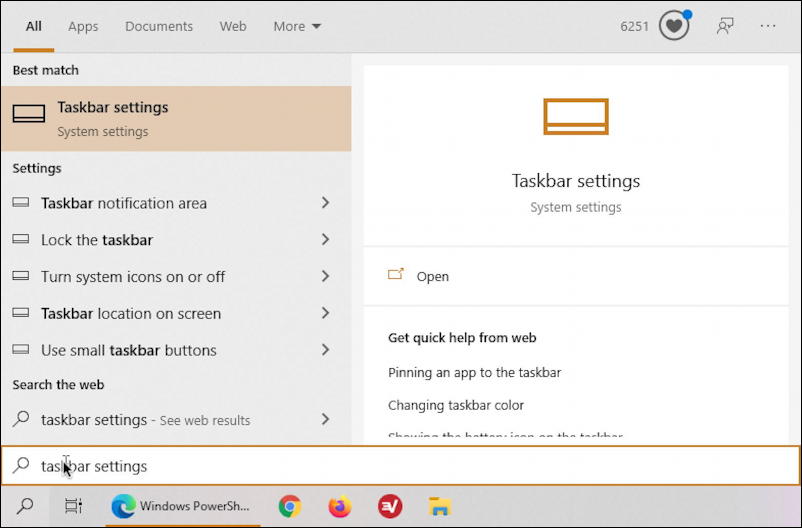
Click or tap on “Taskbar settings” on the right and you’ll jump directly to the page you want in the vast library of preferences and settings in Windows 10:
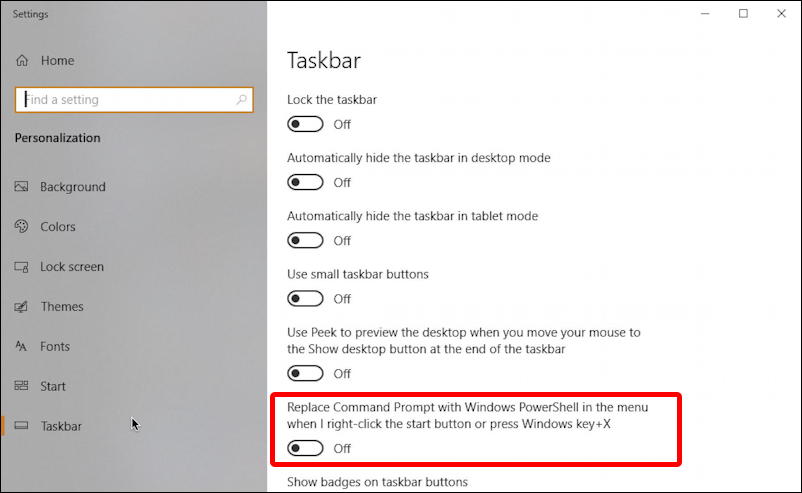
I’ve highlighted the setting you want to change: “Replace Command Prompt with Windows PowerShell in the menu when I right-click the start button or press Windows key+X”. A bit long winded, but enabling this option will make it more likely that you will get PowerShell when you try to enter a command.
Choose “On” then close this window. Now let’s check it out…
CUSTOMIZING COMMAND SHELL IN WINDOWS
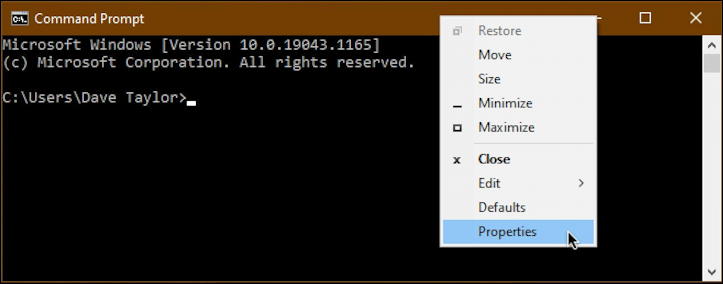
Before we proceed, it’s worth pointing out a few things about Command Prompt, that venerable old app that’s been part of Windows for a mighty long time. First off, fire it up and right-click on the titlebar and a menu appears:
Choose “Properties” and it’ll let you change font, font size, colors, and quite a bit more:
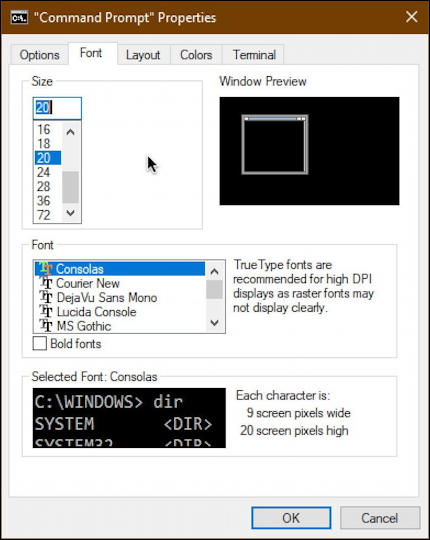
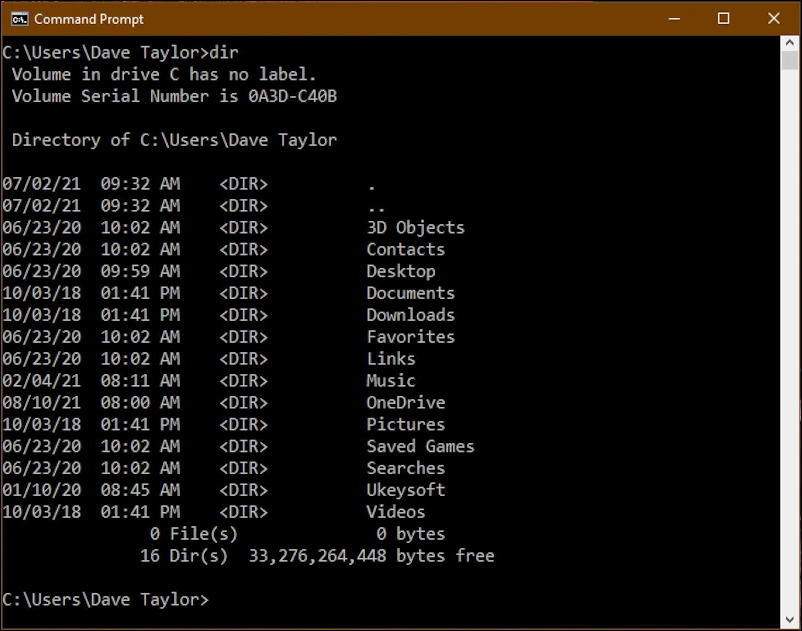
Lots you can customize and change as desired, but it’s still Command Prompt. Type in “DIR” and you’ll get the same results you would have if you were using Windows 3.1 decades ago:
But what about PowerShell?
HOW TO CUSTOMIZE POWERSHELL
Turns out that the process of customizing PowerShell is remarkably similar…
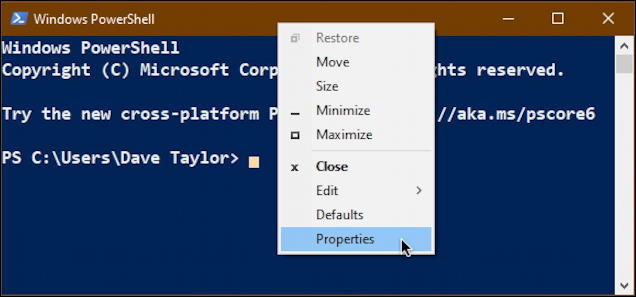
Just like earlier, choose “Properties” and you can change the color scheme, font, font size, and so much more:
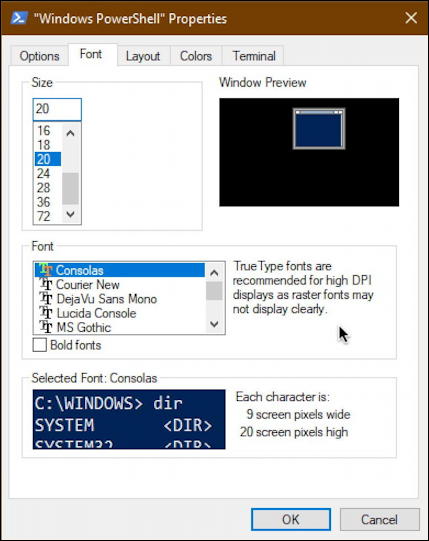
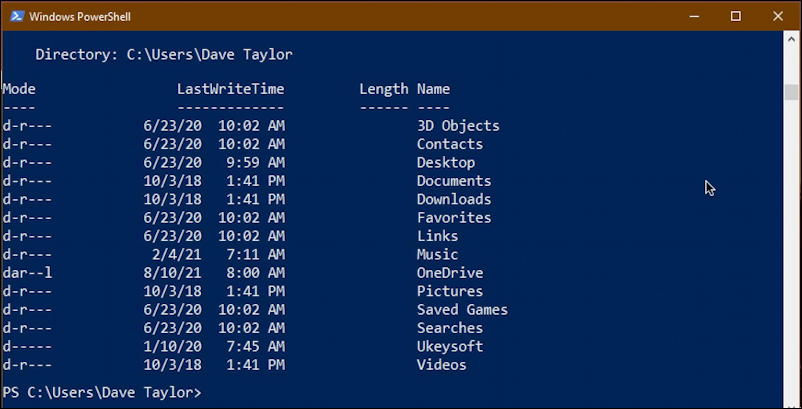
Looks similar, doesn’t it? But type in “DIR” and the results are markedly different:
So there you have it. How to install, switch and get started using PowerShell on your Windows PC. Good luck!
Pro Tip: I’ve been writing about Windows for many years and have an extensive Windows 10 help library. Please check it out to find lots of additional tutorials and guides while you’re here. Thanks!