
I saw a photo you posted to Instagram the other day, Dave, and thought it was just the coolest thing. It was a view out your window of the trees with their fall foliage, but somehow you’d manipulated the focus so that it looked like they were miniatures and the whole thing was a tiny model. How’d you do that?
You’re talking about a very cool photographic effect that’s shown up in the last year or two called “tilt-shift”. The idea is that you take a photograph and apply either a circular blur filter so that a specific image is sharp and everything else is increasingly blurred as you get further away (think of the old vignette filters on cameras) or a horizontal blur filter that has one band in focus and elements above and below blurred. The latter tiltshift filter is what I used for the image you’re talking about, and it’s pretty easy to use in Instagram once you know all the buttons to tap.
To accomplish this, you’ll need to have Instagram loaded on your iPhone or Android phone. I picked the former as I’m a happy iPhone owner.
Once in Instagram, find a suitable composition — landscapes work well — and take a photo within the Instagram app itself:
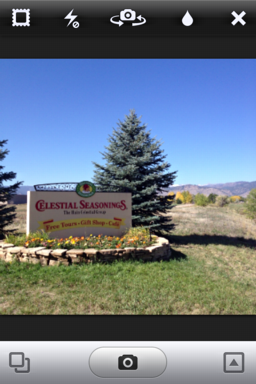
In this case, I was by the Celestial Seasonings factory and thought the sign would make a good landscape shot. To actually take the photo, tap on the camera icon on the bottom.
Note: for reasons I don’t understand, my version of Instagram crashes if I use it to take a picture, so if you have a similar problem, just use the iPhone camera app instead, then select your photo within Instagram instead. An easy workaround.
The image loads and you get a bunch of different tools you can use, top and bottom:
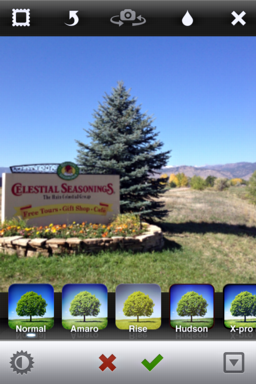
Now you could just post it like that, but we want to explore tilt-shift filters, so instead tap on the water drop icon on the top right. A small menu of options appears:
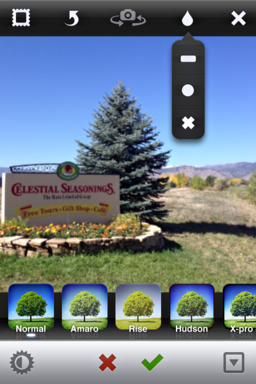
The “-” is the horizontal filter – which we’ll use – and the circle is the vignette-style filter, much better for portraits and similar. The “x” removes any filter you’ve applied if you change your mind.
I’ll tap on “-” to get the horizontal filter, and a white blur superimposes over the photo:
Basically, everything you can see easily is going to stay in focus, and everything occluded by the white filter is going to get blurry. You can actually move the horizontal focus region up and down to perfect the effect by just tap-dragging your finger. Try it.
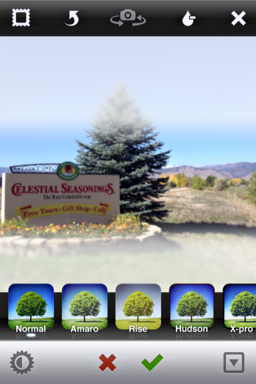
Once you’re done, tap on the contrast filter on the lower left. A lot of times it brings out the colors and makes the image a bit more moody, as you can see here:
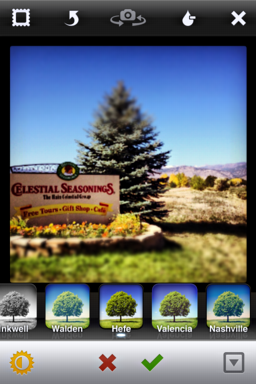
Notice that I’ve also chosen the “Hefe” filter to get the black frame around the image and tweak its color balance a bit (actually, the frame is enabled/disabled with the stamp-like icon on the top left. Again, tap it to see the difference).
Looks good? Tap on the green check mark to proceed with a caption, tagging, etc.
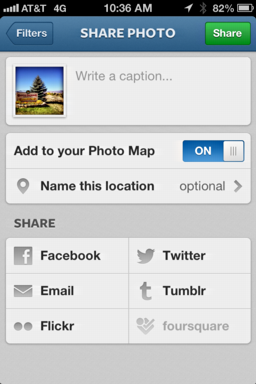
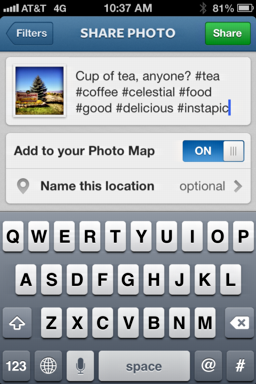
To add a caption, tap in the “Write a caption…” section and the keyboard appears. Here’s what I entered:
Almost done! Just want to identify the location of the photo by tapping on “Name this location”, which brings up a list based on where I am. Found? Good. Tap on it and you’ll now have the image located:
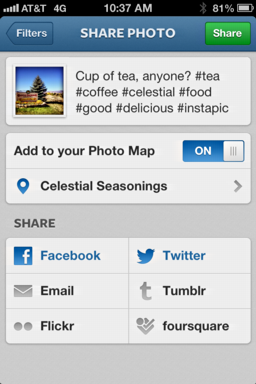
Notice I’ve also tapped to select Facebook and Twitter for sharing the image, after having previous set up my account credentials. The one I wish were here too? Pinterest. But that’s another story…

Looks great, definitely eye catching and a good contribution to my Instagram photo stream. What do you think?
What? Want to follow me on Instagram? Cool. Just search for d1taylor and tap “Follow”.
One cool additional feature of Instagram worth noting is that the program automatically saves a verison fo your image with all the filters applied into your photo library, so here’s a full-size copy of that image with tilt-shift applied:

I dig it!