
Hey Dave, on Outlook, my banking info, balance and whatnot always go into the junk folder. I always have to move it to the inbox manually. How do I fix that so email messages from my bank are automatically added to my inbox?
A decade ago, referring to “Outlook” meant the program, but nowadays there’s an excellent Web-based version of Microsoft Outlook that has become my preferred way to interact with my email. No downloads, no worries about keeping the program up to date, no malware issues, just a URL and a program that has zero additional resource requirements on your computer. Even better, you can access it from anywhere, even if you’re far away from your home or office PC.
This is a roundabout way to say that I no longer have Microsoft Outlook, the separate program, since I don’t need it. As a result, this tutorial is going to focus on Outlook.com, which I expect you’re also using at this point. If not, the program should have a fairly similar settings organization.
MARK A SPECIFIC EMAIL ADDRESS AS A SAFE SENDER
Outlook uses what’s generally called in the industry “a whitelist” that it refers to as a “safe sender”. The easiest way to add someone to your safe sender list is to right-click (or control-click, if you’re on a Mac) on the message. A menu appears…
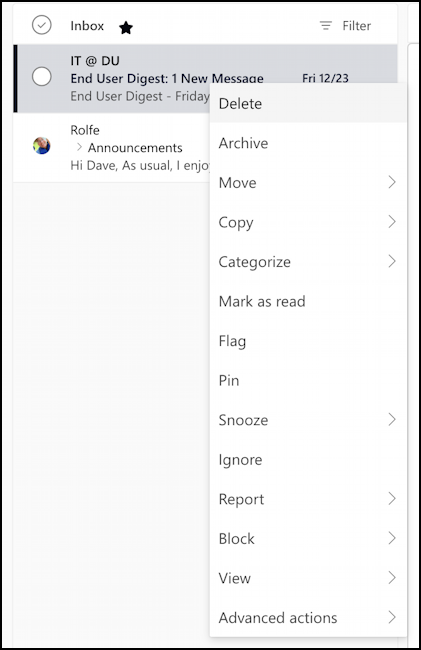
As you can see, there are a lot of choices for this context menu. You might think that “Categorize” would let you specify it should be i the category ‘safe senders’, but no, that’s how you tag messages by color. Report? Almost:
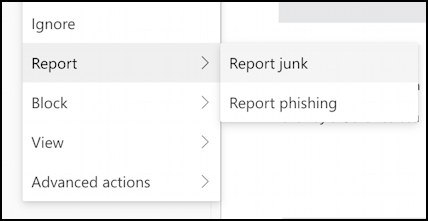
This is how you can report a message as junk or phishing, but it’s not quite what you seek. Instead, try the unintuitive option of “Block”:
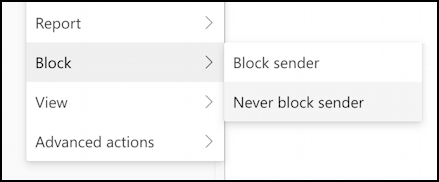
Choose “Never block sender” and, as the program will confirm momentarily, you’ll have added the sender to the Safe Sender list.
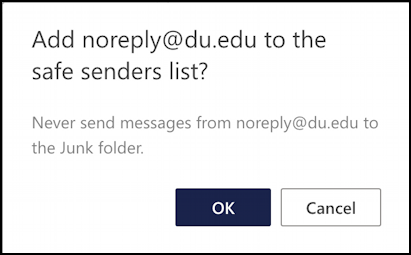
Easy enough. Click “OK” and you’re done.
MANAGING YOUR SAFE SENDERS LIST
Once you’ve added a sender to your list, how do you later manage who’s on the list, remove people who, perhaps, have violated your trust, and add additional email messages like that used by your bank? It’s all through Settings. This time, click on the gear icon on the top right to bring up a different menu:
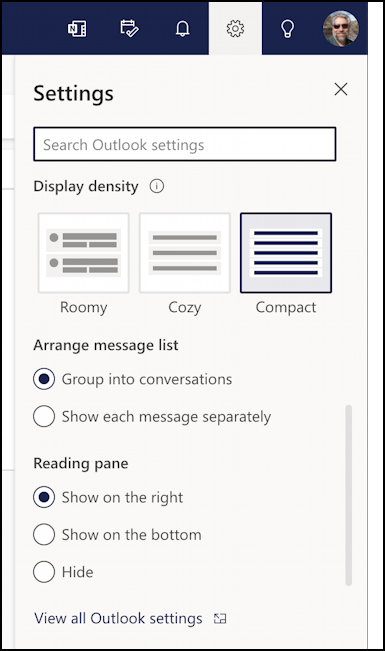
There are lots of useful settings and configuration options on this menu, actually, so it’s worth spending a minute or two considering each option. Ready to proceed? Click on “View all Outlook settings” at the very bottom of the menu, then navigate to Mail > Junk email to find the below:
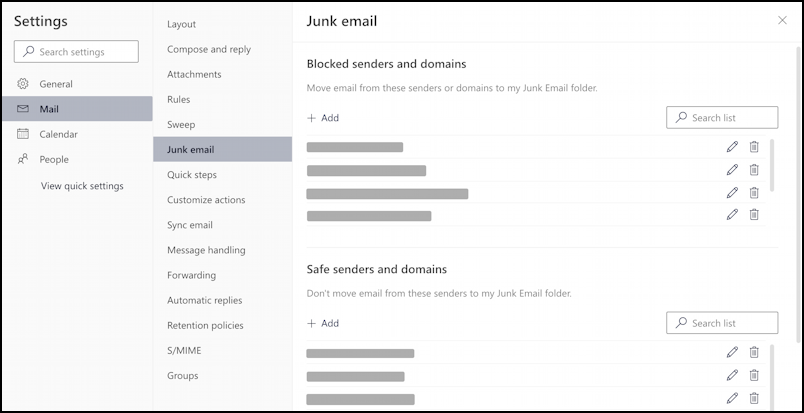
I’ve redacted the entries on my own configuration, but from this point you can see both the Blocked senders and domains and Safe senders and domains. Notice that phrasing too; “and domains”. This means you could whitelist “@askdavetaylor.com”, for example, by adding it to the safe senders section, or block all email from “@scamshop.com” by adding it to Blocked senders.
You can also “whitelist” a specific email address, like “notifications@mybank.com”, by clicking on “+ Add” on this page too. Now ya know. Good luck and remember phishing attacks and scammers could still fake a sender email address so please remain skeptical and vigilant with those bank email messages anyway.
Pro Tip: I’ve been using and writing about Microsoft’s Office Suite for many years. Please check out my Outlook help library for plenty of useful tutorials, as well as additional Office 365 help pages! Thanks.