Ask Dave Taylor
  • Facebook
  • Instagram
  • Linkedin
  • Pinterest
  • Twitter
  • YouTube
  • Home
  • Videos
  • Most Popular
  • Top Categories
  • Books
  • About Dave
  • Ask Me
  • > Donate <
  • Home
  • Mac & MacOS Help
  • How Do I Update the Trusted Phone Number on my Apple ID Account?

How Do I Update the Trusted Phone Number on my Apple ID Account?

December 8, 2018 / Dave Taylor / Mac & MacOS Help / 1 Comment

When I set up my Apple ID years ago, it required me to enter a “trusted phone number” for password recovery. That number is now my ex and I do not want that on my account! How can I update my AppleID Trusted Phone Number?

Backup and recovery of accounts is somewhat of an Achilles heel with most long term accounts and Apple ID is pretty typical. We sign up and specify birthday, home address, recovery phone numbers and similar, then promptly forget about what we entered. Then years later we need to get back into the account and for confirmation it asks you to verify some of this info. And you can’t, because you don’t remember what you entered! Oh, the number of times I’ve received email from people in exactly this situation, trying to recover account access…

My daughter was in exactly this situation a few days ago, actually, so it’s all very fresh too. She lost her iPhone and we remote locked it. Then it was found and returned to us, but to unlock it and regain access to her account, she had to verify she had legitimate access. We hopped onto appleid.apple.com and it wanted to send her a secret text code to a phone number that she didn’t recognize, and certainly wasn’t one of our lines! You know how they display things, like (303) ***-**48. Fortunately we unlocked access through a different path, but it was a good reminder that it’s important to ensure that those recovery Trusted Phone Numbers are darn important!

And so, your question is well timed. Here’s how to connect to your Apple ID information and update your trusted phone number list, whether that involves deleting a line or adding another one. Start at appleid.apple.com (note: that’s deliberately not clickable. Type it in, ensure it’s the legit site before you proceed):

enter apple id appleid.apple.com

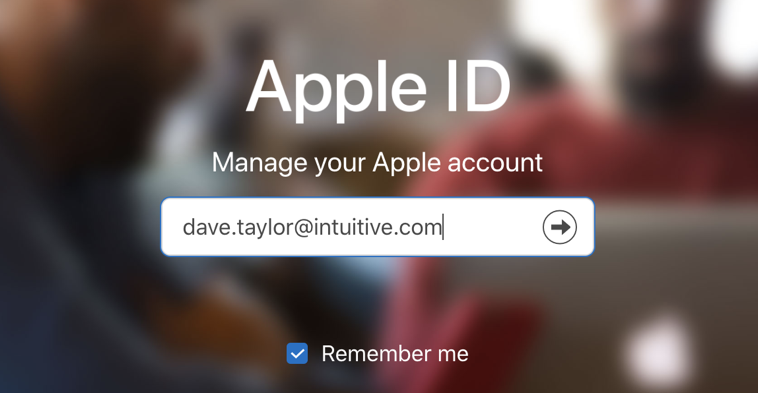
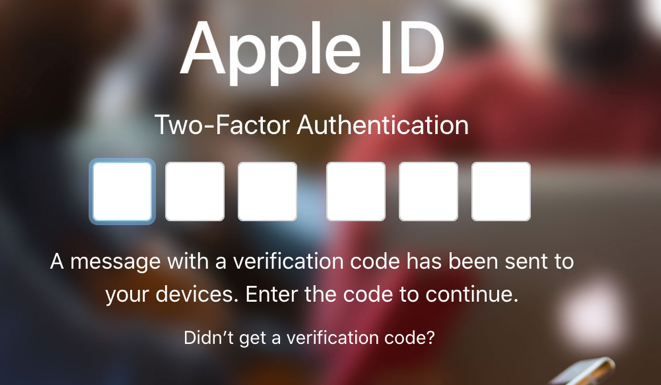
You’ll need to enter your Apple ID account, then your password. Hopefully you also have 2-step verification enabled – if you don’t here’s a tutorial: Enable 2-step verification for iTunes and your Apple ID – because you really should have it turned on! With 2-step authentication, you’ll be prompted for the secret code sent to your mobile device too:

apple id 2-step verification authentication

Finally, once you’re safely logged in to your account, you can proceed. The Apple ID site drops you directly onto your main profile, which will include a list of trusted phone numbers in the Security section:

appleid trusted phone numbers

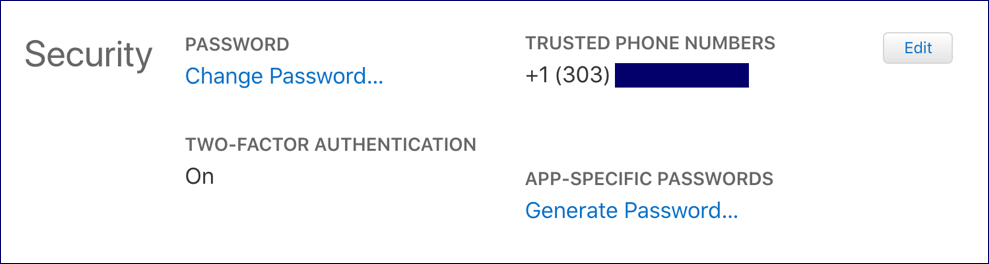
If you don’t have two-factor authentication (the same thing as 2-step verification), you’ll be able to change it once you click on the “Edit” button, but for now we’re focused more on the Trusted Phone Numbers, so check that list to ensure it’s a good number you can still access. If not, or to add a second trusted phone number, click on, you guessed it, the “Edit” button.

Now you’ll see the various options. To add a new phone number, simply click on the “Add a Trusted Phone Number…” and a small window will pop up, as shown:

enter new trusted phone number, appleid

You will need to verify that you have access to this phone number, so be prepared to either receive a text message or a phone call (from a computer) that will give you the secret verification code. I enter a secondary number, as shown, then click on “Continue” and…

enter verification code - apple id trusted phone number

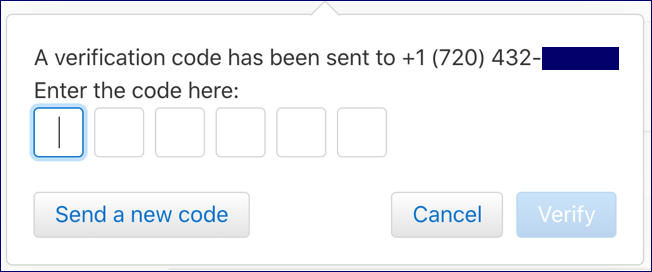
Meanwhile, at that number, you’ll get either a phone call or a text message with a sequence similar to:

apple id trusted phone number verification code

So, easy enough, just enter it, digit by digit into the window on the Apple ID site:

trusted phone number apple id verified

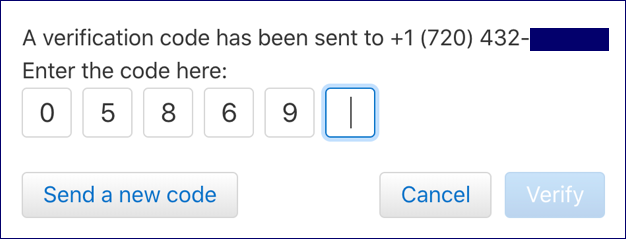
Once you’ve entered all the digits, a click on “Verify” and you’re done. New trusted phone number added to your Apple ID account. And that’s a smart thing to update occasionally, for sure. Now, if you want to delete a number, you can do so from the same Edit screen, but I strongly – strongly! – recommend you don’t end up without a trusted number at all. Just use your own smartphone or cellphone number, if necessary. That’ll still help you regain access to the account if anything happens.

Pro Tip: We have hundreds of useful and informative Mac and MacOS X tutorials here on the site. Please do spend a few minutes exploring them while you’re here.

Let’s Stay In Touch!

Never miss a single article, review or tutorial here on AskDaveTaylor, sign up for my fun weekly newsletter!
Name: 
Your email address:*
Please enter all required fields
Correct invalid entries
No spam, ever. Promise. Powered by FeedBlitz
Please choose a color:
Starbucks coffee cup I do have a lot to say, and questions of my own for that matter, but first I'd like to say thank you, Dave, for all your helpful information by buying you a cup of coffee!
2-step verification, apple id, appleid, trusted phone number, two factor authentication, verification number, verify trusted phone number

One comment on “How Do I Update the Trusted Phone Number on my Apple ID Account?”

  1. Akka says:
    August 30, 2019 at 11:14 pm

    Thank you so much

    Reply

Leave a Reply Cancel reply

Your email address will not be published. Required fields are marked *

Search

Recent Posts

  • Speed up your PC by Reinstalling Windows 10 with the Win10 “Fresh Start” Tool
  • Can I Copy and Backup My Facebook Posts to Google Drive?
  • How to Get Screen Captures in ChromeOS on a Chromebook?
  • Is There a Way to Scan And Paste OCR’d Text within Android?
  • How Can I Remove All Colors From A Graphic Logo?

On Our YouTube Channel

New Watches Purchased on Alibaba.com: The Unboxing!

One by Wacom -- Student Drawing Tablet -- DEMO & REVIEW

Categories

  • AdSense, AdWords, and PPC Help (106)
  • Amazon Echo & Kindle Help (79)
  • Amazon, eBay, and Online Shopping Help, (158)
  • Android Help (162)
  • Apple Watch Help (49)
  • Articles, Tutorials, and Reviews (329)
  • Business Advice (193)
  • Computer & Internet Basics (728)
  • d) None of the Above (160)
  • Facebook Help (367)
  • Google, Chrome & Gmail Help (159)
  • HTML & Web Page Design (243)
  • Instagram Help (44)
  • iPad Help (137)
  • iPhone & iOS Help (573)
  • iPod & MP3 Player Help (173)
  • LinkedIn Help (79)
  • Linux Help (150)
  • Linux Shell Script Programming (86)
  • Mac & MacOS Help (838)
  • Most Popular (14)
  • Outlook & Office 365 Help (14)
  • PayPal Help (68)
  • Pinterest Help (53)
  • Reddit Help (13)
  • SEO & Marketing (80)
  • Spam, Scams & Security (85)
  • Trade Show News & Updates (23)
  • Twitter Help (212)
  • Video Game Tips (66)
  • Web Site Traffic Tips (62)
  • Windows 10 Help (837)
  • Wordpress Help (202)
  • Writing and Publishing (72)
  • YouTube Help (43)
  • YouTube Video Reviews (159)
  • Zoom, Skype & Video Chat Help (45)

Archives

Social Connections:

Ask Dave Taylor


Follow Me on Pinterest
Follow me on Twitter
Follow me on LinkedIn
Follow me on Instagram


AskDaveTaylor on Facebook


microsoft insider mvp


This web site is for the purpose of disseminating information for educational purposes, free of charge, for the benefit of all visitors. We take great care to provide quality information. However, we do not guarantee, and accept no legal liability whatsoever arising from or connected to, the accuracy, reliability, currency or completeness of any material contained on this site or on any linked site. Further, please note that by submitting a question or comment you're agreeing to our terms of service, which are: you relinquish any subsequent rights of ownership to your material by submitting it on this site. Our lawyer says "Thanks for your cooperation."
© 2020 by Dave Taylor. "Ask Dave Taylor®" is a registered trademark of Intuitive Systems, LLC.
Privacy Policy - Terms and Conditions - Accessibility Policy