
My cousin sent me a bunch of digital photos I want to share with the family, but they’re taken at weird angles. Is there some way to unskew or square off photos on a Mac?
Unskewing is one of about a million different things that the wonderful Mac program GraphicConverter can accomplish. Haven’t heard of GraphicConverter? It’s the brainchild of a single programmer and it has features that rival the far, far more expensive Photoshop and similar programs. And you can use it for free if you want to just give it a try because it’s shareware, a sort of pay-as-you-go model. I know, I’ve been using it for so many years I don’t remember the first version of the program I installed!
One of the features I use quite a bit in GraphicConverter is its simple and remarkably powerful unskew feature, so this is a great question for me to field! I also have a photo of my “I Voted” sticker that ended up a bit more skewed than I wanted. Oh, for everyone else, “skew” is when instead of something square being shown as square, the top portion is too narrow or too wide, or one of the sides is off kilter. Or they all are!
Here’s an example, the photo of my sticker:

This is a perfectly rectangular sticker sheet, but in the image, the top appears to be smaller or shorter than the bottom portion. Not only that, but both sides skew outward as you look from top to bottom. Stuck? Not at all. We can, as Bob the Builder says, fix it!
From the “Effect” menu, choose “Unskew (Keystone Correction)…“, as shown:
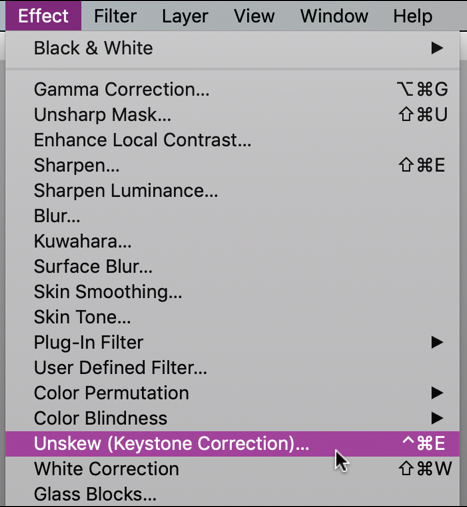
Take your time here, there are a zillion different Effect options, most of which I have to admit I have never tried or used. As I said, lots and lots of power and capabilities in GraphicConverter!
Once you choose this option, a grid is superimposed over the image. I’ll make this graphic extra big so you can see:
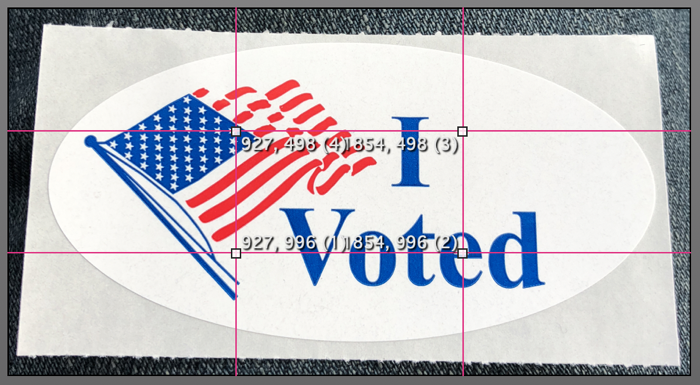
Here’s the trick: Click and drag the handles [tiny boxes] to the four corners of the skewed image. It’ll take a minute or two to get it all just right, but take your time and position them all on the corners like this:

Look closely at the above, because the pink grid box is also now askew, but it’s exactly askew to match the source image. The x,y coordinates shown on each corner are the pixel horizontal and vertical measures from the top left corner. The number in parents is the point number; while you should try to have #1 in the top left, #2 in the top right, etc, I have found it doesn’t matter at all and the 4,3,1,2 layout I have above simply mirrors how the original unskew box is shown for this effect.
Almost ready for the magic!
Look along the top and you’ll see a very narrow bar has appeared in the image window:
![]()
Ready to see what it can do? Click on the “Apply” button. It’ll confirm a few settings…
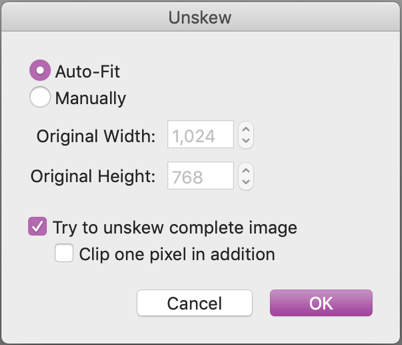
You can just use the settings I have shown above or you can apply the effect, undo the effect, try a different setting and apply it again until you get just the result you want. Me? A click on “OK” and it really is like magic:
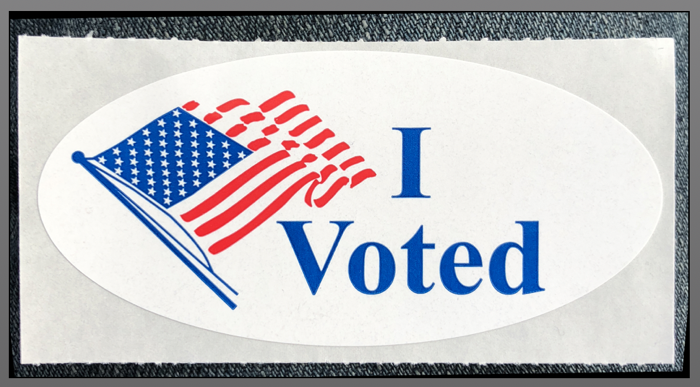
It’s not perfect because both the top and bottom edges sag slightly, but it’s a whole lot better than the original image and there’s no obvious or visible spot in the image where things have been distorted to correct the keystone problem / unskew the image.
Now you know how to do this, download a copy of GraphicConverter, unskew your cousin’s images, crop them a bit to erase any artifacts of the unskew and you’re good to go. But don’t forget to register and pay for your copy of the program for your Mac; it’s well worth it!
Pro Tip: I’ve been writing about Apple systems since before there was a Macintosh. Please check out my extensive Mac help library here!
Very helpful. Just the feature I was looking for.