
I want to create some composite photos that have a friend in the most unlikely of locations. I have a photo of them and photos of the locations, but how do I superimpose one on the other? I’m using an iMac and don’t have anything fancy like Photoshop.
The ability to create composite photographs is one of the most fun parts of modern digital photography. Back in the old days you’d be cutting things out and literally gluing photos atop each other. Clumsy and the results certainly weren’t very good. With Photoshop and the many other photo editors on the market, however, whether you’re on a Mac, Windows system or even a Linux device, you’ve got a lot of options.
On the MacOS X side, I remain a big fan of the shareware program GraphicConverter and use it quite a bit. It’s easy to download a copy for experimentation – and not expensive to license! – and the developer has been involved with the Mac since forever, so it’s 100% compatible and supports all the latest Mac features and capabilities. That’s what I’ll use for this demo.
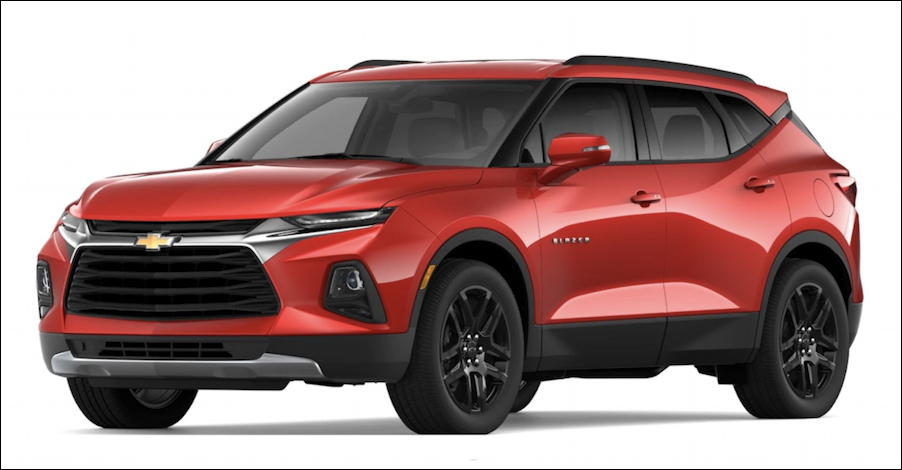
To start out, my project is going to be to superimpose a photo of the beautiful new 2019 Chevy Blazer in “Red Hot” on top of a map of Montana. Sound hard? Let’s see if it is…
The first and perhaps most tricky part is to find an image where it’s easy to extract the object you want from the background. Chevrolet makes it easy by having a photo of the vehicle against a pure white background:
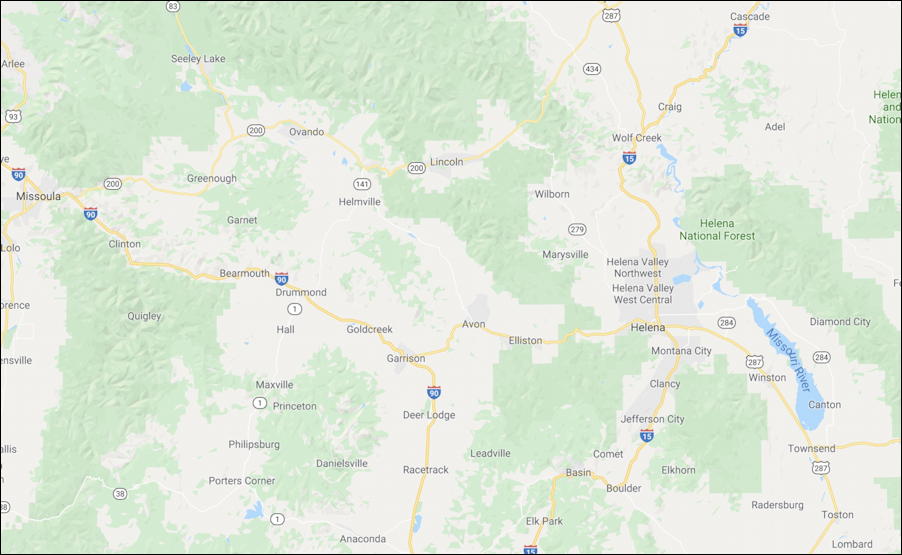
In terms of the map for the background, I’m going to just use a generic map of the state of Montana, sufficiently close up that you need to actually read city names to figure out what the location is in the image:
Those are our two components.
Now to open up the Blazer photo in GraphicConverter. The image window shows a lot of tools along the top toolbar and various information about the image itself:
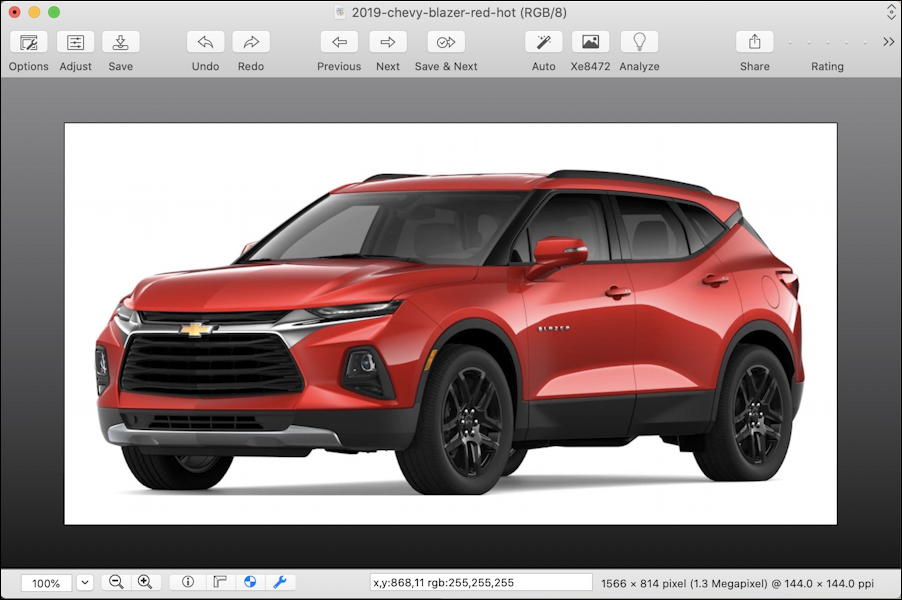
For right now, the most important element to pay attention to is the size of the image. That’s shown along the bottom. Here’s a closeup of that portion:

The vehicle image is 1566 x 814. How about that map?
I’ll open that up in GraphicConverter too, and this time you can figure out the image size yourself:
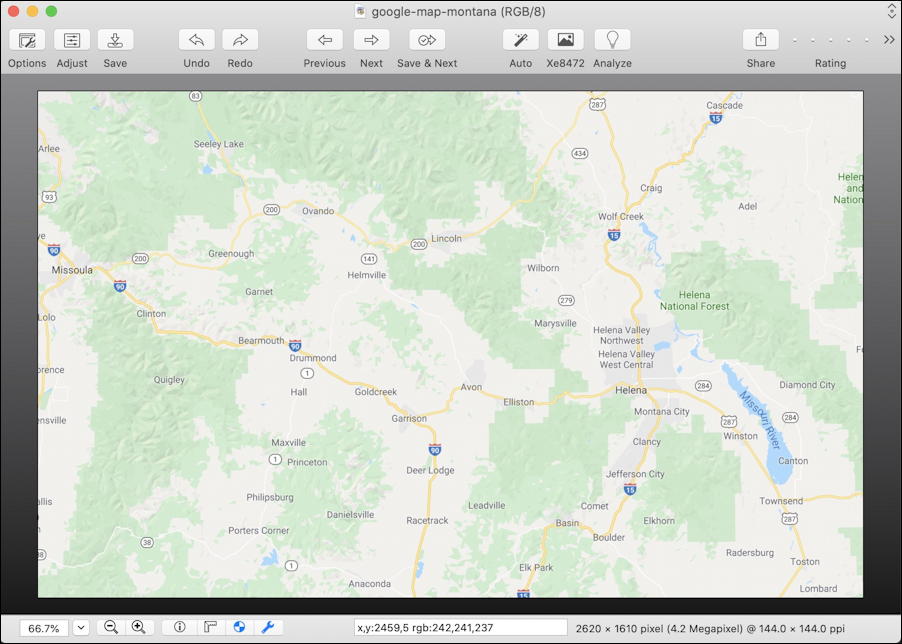
Did you get 2620 x 1610? Yes, definitely bigger than the car photograph. That proves to be important because without doing any scaling, the car is going to be fairly small on the map image.
We’ll see that, so let’s select the car itself from that image. We’re going to use something called the “Magic Pen” in GraphicConverter, which you can find on the Tools window:
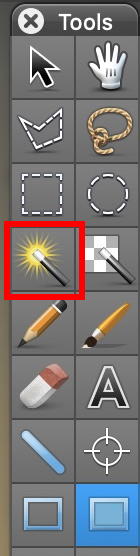
Here’s where knowing your tools proves handy: We’re going to use Magic Pen to select the white area around the image to start. A click anywhere on the outer white region and it’ll all be selected:
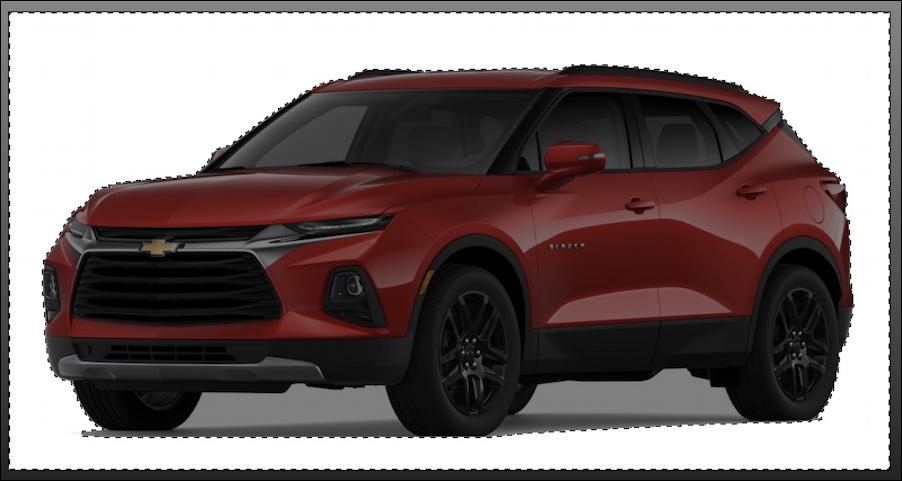
Looks good, but we want the inverse of this selection: we want the object without the background, not the background without the object!
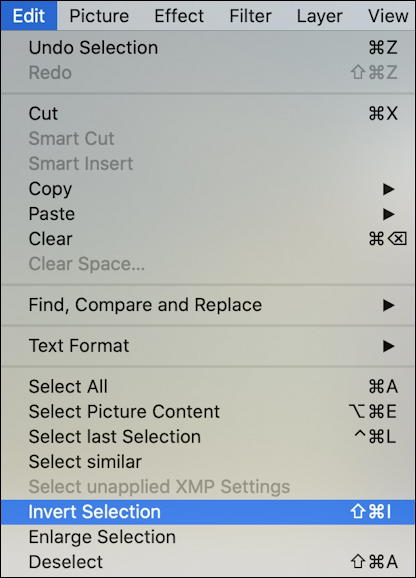
No worries, GraphicConverter has you covered: There’s a menu option on Edit that lets you choose the inverse of the current selection conveniently enough:
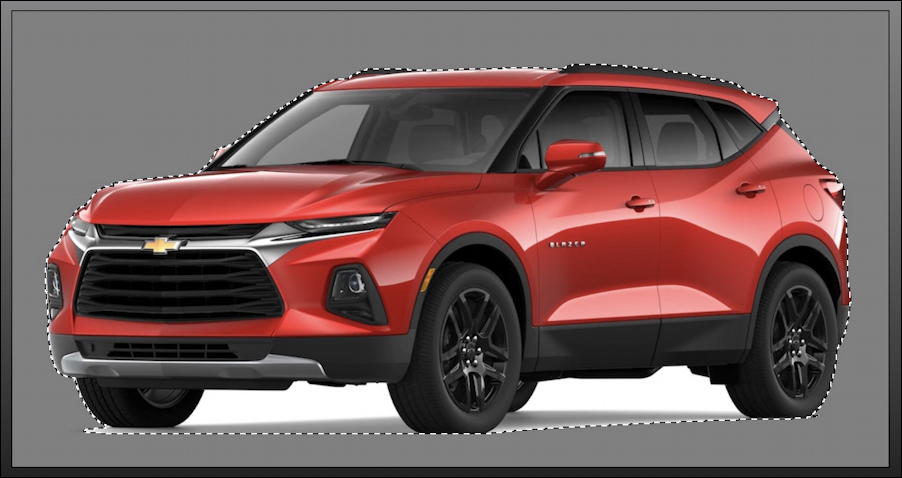
A click and we have exactly what we want; the car selected, but not the background:
Great. We’re ready to copy it onto the map image. For this task, use Edit > Copy (or the Command-C shortcut) to get the object into the copy/paste buffer.
Now switch to the map image and… paste!
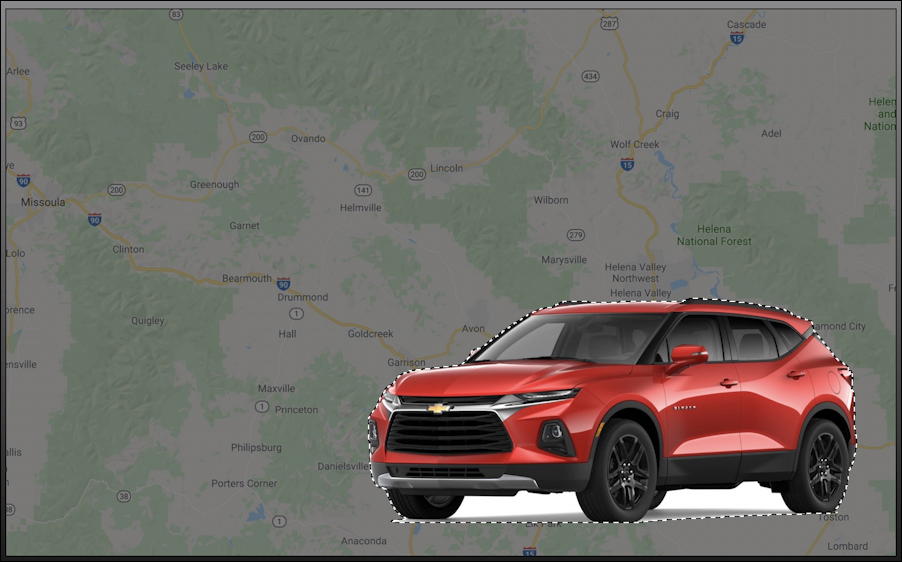
Notice it’s still selected so you can drag it around to get the perfect positioning.
Or you can look and say “hmm… that car’s a bit too small for the map. Let’s fix it.” That’s what I did in this instance.
There are, of course, two ways to fix this: make the map background smaller, or make the car image bigger. Since I already have the car ready to go in the buffer, I’m going to opt for the former. Again, in GraphicConverter it’s super easy: Choose Picture > Size > Scale and you can resize it as needed:
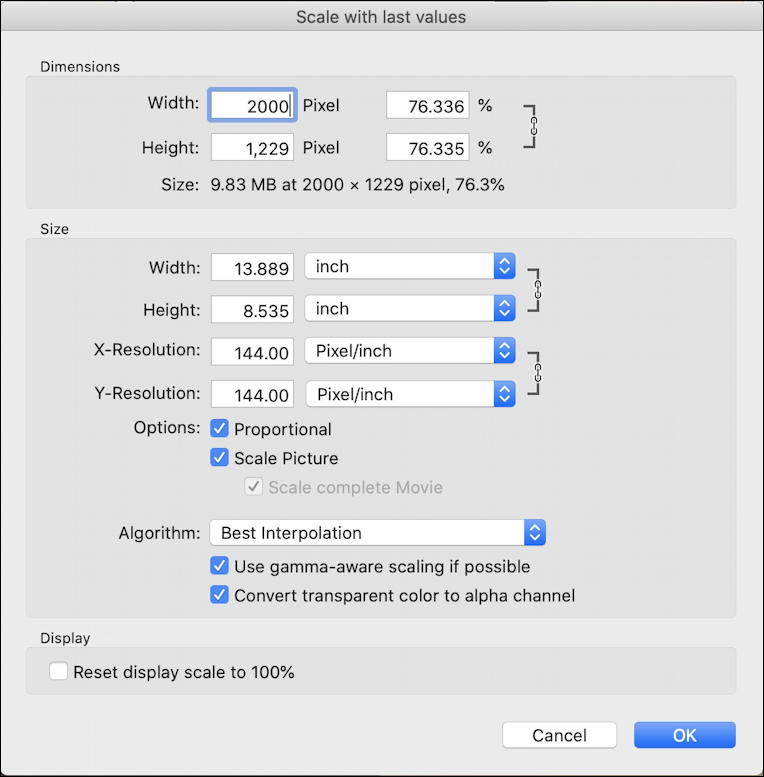
The image started at 2620×1610 so I’m going to reduce it about 25% to just 2000 pixels across. Since it’s a proportional scaling, that means it’ll shrink down to just 1229 pixels high.
A click on “OK” to proceed and I can again paste the car object onto the map:
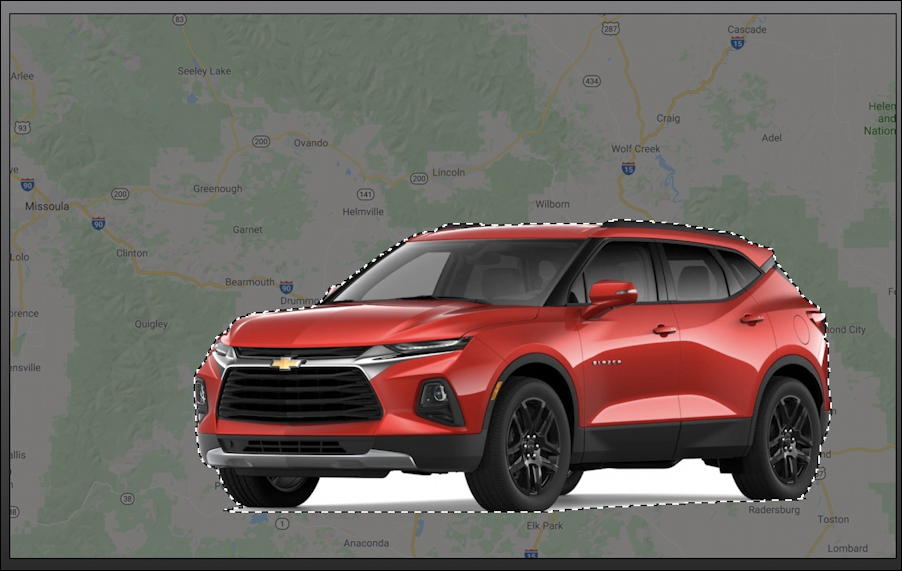
A much better relationship of the size of the two objects. Since it’s still selected we can also move it around to get it in the optimal location.
Then just click anywhere outside of the car object and it’s “dropped” onto the background:
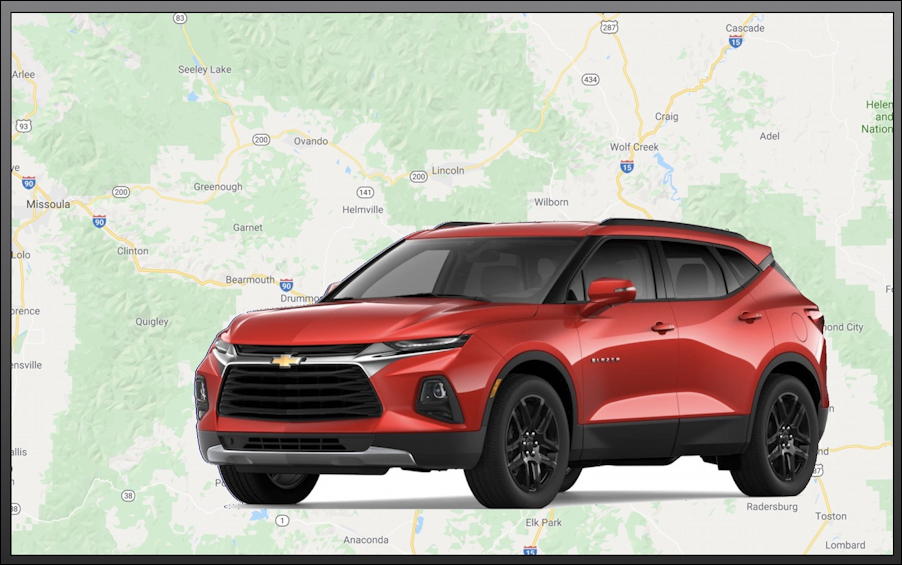
Mission accomplished! Pretty cool, isn’t it? Turns out you can do this sort of thing with any two images, so you can easily add your friend to the lunar surface, the middle of a jungle, the assembly hall of the United Nations, or on the Death Star in a movie still! There are a lot of refinements you can still do, including exploring how to soften the edge between the two images, but this will definitely get you started with superimposition of images on your Mac system!
Note: I am using these two images for educational purposes for this tutorial. If you wanted to do something like this for a commercial application, you’ll want to ensure you have the rights to those images so you don’t get into trouble with copyright laws. Certainly the Blazer image is copyright 2019 by Chevrolet Motor Company.
Pro Tip: I’ve written hundreds of tutorials about how to get things done on the Mac. Please check out my extensive Mac Help Library for lots more help!