
I produce a lot of PDF files from Keynote for presentation handouts. And they’re huge. Too big to email huge. Is there some way to reduce my PDF files on an iMac?
Everyone has grown to love – well, tolerate – PDF files when you want something to look consistent across platforms, operating systems and distribution channels. The problem is that by default the entire system was designed to capture printable documents, which means that generally speaking the docs are huge because images and any custom content is at print resolution, rather than screen display resolution. This can result in enormous PDF files that are tens or even hundreds of megabytes in size, way too big for most purposes.
There are a lot of third party PDF management tools [I reviewed PDFelement recently, for example], but it turns out that a program included with MacOS X can shrink your PDF files pretty darn well all by itself. That program is… Preview! Yes, it’s one of the many programs on your Mac that has a lot more capabilities than you probably realize.
Let’s have a look. To test this I have a Keynote-produced handout for a digital marketing class I’m teaching, and as the Get Info window shows, it’s pretty darn massive:

I have the “More info” open because it’s interesting to view too, showing details like the number of pages and the (odd) resolution of the document too. It’s 51 pages and takes up 100.9MB on disk. That’s 1.9MB per page! Sheesh.
To shrink it down, open it up in Preview. You can almost always do this by simply double-clicking on the file.
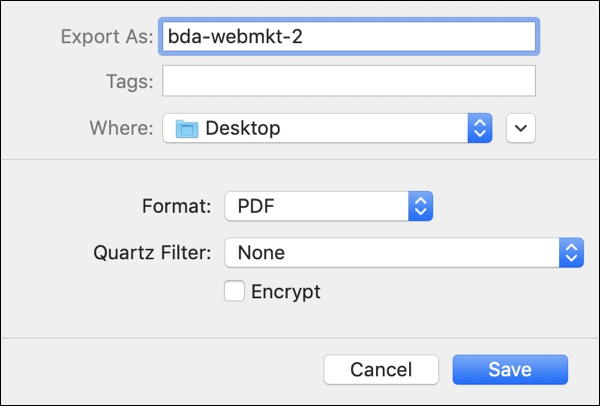
Now choose File > Export, as shown:

You wouldn’t think of exporting a PDF from another PDF but that’s how you can gain access to the key control. So export it is!
A window pops up with no clue how you can reduce the PDF file:
The secret is in the “Quartz Filter” menu. Quartz is the render engine that the overall Mac windows system uses and it’s also utilized for working with PDF documents. So there are a bunch of really useful Quartz filters that are hidden, like at this spot in Preview. Okay, click to open up the menu and check out those glorious options:
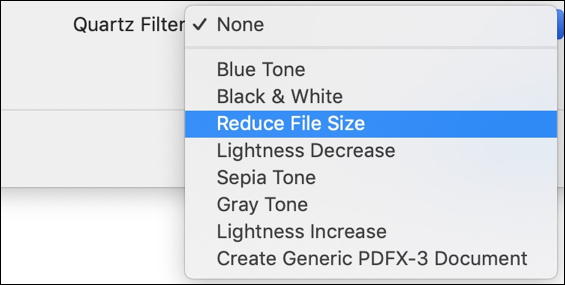
Cool choices, eh? Not sure when you’d want Sepia tone unless you’re creating ye olde pdf documenty, but otherwise, pretty cool stuff. And the choice we want for this task, highlighted: “Reduce File Size“. Choose that, give the new PDF document a different name to the original and save it.
Now let’s have a look at the Get Info window of the new shrunk PDF:
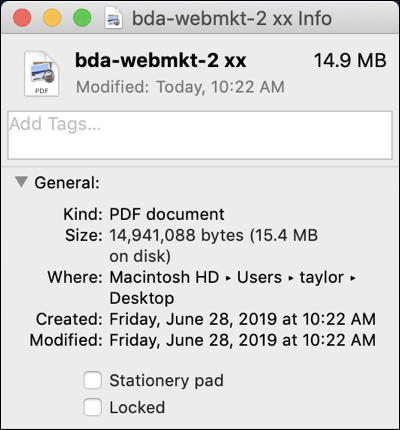
That is a sweet savings! We went from 100MB to 15.4MB with about 30 seconds worth of effort. That’s a savings of about 85% which is something every single recipient of your handouts will appreciate. Of course, not every single PDF file will reduce as dramatically and some won’t shrink at all, but just about every time I’ve used this feature, it’s helped make my files smaller and more easily shared.
Now, try it on your documents!
Pro Tip: I’ve been writing about MacOS X and its many great programs since before Mac OS 9, so please do check out my extensive Mac help pages while you’re here on the site. Thanks!
The article provides a great tip. However, I’ve found a limitation. Some graphic images get “fuzzy” (lose resolution) when the Reduce File Size option is attempted in Preview. One example is the PDF file I generated from an article at winemag.com. Moral of the story: Don’t get rid of the original file until you scan through the reduced file.
Another tool is built into Adobe Acrobat, which is the purchased version. Adobe calls it ‘Optimization’.
First Open the file in Acrobat. Then save it using Save As, setting the Save as type to ‘Adobe PDF Files, Optimized’.
A scanned architectural drawing went from being a 60 MB file to a 1.3 Mb file. I believe that under the hood, Adobe converted the as scanned data to a .jpeg format.