
I switch between a couple of different Windows computers and am wondering if there’s any way to share their clipboards so I don’t have to email links and text snippets back and forth? All running Windows 11.
One of the coolest unknown features in Windows is that you can not only have a multi-item clipboard but that you can share it across all your Windows PCs too. Not only that, it’s atypically easy to set up for a Windows utility too. The first step is to ensure that all of your computers are logged into the same Microsoft account so they can share, but then it’s all about that Windows key on your keyboard.
Before we proceed, however, be aware that once enabled, everything that you Cut or Copy is added to the Clipboard history on every computer you’ve enrolled, from screen captures to Amazon gift purchase URLs. For that reason, I’m not sure I would recommend that you have both your work and home computers sharing the same Clipboard. Privacy, and all that, ya know.
HOW TO ENABLE CLIPBOARD HISTORY
The first step is to get the more sophisticated Clipboard with history enabled on your PC. That’s most easily done by just pressing Window+V. If it’s already enabled you’ll see your list of recent clips, but if not, here’s what pops up on your screen:
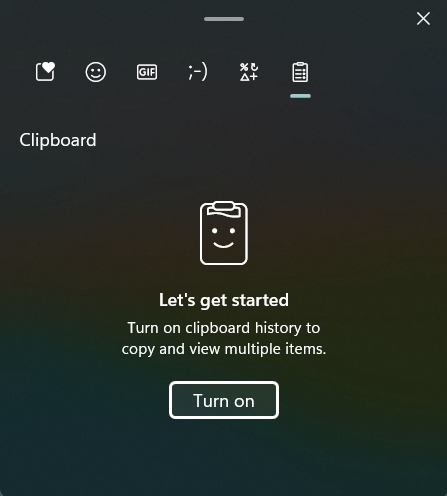
As I said, it’s super easy to get things set up. Just click the “Turn on” button in this little window. It’ll show the current Clipboard entry and give you some options:
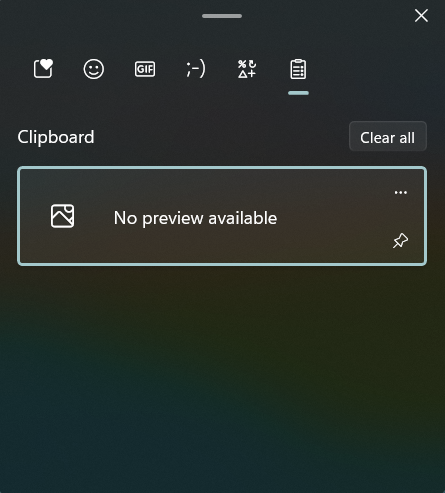
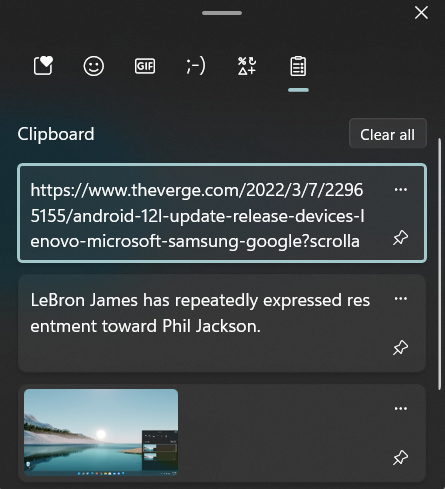
To choose a Clipboard entry, just click or tap on it and it’ll be pasted. The “•••” lets you explicitly choose a “paste as text” option or delete just that entry, the thumbtack lets you lock a favorite one at the top (like your email signature), and the “Clear all” at the top lets you remove anything potentially embarrassing, awkward, or confidential.
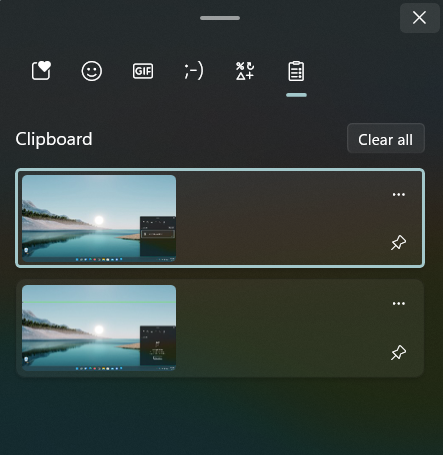
Take a screenshot – as I did with PrtScrn – and they show up in the Clipboard too:
It’s enabled multi-entry clipboard, but sharing? That’s something you’ll need to do through System Preferences. Go to the Windows 11 search and look for “clipboard”:
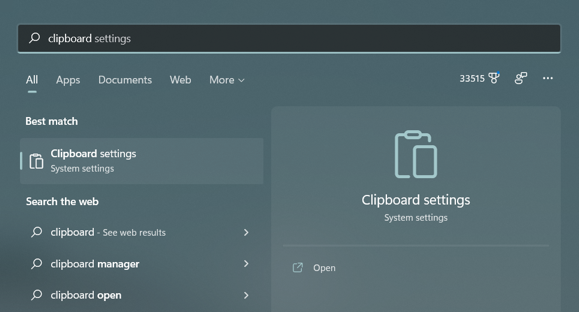
Choose “Clipboard settings” from the list and you’ll see that there are just a few settings to tweak:
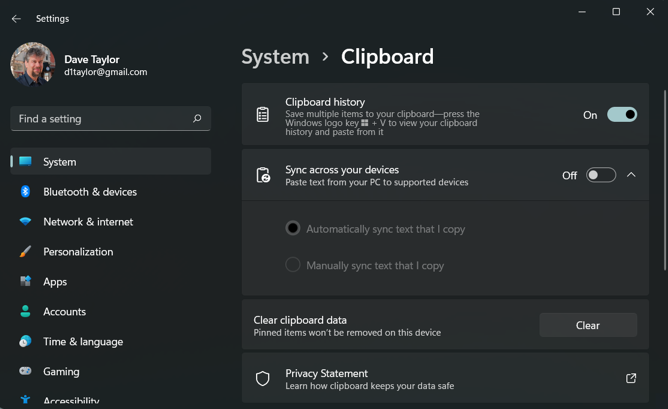
You’ve enabled Clipboard History already, so enable “Sync across your devices” to get this sharing. Note that you’ll need to enable both Clipboard History and Sync Across Your Devices on every PC you want to utilize.
LEARNING ABOUT WINDOWS CLIPBOARD HISTORY
Turns out that there’s a lot tucked into the Clipboard History window too. First, though, here’s what it looks like with text, Web page URL, and image entries:
But what about that list of icons along the top? Click or tap on the smiley face and you’ll find that there’s a super-useful emoji palette!
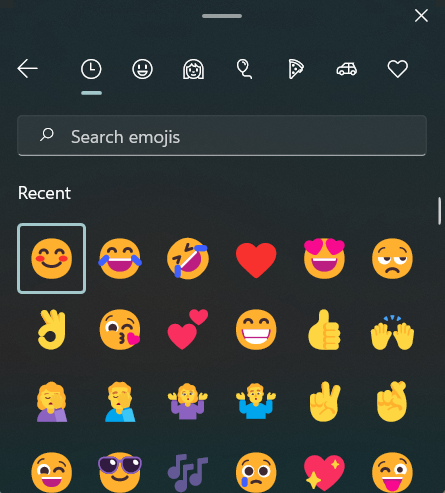
Not only that, but you’ll also want to explore the other options, they’re a fun surprise and darn useful to know about. Need an obscure emoji? Just press Window+V and you can choose from thousands!
Once it’s all hooked up, notice that Clipboard entries don’t indicate whether they’re from local or network use. Consider the below:
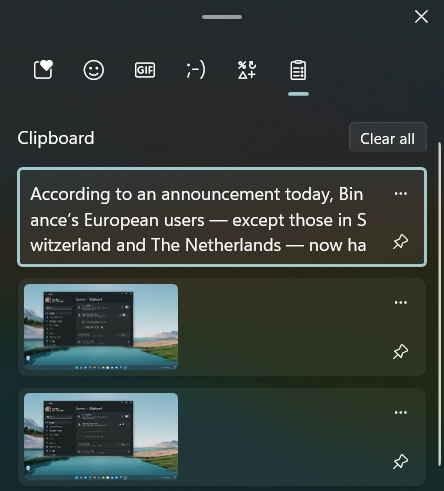
The two screen captures are locally added to the Clipboard, but that text snippet “According to an announcement…” is actually from a different PC where I used Edit > Copy to add this selected passage to that computer’s clipboard, and, through the magic of network sharing, had it show up on this PC too!
Pro Tip: I’ve been writing about Windows for many years and now have an extensive Windows 11 help area. Please check it out to find lots of additional tutorials and guides while you’re here. Thanks!