
I’m stuck working on a Chromebook, which mostly isn’t a big deal, but I like to dictate my emails and haven’t figured out how to do that in Chrome OS. How do I enable and use dictation on my Chromebook?
There’s lots to like about the Chromebook, actually, and the latest version of Chrome OS is 101, meaning that they’ve had a lot of time to add features, fix problems, and generally make it more and more powerful. Dictation has been included for a long time, however, as part of the Accessibility featureset of the operating system. Some of us like dictation as an alternative to typing but others have to use it because typing is quite difficult for them. Chromebooks can do it all, however, so no worries.
For dictation to work, of course, your Chromebook needs a working microphone and you’ll have much better results in a quiet environment, so if you work at a sawmill, well, it might be a problem! Once enabled, Dictation puts a handy little microphone icon on your Taskbar — errrr, “Shelf” — along the bottom too. Let’s have a look!
ENABLE DICTATION ON YOUR CHROMEBOOK
To start, here’s the right side of the Shelf bar along the bottom. Yours probably looks quite similar:
![]()
Click or tap anywhere in the shortcut area that isn’t the actual date and time [Learn how to add date and time to your Shelf here, if you’re curious] and you’ll bring up the shortcuts window:
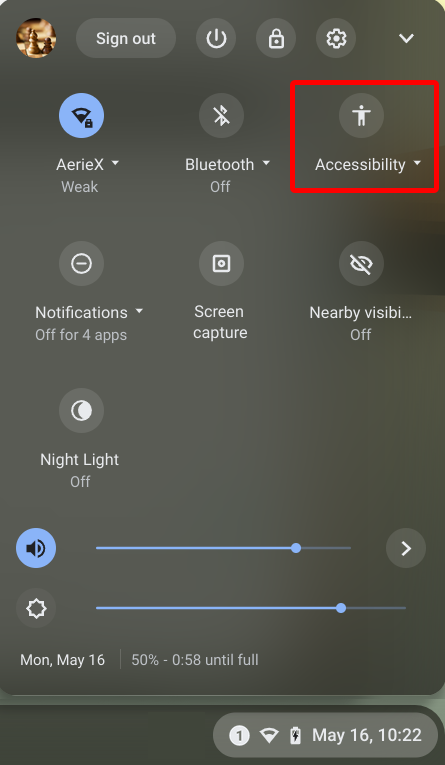
Lots of options and settings are accessible here, including playback volume and brightness, but for our task, you’ll want to click or tap on “Accessibility“, as highlighted. It will show you a number of Accessibility shortcuts:

Click on “Dictation” and a symbol will appear adjacent, indicating you’ve now enabled it. Much more importantly, though, notice what shows up on the Shelf:

That’s the dictation microphone and it’ll stay there until you disable the feature. It’s the shortcut to start having your Chromebook listen to what you say and transcribe it into whatever program or app you’re using.
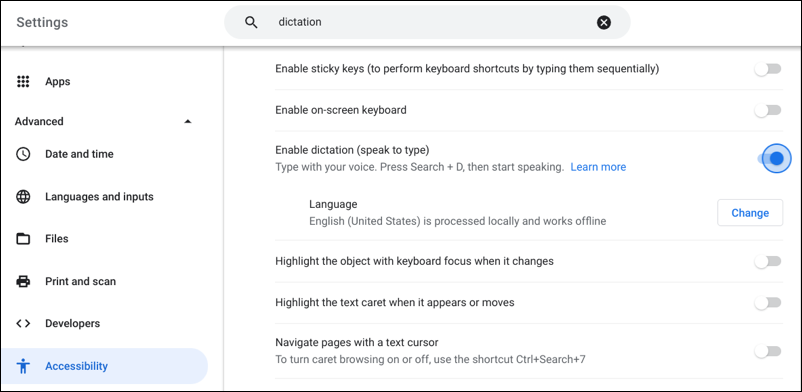
Before I demonstrate how to use it, I’ll add that there’s a bit more control over dictation – notably chosen language – accessible from the main Chrome OS Settings window:
That’s it. You now have dictation enabled and ready to go. So how do you use it?
HOW TO USE DICTATION ON A CHROMEBOOK
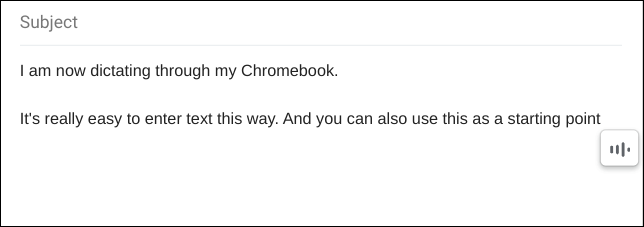
It’s surprisingly easy. Anywhere you’d type, you can instead tap or click on the dictation mic icon and start talking instead. For example, if I go to the main body of a message in Gmail and click the dictation button on the Shelf, here’s what I see:
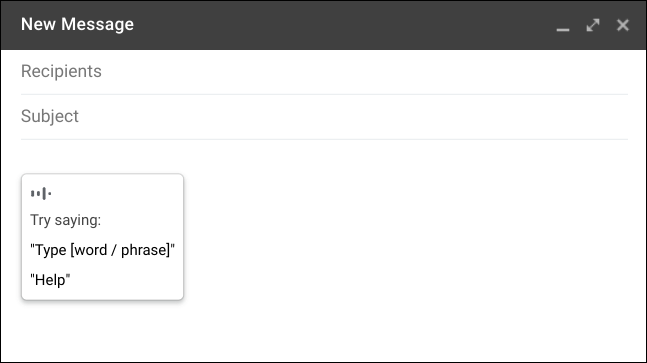
That pop-up window shows that Dictation is listening and it’s even prompting for a few things I could try saying. It’s really easy, though, you don’t have to say “type”, just start talking!
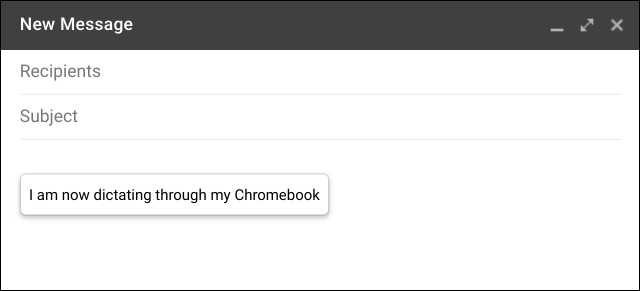
The words all appear in a floating dictation window, and once you pause for a moment are sent to the app as if you’d typed them in. Keep talking and you can continue…
It doesn’t always get it right, but if you speak clearly, it’s surprising just how good the dictation service is on a modern Chromebook. When you’re done, either click the microphone icon again or just stop talking for a few seconds. Don’t forget to say “help” to see all the handy shortcuts too!
Pro Tip: I’ve been writing about operating systems for many years. You can find a lot more useful tutorials in my computer basics help library here on the site, along with a dedicated Chrome OS and Chromebook Help area too. Why not check it out while you’re visiting?