
I want to start experimenting with the new Windows 11 beta release on my Mac. I currently run Windows 10 within VMWare Fusion on my Mac running MacOS 11 and it works fine. But VMWare doesn’t support Win11? What’s the story?
Microsoft is tightening the requirements for people to run Windows 11 on their computers, muchly around the issue of security. For a PC to be compatible with Windows 11, it will now need to have what’s known as a Trusted Platform Module for better platform security. You can test your existing PC to ensure it’s Win11 compatible – How to Check If Your PC Can Run Windows 11 – and it turns out you can actually create a virtual workspace in VMWare Fusion that includes a TPM, as I detail here: Add TPM 2.0 To Your VMWare Fusion Virtual Machine.
But this begs the question; can VMWare Fusion actually run Windows 11 at this point? The answer is, well, mostly. In this tutorial, I go through a full Windows 11 install from the Microsoft ISO image download so you can see where it’s easy and where you have to guess and hope you’re choosing the best option. I imagine it won’t be long before there’s a default “Windows 11” option within the Fusion setup process, but until then, I’m running version 12.1.2 and here’s how it worked…
DOWNLOAD THE WINDOWS 11 ISO
The first step is to get a copy of the latest Windows 11 release as an ISO file. It’s big, over 5GB, and you’ll need to join the Windows Insider Program to gain access. Do that by going into Settings on your Windows 10 system and searching for ‘insider’. A few clicks and you gain access to the Windows Insider area on the Microsoft site. One of the options there is to download a beta of the new operating system. Do that, then go get a cup of tea; it’s going to take a while to get a 5GB download.
Once the download’s done, launch VMWare Fusion…
CREATING A WINDOWS 11 VIRTUAL MACHINE
Fusion makes creating a virtual machine pretty easy, actually. Choose File > New and you’ll see this:
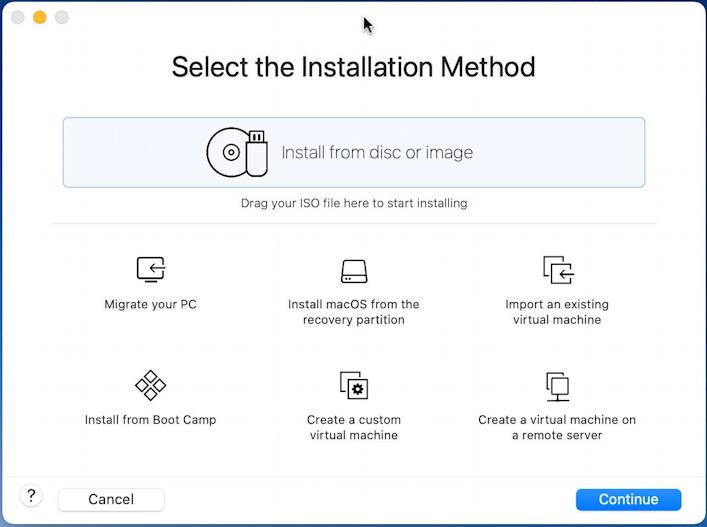
As you can see, lots of choices. Since we have the ISO disc image from Microsoft, that’s the easiest option. Drag the ISO file onto the light blue target rectangle.
After a few moments it’ll recognize the image and offer up this new window:
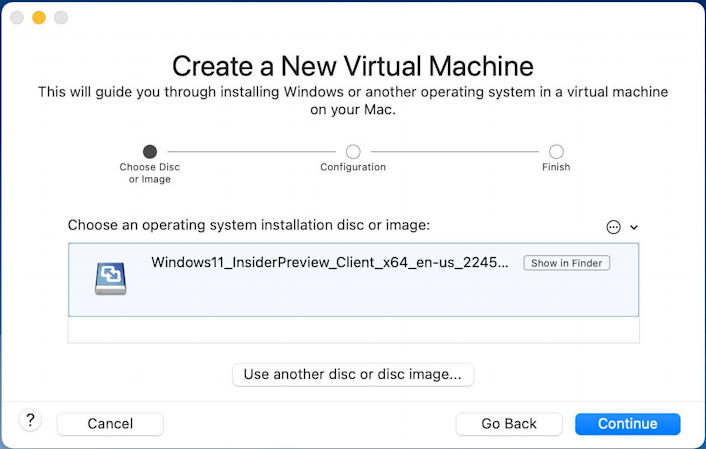
Notice it’s picked up “Windows11_InsiderPreview_Client_x64_en-us_2245…” as the image name.
Proceed by clicking on “Continue“.
Now the actual configuration begins.
WHICH OS IN VMWARE FUSION FOR WINDOWS 11?
As is immediately obvious, Fusion offers a lot of OS options, but no Windows 11:

Since we’re not going back in time and running Vista or Win 2000 (thank goodness!) instead choose the most advanced configuration offered, Windows 10 x64. You might be able to find an “Other” configuration that would work too, but Windows 11 isn’t hugely different from Win 10…
Another click on “Continue“.
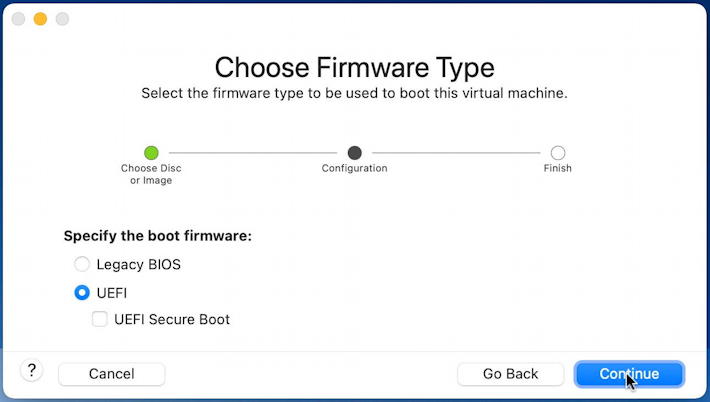
I have to be honest that I guessed UEFI without secure boot was the best choice here, not really knowing the differences. Still, a “legacy” BIOS on the latest and greatest from Microsoft? Seems unlikely. On the other hand, the UEFI Secure Boot might be better since Windows 11 does require encryption at some level (part of what that Trusted Platform Module offers).
Click on “Continue“.

Done! Well, no. Now you need to install that Trusted Platform Module so that Win11 will see your Mac as acceptable hardware.
To do that, click on the “Customize Settings” button.
ADD A TRUSTED PLATFORM MODULE TO YOUR WINDOWS 11 VM
Customize Settings lets you access all the control panels you can normally access in Fusion, but before the install begins:

I’ve highlighted the two areas you want to change: Encryption, then Add Device… You can, of course, tweak other settings too if you want to allocate it more disk space, more CPUs, etc. For now, go into Encryption and enable the Encryption feature. Once that’s done, click on “Add Device…” and choose the Trusted Platform Module TPM.
Now you should see a new icon show up in Removable Devices:
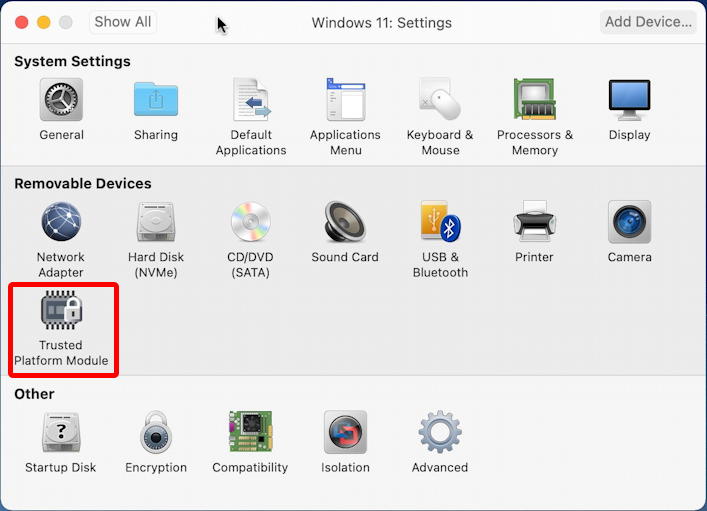
There it is, that Trusted Platform Module. Sweet!
You can now close the Customize Settings window and proceed!
FINAL STEPS FOR INSTALLING WINDOWS 11
The process from this point is pretty straightforward once you click on the blue Finish button. First off, we’re back to 1999 with the first screen you’ll see in Windows 11:
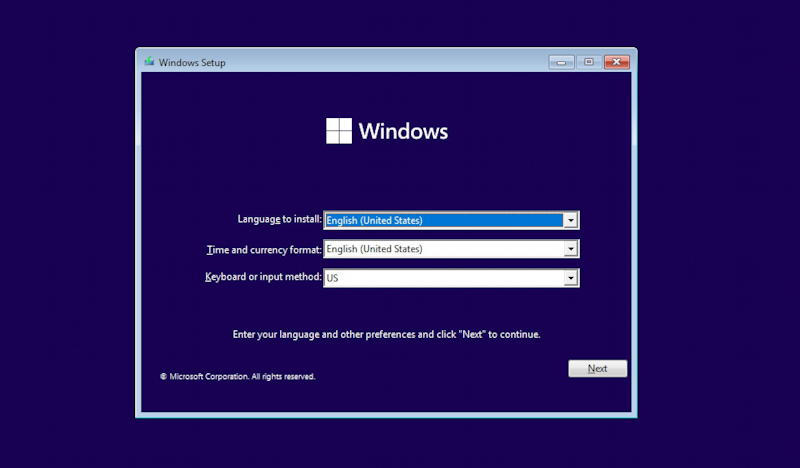
Before you get to this point, it might seem that the boot process itself times out and fails, but just have patience, it will eventually boot into the ISO install program and get you to the actual setup and installation.
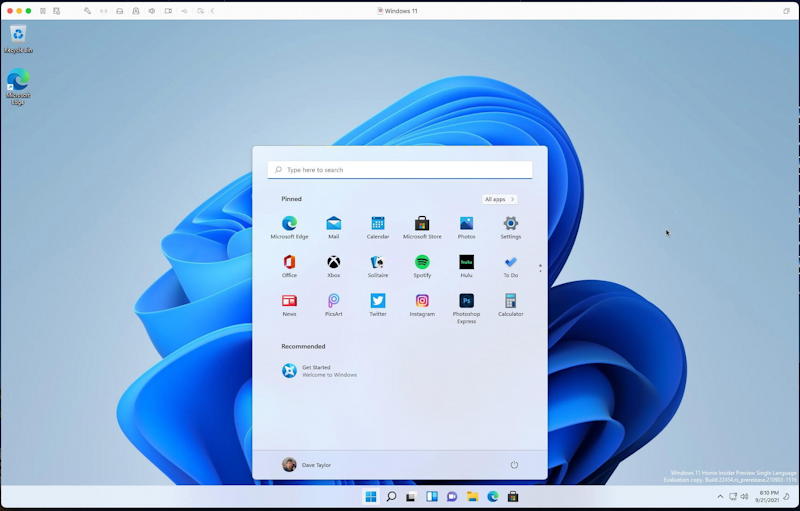
Specify language and similar formats in this first window and you’ll progress through the install process, finally having Microsoft Windows 11 running in all its glory within VMWare Fusion on your Mac system!
I expect that this process will get smoother and easier as Windows 11 gets closer and closer to release, but at this point a lot of VMWare’s efforts are focused on migrating Fusion to the M1-based Mac systems too. In fact, I have an interview about that subject with Fusion product manager Michael Roy you can read if you’re curious: VMWare Fusion, the Apple M1 Architecture, and Windows 11.
Otherwise, enjoy Windows 11 and do let me know in the comments if you had any problems or tweaked anything in your install process!
Pro Tip: I’ve been writing about Mac & Windows for quite some time. While you’re visiting, why not check out my Windows help area and my MacOS help area too? Thanks!
Hi Bob,
I tried it and it seems not to be working. After following your step by step approach I get ‘This PC can’t run windows 11. Please any ideas on how to fix this?
Thank you
Thanks for trying. I have a late 2013 MBP, 1tb SSD and 8 gb of ram. Like Bob Masson it hasn’t worked for me. Encrypting the original Win 10 to use as the OS didn’t work either. I’ve also tried all the Registry tweaks known to man but nothing seems to want to work. It always comes back to “this machine cannot run Win 11” or words to that effect. Who needs it anyway. I’m not a fan of Windows but I need it sometimes and thought the update might make me like it a bit more. Err. No!
I tried this and got caught between: If I check UEFI Boot (and Secure Boot), then my Virtual Machine can’t read the CD (the ISO file), but if I uncheck UEFI Boot I can read the CD ROM for the install, but it’s incompatible with Win 11. I tried everything to read the .iso but with those firmware options checked was never successful.
I am currently trying (and it seems to be working) encrypting my Win 10 VM, adding TPM and upgrading to Win 11.
Thanks for the step-by-step – great job.
Bob
Try increasing the RAM to 4GB minimum before booting from the iso
Hi Bob, you have written: “I am currently trying (and it seems to be working) encrypting my Win 10 VM, adding TPM and upgrading to Win 11”
Did you succeed here?
I have my Win10 VM running on a Legacy BIOS, it seems I can convert it to be UEFI and tick it Advance Setting, but any tips or successful experience should help me!
Thanks!
J.Luc
yes, this works, encryption and TPM and UEFI needed, but not UEFI Secure Boot.
MF
Running this (so far successfully) on newest Windows 11 image, version Enterprise, downloaded from Visualstudio : Windows 11 (business editions), (updated Nov 2021) (x64) – DVD (English)
2 vCPU, 5120MB RAM on VMware Fusion Pro 12.2.1 (18811640)
Tested earlier to upgrade a working Fusion W10 to W11, that one is completely stuck during opening all windows from previous session, fresh install from scratch seems to make a difference.
Mac Book Pro 2019, MacOS Monterey 12.0.1
MF