
I take a lot of pictures with my phone and copy them all to my computer to save copies. When I look on the big screen, however, it’s clear that sometimes the horizon line isn’t level so the photos look weirdly askew. Is there an easy way to fix (rotate?) the photos in Win10 to correct the problem?
Not being perfectly parallel to the horizon line is a rather common problem in photographs. Given all the AI features in modern smartphones, it’s surprising that there isn’t an “auto level” sort of feature that you can enable right on your phone, whether you’re an Android or iPhone fan. But have no worries, with Microsoft Photos there’s an easy unskew feature that lets you not only fix your horizon line on photos, but automatically adjusts the crop so that it’s invisible in the fixed image.
The downside, as you’ll see once you start rotating images even a tiny bit, is that it cuts off the edges of an image. Rotate it a lot and you can lose a significant percentage of the overall photo. There are some ways to manage this but generally speaking, if you’re trying to fix an image where the main subject is almost edge to edge, you might end up with some cropping problems. But let’s jump in!
ROTATE PHOTOS TO FIX HORIZON IN MS PHOTOS
One of the many great programs included in Windows 10 is Photos, a powerful and capable program that lets you do all sorts of interesting repairs and transformations to your photographs and other images. To go through this demonstration, I’m going to start with a photo I took a few days ago of a 2021 RAM 1500 TRX pickup truck. It’s a beast!
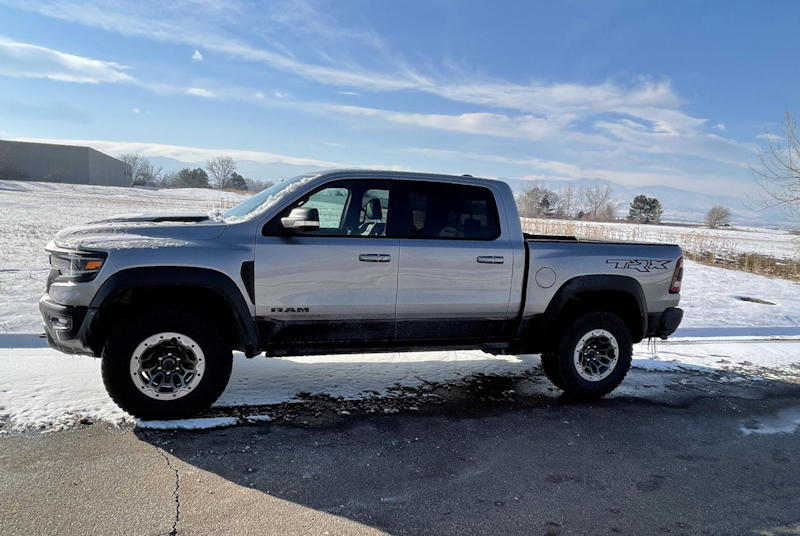
At first glance, that photo might look okay because the truck seems mostly level, but look at the horizon line behind it. Definitely not level and unless the entire Earth tilted upward, it’s time to crack open Photos and fix the problem…
You’ll immediately notice that there’s a rotate shortcut among the icons along the top. Indeed, left to right, those icons are zoom, trash, favorite, rotate, crop, edit, share and the “•••” for yet more options. It doesn’t take more than a single click on the rotate button to realize that it’s not nuanced, just a quick 90-degree rotate:

Not useful in this instance! Click it three more times to restore the original orientation of the image. Now click on the crossed pencils “edit” icon and a menu appears:
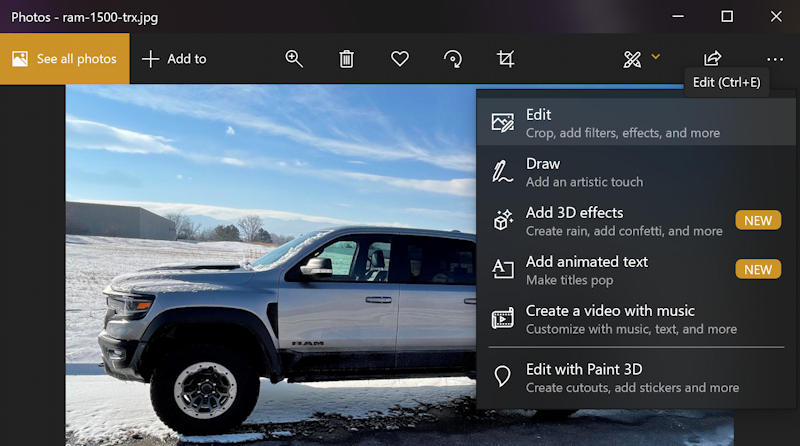
Actually a fair number of interesting options, including the ability to bounce into the Paint 3D program if you want to create stickers from your photo. But let’s stay focused! Choose “Edit” from the menu options.
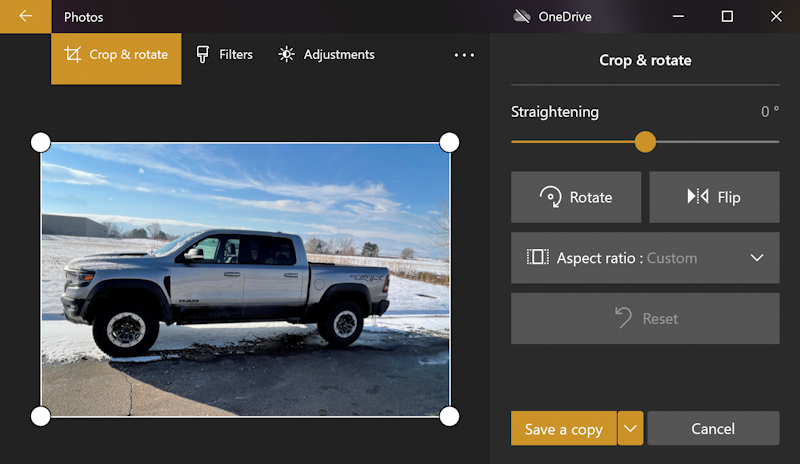
Make sure “Crop & rotate” are chosen at the top and now you can see a variety of controls and the entire image is surrounded by a white crop box with four big round “handles” on the corners. You can click and drag those to choose a subset of the image, but let’s fix the horizon line first. To do that, click and slowly drag the “Straightening” slider. A grid appears after a moment to help with adjustment:
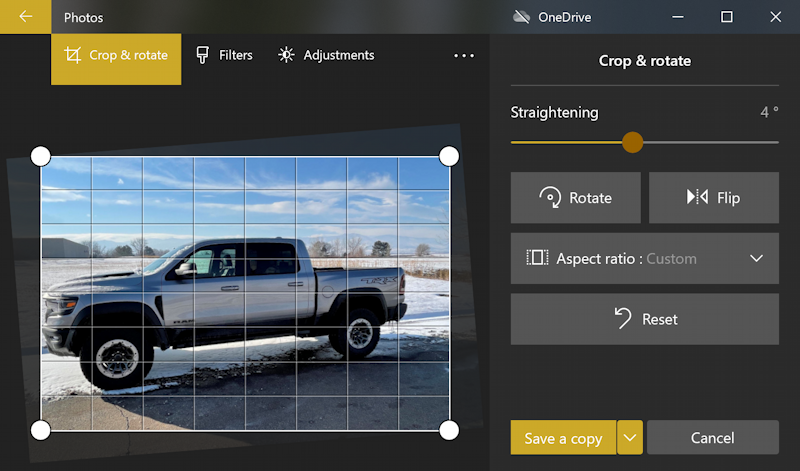
I find the grid super helpful because it makes it much easier to eyeball the horizon versus a level line and adjust it just so.
At any point you can ‘let go’ of the slider and the grid will vanish so you can see how it looks.
The problem, once you’ve straightened it, is that you’ve necessarily now excluded a bunch of the image data so that the resultant straightened photo can be as big as possible. But here’s the secret: once you’ve straightened it, use the crop handles to maximize the portion of the image you want. In the below, you can see that I’ve pulled down the top left handle so that I can get more of the space in front of the RAM 1500 bumper (compare it to the grid overlay crop above to see what I mean):
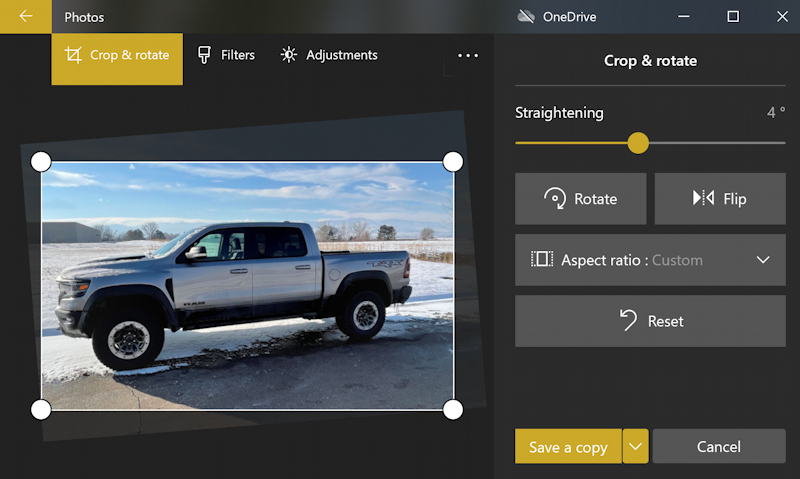
Looks good! Definitely more straight, so a less disturbing image.
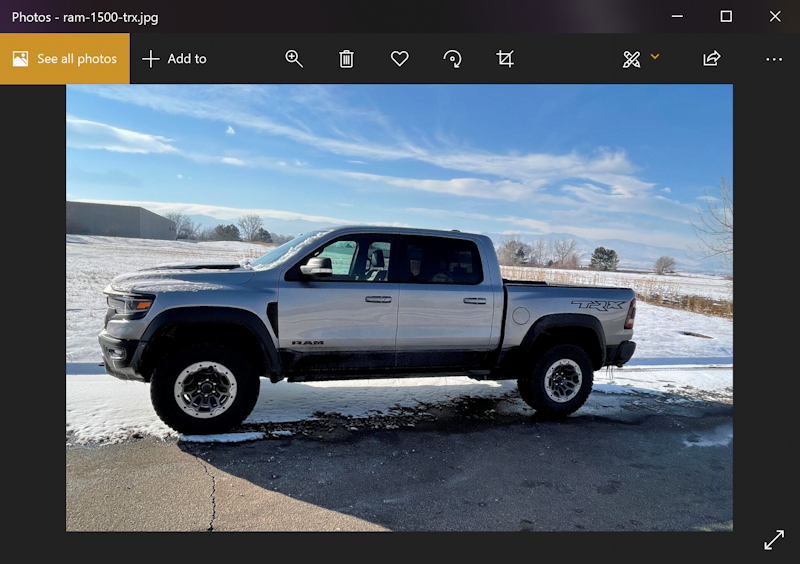
Ready to save this straightened and fixed copy? Click on “Save a copy” and give the resultant photo a new name. I’ll use “ram-1500-trx.jpg”. And here’s the result:
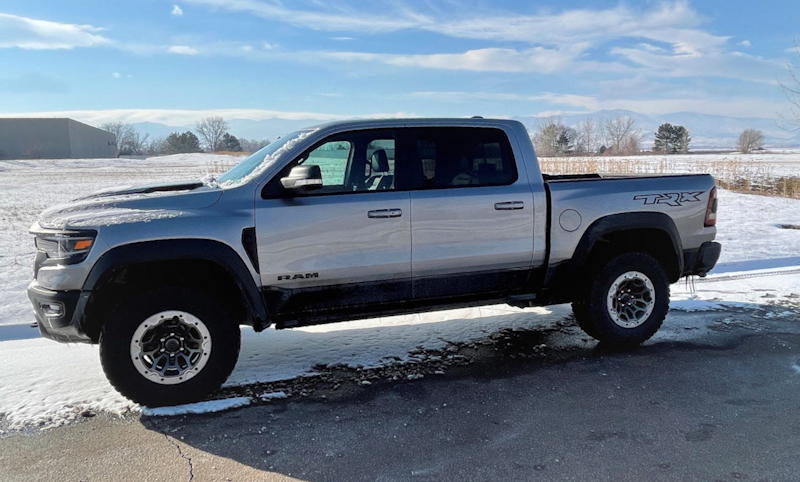
What do you think? An improvement? I definitely think so!
Pro Tip: I’ve been writing Windows 10 how-to material for quite a while, so please do check out my extensive Windows help area for hundreds of useful tutorials while you’re visiting. Thanks!