
I need to install a Linux system on my Mac and decided I’d use VMWare Fusion for convenience. The company wants me to install OpenSUSE. Can you show me how to proceed, please? Thanks!
If you’re coming from the world of MacOS X or Windows, you are in for quite a shock when you realize just how many different versions of Linux are available. Called “distros” (distributions) or “flavors”, there are at least a dozen significantly different Linux options that are popular for specific audiences or in certain geographic regions. OpenSUSE, for example, is more popular in Europe than in the United States, which is too bad as it’s a solid option. I’m also a big fan and longtime user of VMWare Fusion for the Mac. I’ve been running Windows and Linux operating systems within my Mac system for years with excellent results.
In other words, you came to the right place! The good news is that there are about twenty different Linux distros that have already been profiled and optimized for the VMWare Fusion environment and OpenSUSE is one of ’em. Makes things easier (though it’s not too bad if you have to start from scratch with a generic Linux 32-bit or 64-bit install). It all basically revolves around an ISO disk image that you’ll download from the OpenSUSE site to get started. I am going to assume you already have VMWare Fusion installed and ready to go on your Mac too, if not, I’d suggest getting that all set up first.
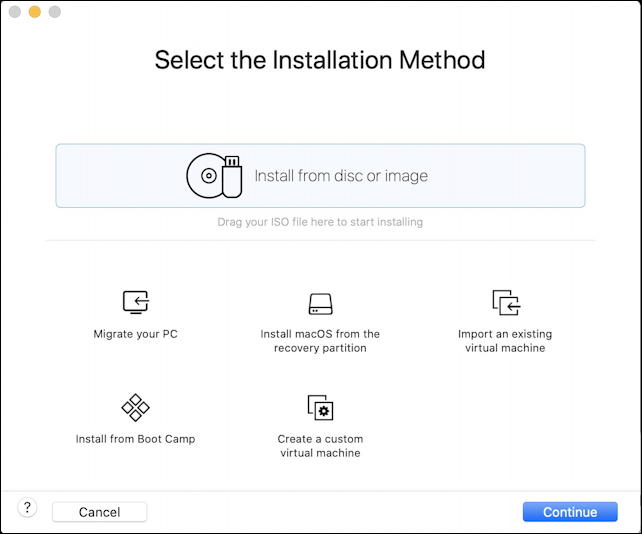
Now in VMWare Fusion, choose File > New to create a new virtual machine. You’ll be prompted with this:
Now open up a Web browser window and head over to the OpenSUSE site. That’s at www.OpenSUSE.org. There you can get to the download page and decide which version of the system you need, and how big your install should be. I suggest “Leap” if you’re not a software developer since it has more end user programs:
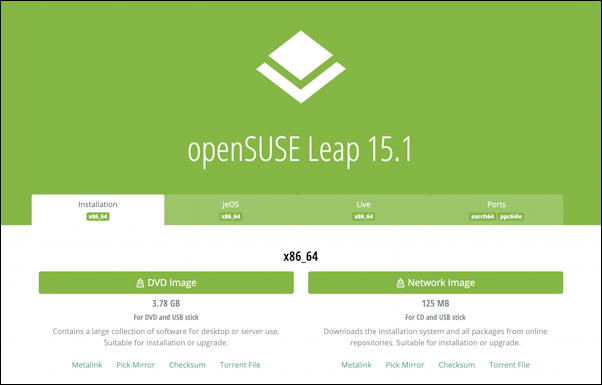
If you’re on a slow network connection, you can choose Network Image, which is an incredibly small 125MB, but it’ll just be deferring all the additional data you need to download to get a full OpenSUSE up and running. Instead, choose DVD Image. The fastest way to get it is through a Bittorrent client. I like Transmission for the Mac and that 4GB download zipped along in well under five minutes:
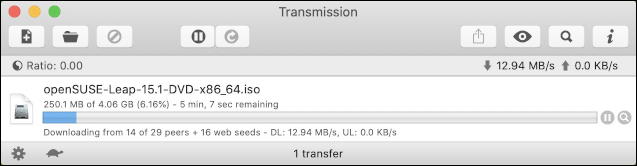
It might take a bit longer for you, and if you’re at home, you might consider launching a VPN to mask the torrent traffic so your ISP doesn’t get confused and think you’re behaving in a nefarious manner. You can also opt for a regular file download, of course, but it’ll be slower.
Finally, the ISO image will finish downloading and you’re ready to proceed:
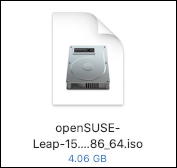
Their estimate of 3.76 GB? A bit off, as you can see. But that’s okay. Now just drag and drop that into the target area on the VMWare Fusion window. It’ll confirm that’s the ISO you want to work with, and identify that it’s OpenSUSE 64-bit:
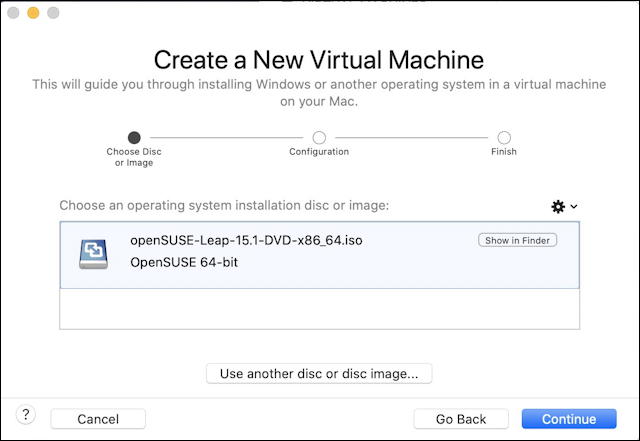
Looks good. A click on “Continue” and…
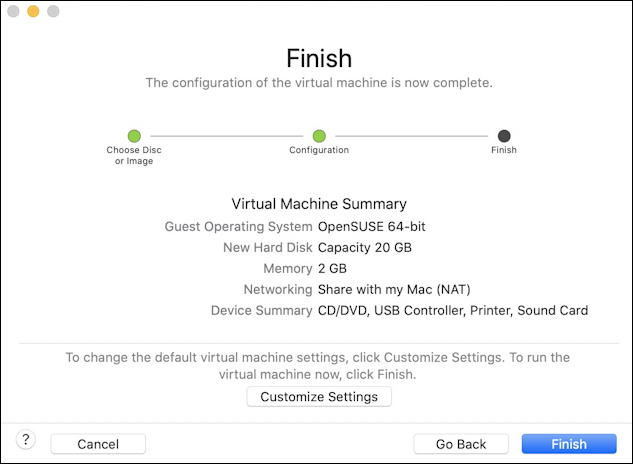
Notice it starts out modestly with disk space requirements: 20GB. You can dynamically expand that – heck, VMWare Fusion can do that too – but for now that should be plenty to proceed. Also notice that it’ll install a CD/DVD device, a USB controller, a printer and a (virtual) sound card. All good. Let’s do this!
Click on “Finish” then give your new virtual machine a good, helpful name:
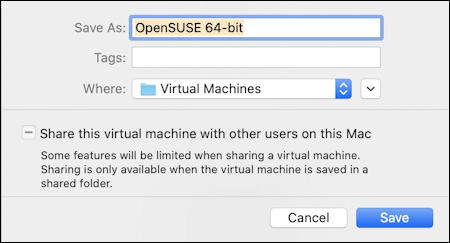
“OpenSUSE 64-bit” is a good name. Proceed with “Save” and the machine will fire up!
After a few window resizings and a lot of text scrolling by, you’ll get here:
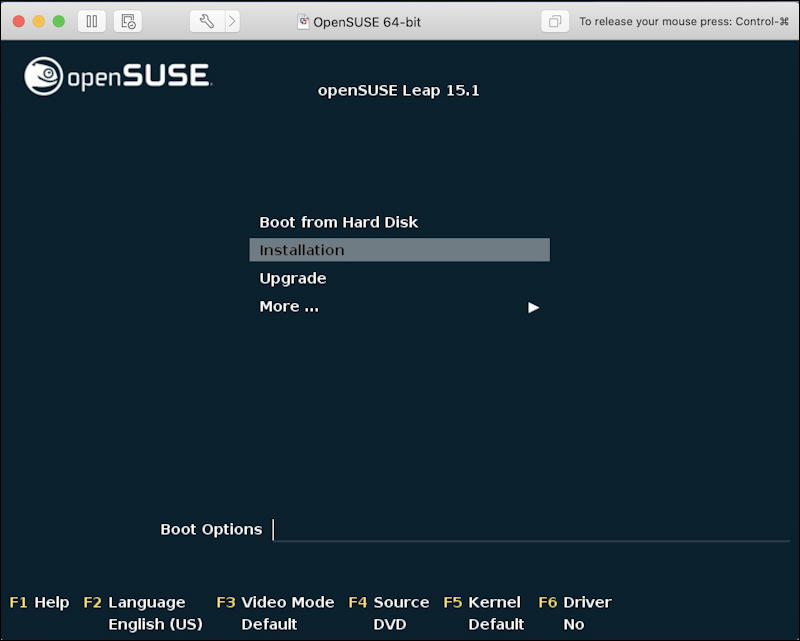
You can use the arrow keys to move up and down, and after you move to “Installation” press Return to proceed.
As I said, VMWare Fusion is really doing all the heavy lifting here, so it really is pretty darn easy.
Depending on how fast your system is, you might see this flash by or get to watch the boxes fill in:

I like it. Old school, ya know. After a bit, you’ll finally be in the OpenSUSE installer:
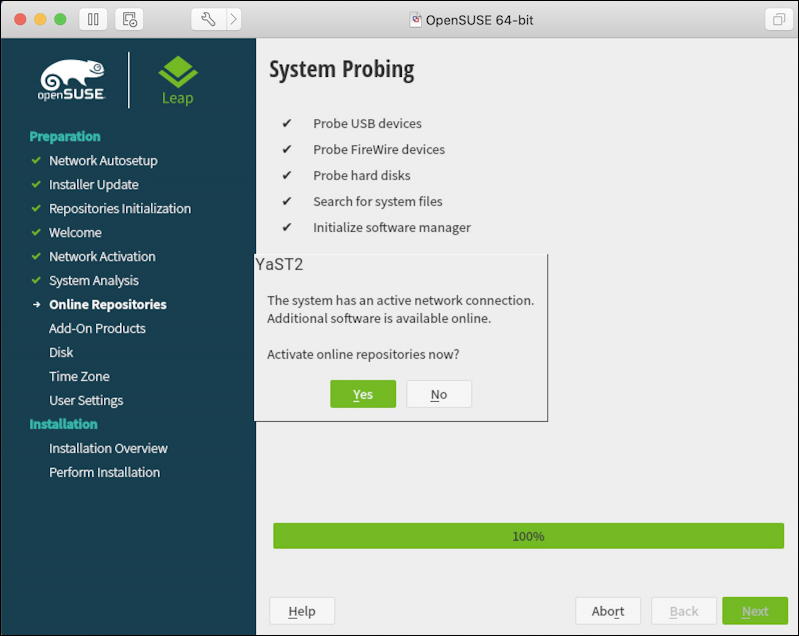
It has, of course, found all these devices because VMWare Fusion has created them and made them available. OpenSUSE doesn’t know which are virtual and which are physical, but that’s fine. More importantly, notice the window that’s popped up: “The system has an active network connection. Additional software is available online. Activate online repositories now?” You might as well say “yes” and install everything you can. You did say you had disk space, right? (remember, this all fits within that 20GB virtual drive file)
Click on “Yes”. You’ll then be asked which installation configuration you’d prefer:
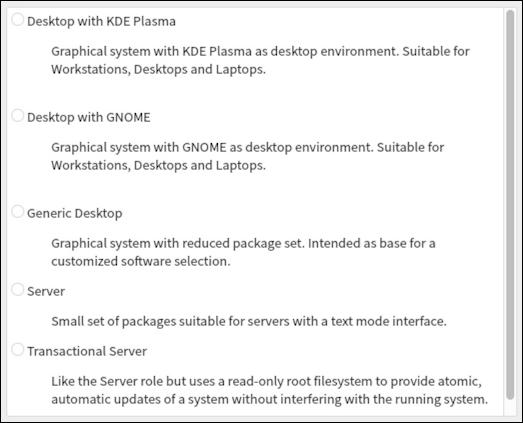
I almost always go with GNOME but this time thought I’d try out KDE Plasma. Don’t choose generic desktop, server or transactional server unless you’re sure you understand what will and won’t be installed. GNOME vs KDE Plasma? That might well just be a user preference.
Choose your preference and the install will continue with a prompt to create the admin user’s account:

You really want to create a user here, it’s much easier than doing later. You can easily change the password at any time, so feel free to use a simple password to start, though why not have something with upper and lower case, a few digits and some punctuation? 🙂
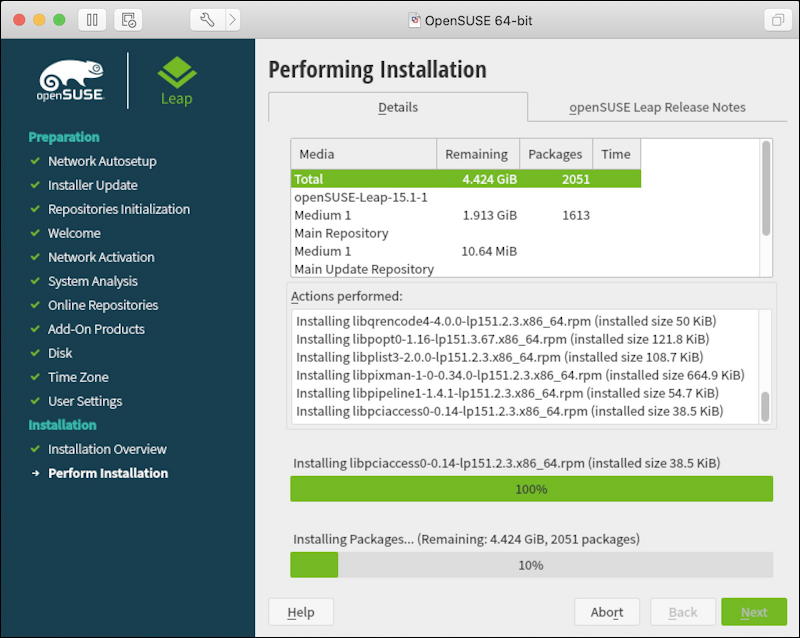
Almost done. Just a few more programs to install…
Once this is done, it’ll reboot and prompt you to log in with that new account you just set up.
Do so and you’re in, running OpenSUSE and ready to proceed!
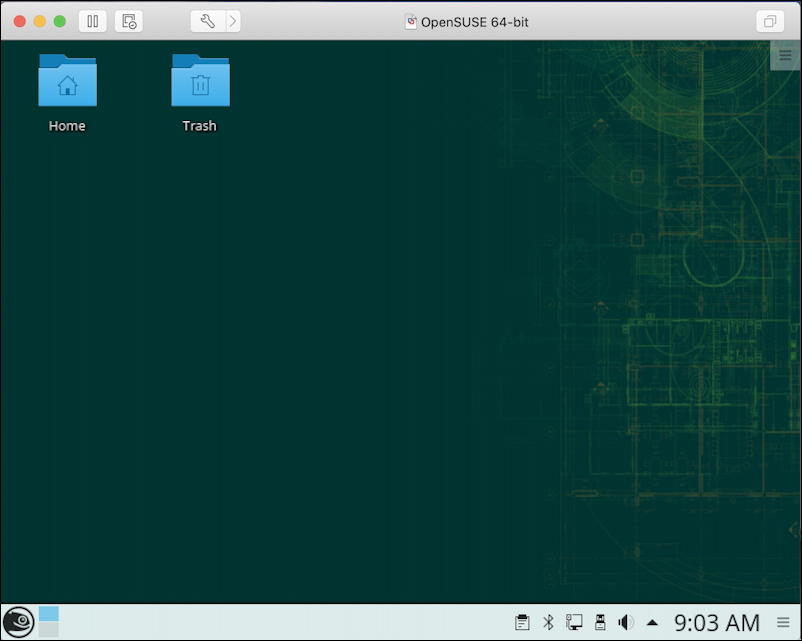
Not a very glamorous default desktop setup, but it’s your starting point. From here there are a million things you can do to improve, update, change and customize your OpenSUSE experience, all within VMWare Fusion. If you need a book to help you get started, can I suggest my classic book Teach Yourself Unix in 24 Hours (it’s focused on the Linux command line) Good luck!
Pro Tip: I’ve been writing about Linux and the Mac for eons. Check out my Linux help while you’re here, and my Mac system help too!