
My friend sent me some photos that he says are from an area of town I think he avoids. I’m suspicious! Is there any way to see the GPS location information included on the photos to figure out where they were actually taken? I’m on an iMac.
My first response is that you and your friend might need to have a conversation about trust and truth, but that’s more of a conversation for AskYourTherapist rather than AskDaveTaylor, so let’s look at the tech side of things! Photographs, particularly those taken by smartphones, include GPS location information, typically in the form of latitude and longitude, allowing you to identify the location to within a dozen feet or so, anywhere on the planet. Since there are all sorts of privacy problems with this, modern smartphone app developers have learned to remove all of that information when images are posted to social media, so grabbing an image off Instagram, Pinterest, or Facebook is going to reveal that there’s no GPS info still included.
In fact, there’s a remarkable amount of information included in the pictures taken with smartphones nowadays, including equivalent focal length, exposure, shutter speed, and more, all captured at the instant you took that snapshot to share with dear old mom. 🙂 While it’s not always obvious how to view this information, you can actually use the underappreciated app Preview on your Mac to check out all of this information. Including GPS info, if it’s still associated with the image.
TWO PHOTOS, ONE WITH GPS INFO, ONE WITHOUT
Here are two photos I took on my Apple iPhone 13 Pro, one with the Camera app and one within the Swarm social app. You’ll see the difference in a moment:
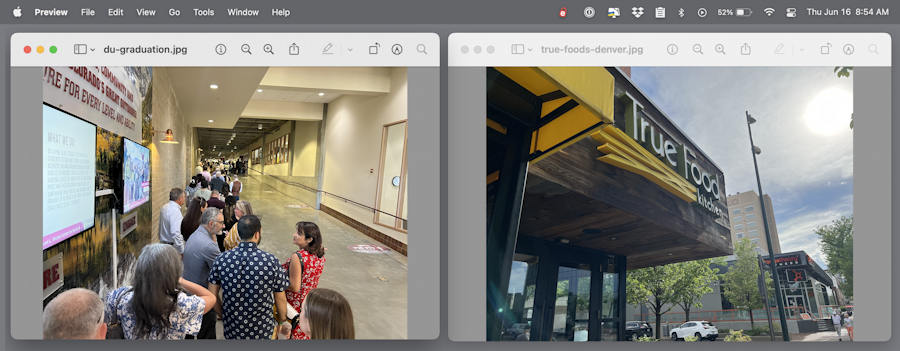
On the left, a photo taken while queued up to attend the University of Denver commencement. On the right is True Food Kitchen, the restaurant where we had dinner the night before. From this view, there’s no indication that one has GPS location info embedded while the other has had it all removed, suitable for social media sharing.
Look closely at the Preview toolbar and you’ll see an “i” with a circle. That’s the Get Info button. A click and a window pops up:

This is the General Info window, as shown. You can see the image size, color model, image format (JPEG), and much more. There are also four different tabs along the top: document, info, search, and edit. Edit? That lets you edit the metadata so you could add your name as photographer, for example. 99% of people never even visit that spot, though.
For the GPS information, click on the “i” tab. Yes, the same button twice in a row. Woot.

Along the middle, you can see General, Exif, and RGB. If we switch to the other photo, however, and go to the exact same place in the More Info window, look at how different things are:

Quite a bit more information, and two new tabs: GPS, and JFIF. Preview doesn’t include every possible category of information in the More Info window, it just hides those that don’t relate to that particular photograph. When I viewed a photo that included GPS information, its corresponding tab appears.
DECODING GPS INFORMATION IN PREVIEW
To learn where a photo was taken, simply click on the GPS information tab!

Notice that you can click on “Remove Location Info” so if you want to scrub a photo you’re about to share with others clean of location info (like an image you captured at home, but don’t want to share your address) that’s an easy solution. It’s pretty small as map views go, however, so click on the other button to see where the image was captured, Show in Maps.
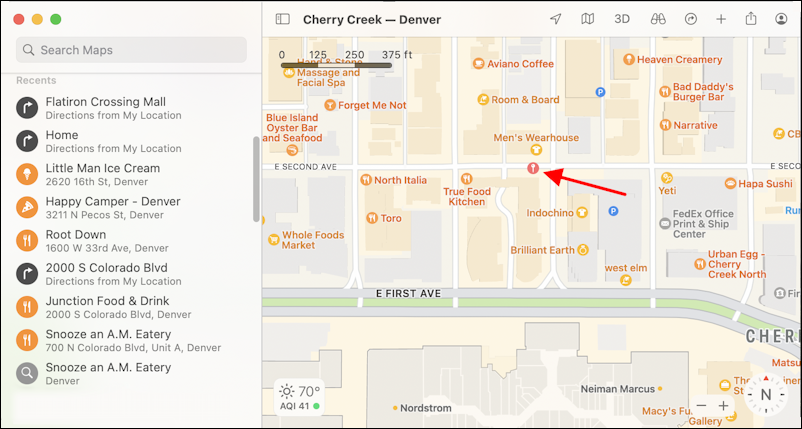
I added the red arrow but the tiny orange icon is the best estimate of the location of the camera when this particular image was captured. Since the restaurant is shown being just a few feet west of that spot, and since the photo is a sort of skewed angle shot of the restaurant’s signage, that’s a pretty solid location!
Armed with this information you can now check to see if your friend’s photos have geolocation GPS information embedded, and if so, bring their location up on a map to see where he actually took them. I hope that ends well. 🙂
Pro Tip: I’ve been writing about Mac systems since the very first model! Please check out my extensive MacOS Help Library for hundreds of additional tutorials to help you be a happy Mac user! Thanks.
I didn’t know that it was possible to visualize GPS coordinates on photographs and locate the location on the photos.
Excellent explanation of the whole process.