
My Dell laptop battery doesn’t last anywhere near as long as it did when I first got my PC. I’m running Windows and just use basic apps like Microsoft Word and Edge. What can I do to extend the duration of each charge?
While our device batteries definitely last longer than they used to, we also now have devices that put a lot more demand on them too. From smartphones that are always running apps even when the screen’s off to computers that are managing background tasks, brighter screens, and even cloud backups, there’s a lot going on that needs power. Fortunately, the tools available in modern operating systems also offer more granular control over what’s going on and even help identify which apps or programs you run that require the most power too!
To start out, as always, please ensure that you’re running the latest version of Windows 10 by going to “Check for Updates” in the System Settings area. The easiest way to do that is to search on the TaskBar for ‘updates’. Now let’s have a look…
ASSESS YOUR BATTERY STATUS IN WINDOWS 10
I’m sure you’ve already realized that one of the tiny icons on the right of your TaskBar is your battery:
![]()
You can see above that my battery’s about 2/3 full. Hover your cursor over it and you’ll get a bit more data:

On this particular PC – a Gateway unit – 69% charge translates into an estimated 4 hours and 8 minutes of usage. That’s not bad, it suggests that on a full charge the battery lasts just about 6 hours on a full charge. Time remaining is an estimate, however, and you can influence that positive or negative depending on your usage. But we’ll get into that in just a moment.
For now, click on the battery icon and another window pops up:
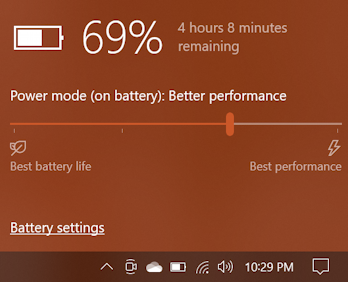
This is the first and easiest place to adjust your battery demand: Move the slider to the left and your computer might be a bit slower, your screen might dim a bit, but you’ll stretch out your battery life. Want the best performance and don’t care how long the battery lasts because you have a power plug at hand? Slide it all the way to the right for the best user experience.
Digging in a bit deeper, click on “Battery settings” on the lower left of this little window. A Settings window pops up:
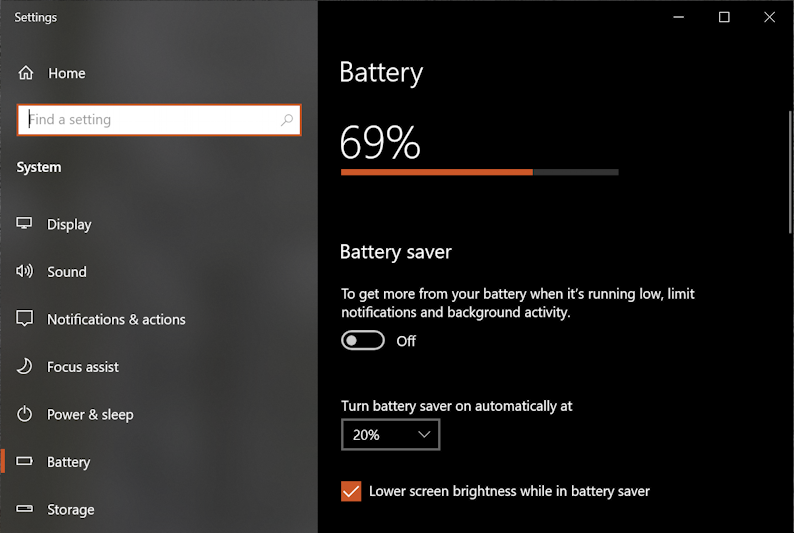
This is where you can set up the very useful Battery saver feature, either by turning it on immediately with the switch or by specifying at what point in the slowly draining life of your latest charge it should start up. Battery saver limits notifications, can disable some background activities, defer cloud backups and even dim your screen (if you enable “Lower screen brightness while in battery saver” which you should check).
UNDERSTANDING WHAT’S DRAINING YOUR PC BATTERY
Scroll down a bit further on this Settings page and you’ll find out something really useful: what apps are actually consuming the most power? You can choose the last 24 hours for analysis or the last week, by default it’s the last day:
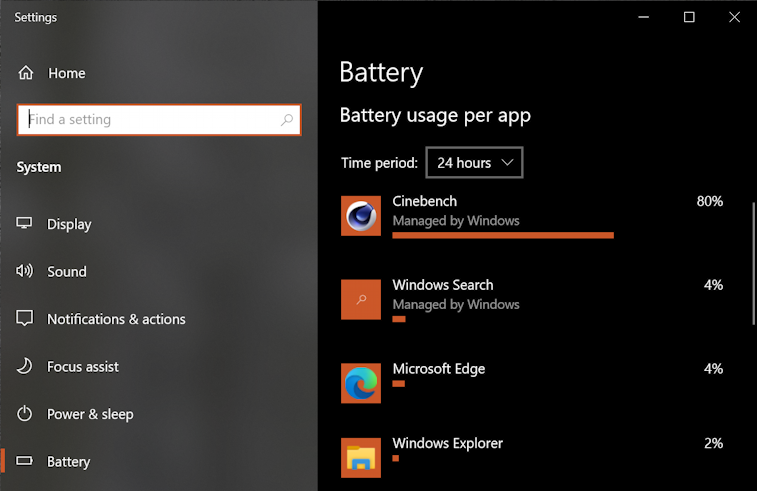
In my case, I’ve been experimenting with the CPU-intensive Cinebench benchmark utility, so it’s no surprise that it’s consuming 80% of my battery while running. Benchmarking is a good way to drain a battery, for sure! Other culprits could be video editing, animation, graphics intensive games, and similar. If it’s a program that you know would “work better” on a faster computer, odds are good it’s also putting some serious demands on your computer too. That being the case, simply plan to defer using these particular programs until you are plugged into a power source (or just know that they’ll have a serious impact when run).
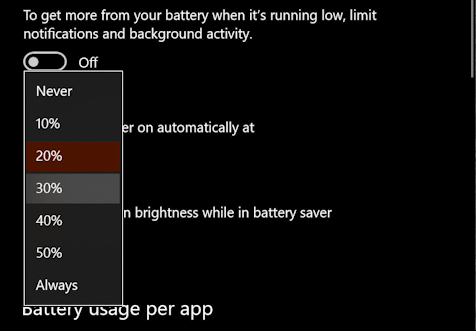
Scroll back up and you can change Battery saver to be enabled when you’re at 30% battery, 40% battery, or similar:
Other factors that can impact battery life include screen brightness and one that everyone forgets: cloud backup. Indeed, enable Battery saver and Windows will even warn you about it:
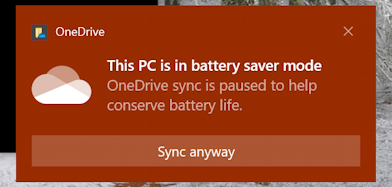
I appreciate that my PC is smart enough to defer things like a OneDrive backup until I’m plugged in again!
Speaking of which, while you’re in Settings, search for “power” and you’ll find some interesting matches:
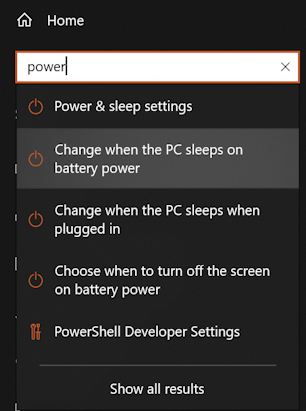
All of these settings are managed in the same place, so choose any of the prompts, like “Change when the PC sleeps on battery power” to get to a different spot in Settings called Power & sleep:
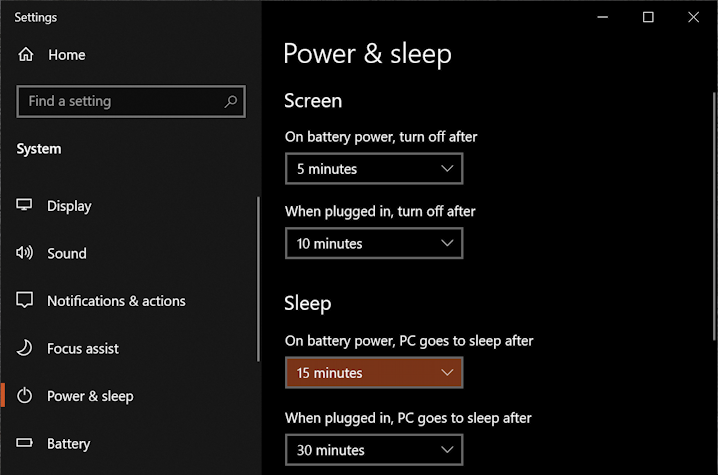
You can see the default settings above. If you really want to maximize your battery, shorten the times for “on battery power” settings. I will warn you that turning off your screen any faster than about 5 minutes is going to be really frustrating if you ever read content in a web browser or other program: It’ll sleep the screen mid-paragraph! But that sleep setting is an important one because if you do get distracted or walk away from your PC, having it sleep quickly is smart: why use battery power if you’re not even there?
Finally, I’ll also note that there’s an older settings interface for the very same bunch of settings you can access if you right-click on the battery icon in the Taskbar:

Why “Power Options” doesn’t take you to the same Setting I cannot explain, but now you know!
With all of these different settings and options, you should now be able to really maximize the battery life of your PC without much impact on your work or enjoyment.
Pro Tip: I’ve been writing about Windows 10 for quite a while, and earlier versions of Windows before that. While you’re visiting, why not check out my Windows 10 & PC help area? Thanks!