
I want to have quick access to photos I’ve taken on my iPhone over on my iMac system. So I want to use AirDrop. But I can’t quite make it work. Help!
Apple’s AirDrop is a bit of a sleeper technology because it only works with Apple devices. iPhone to iPad? Yup. Mac to Mac? Yup. PC to Android? Uh, no. Not even close. But it’s actually not particularly well documented nor is there a central spot for settings to help you understand what you need to share between devices for it to work. Turns out it needs both Bluetooth enabled on both devices and for them to be on the same Wi-Fi network too. It then creates what’s known as an ad-hoc wireless network for file transfer.
Lots of complicated tech talk, right? The good news is that if you have Bluetooth enabled on both devices and they’re both on the same wireless network too, you’re good to go. If not, your recipient device simply won’t show up as a destination option, which will be your cue to go and double check connectivity.
Once it is all hooked up, it’s crazy easy to work with. For example, here I am in Photos on my iPhone viewing a pic I just took:

To share a photo, I can use the Share button. That’s the square along the top with the arrow pointing upwards. A tap and since everything’s hooked up, my MacBook automatically shows up as an AirDrop target:

You can see all the people I share text messages with (they’re easy shortcuts for sharing too!) but the first one is the target of choice. “Dave’s MBP III”. Notice it has a tiny AirDrop icon adjacent to it instead of the white-on-green Messages icon of the other shortcuts.
Ready to upload the photo? I just tap on the MacBook Pro icon and wait about five seconds for the magic behind-the-scenes ad-hoc network to be established and work, then a notification pops up on the Mac:

Yes, it’s that easy. A click on “Open” and I’m viewing the image on my Mac system:

Notice that it’s an HEIC format image. That’s Apple’s proprietary high efficiency image container format and while it’s great for Apple apps, it’s dead useless anywhere else. So while in Preview, choose “Export” and you can easily convert it to PNG or JPG:

Another problem solved. Easy. Now let’s back up just a bit. What if on your iPhone you didn’t see your iMac as a handy sharing shortcut? Then just tap on the AirDrop icon along the bottom instead. You’ll get a list of target options:

Christopher and Faith have their devices pretty open. Not what I recommend. Instead, on your Mac, open a new Finder window, then click on “AirDrop” to view what the MacOS X system sees as AirDrop recipients:
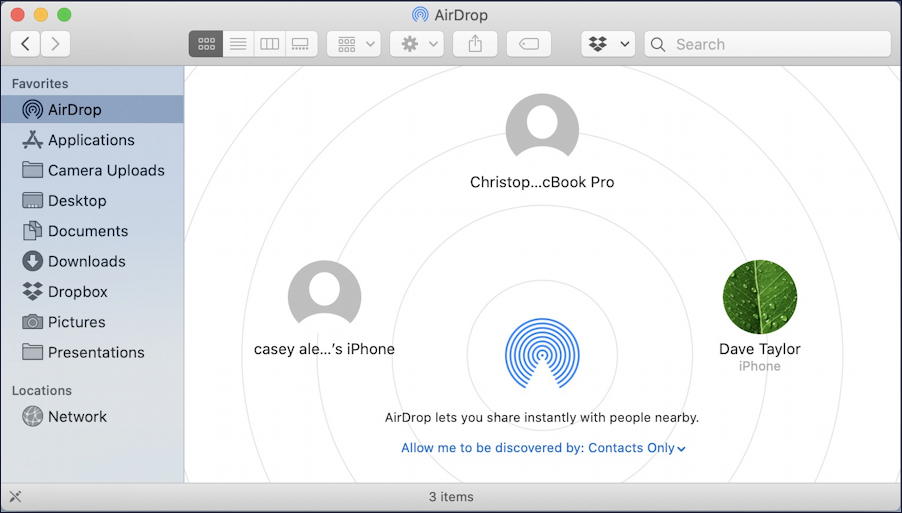
Now Faith’s been replaced by Case Ale… which is still problematic for security. What you want to do is go to the bottom here and choose “Contacts Only” as I have done above. If you have “Receiving off” then you’ll either have transfers all automatically fail or be prompted (seems to vary without any logic). You can find the same setting in Settings on your iPhone too. Go into Settings > General > AirDrop and ensure that it too is set to “Contacts Only” and you should be good to go!
Pro Tip: I’ve been writing about the Mac since it didn’t have overlapping windows. Yes, a long time. Please check out my extensive Mac help area for tons more tutorials and how-to guides!