
I find it super frustrating that when I drag photos into Gmail they appear at the cursor point, but in Outlook they show up above the email and are then sent as attachments. Is there a way in Outlook online where I can actually add inline photos or pictures??
As a former email program developer myself, I imagine that the Outlook and Gmail developers are constantly checking each other’s products for features and capabilities. Along with Yahoo Mail, Thunderbird on Linux, Apple Mail, and so, so many other programs. It’s a good thing; if one of the companies really innovates with a user interface feature, that can then migrate to other programs too (within the limits of software patents, of course, but they rarely apply to the user experience).
You’re right, though, Gmail makes it really easy to add inline images, in a way that few other programs manage. Simply make sure your cursor is in the right place in your message and whatever you drag onto the composition window appears at that exact spot in your message. Logical. Outlook doesn’t view it quite the same way, though, assuming when you want to add something, be it a Word doc, Excel spreadsheet, or JPEG image, you want to attach it as an addition to the message you’re composing. Frustrating.
Fortunately, there are not one, but two easy workarounds, as I’ll demonstrate…
HOW TO ADD A PHOTO INLINE TO AN OUTLOOK EMAIL MESSAGE
The first thing to do is remember that if you reduce the size of your images before you add them to your email, the message will be smaller and less likely to hit a size limit en route. Most graphics programs have easy ways to resize images. I suggest 1000px or even smaller for a computer or mobile device screen is plenty (remember, a modern smartphone can take pics that are 3000×2500 or bigger!)
With that in mind, here’s an email I’m composing in Outlook online:
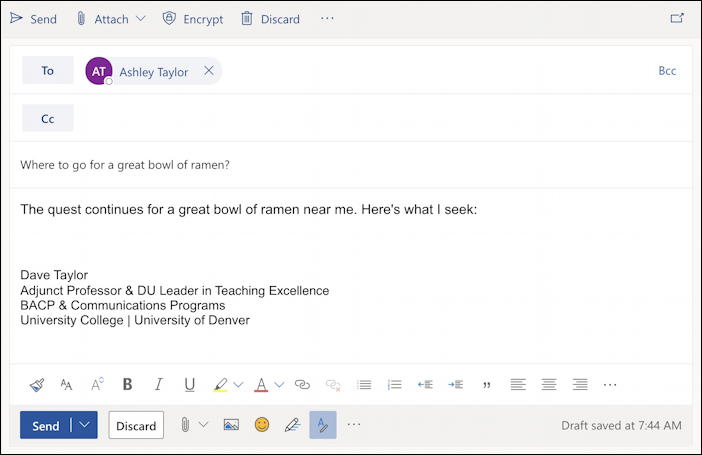
Since I spend a lot of time in Gmail, I’ve already opened up a space for the photo I want to include, and the cursor is in that blank few lines area. When I drag an image onto the composition window, it recognizes that something’s happening:
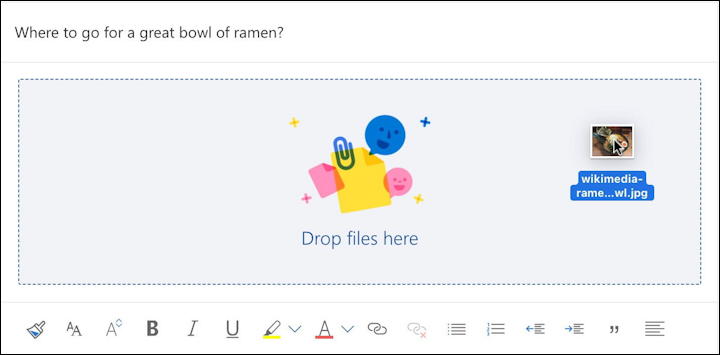
Problem is, as you know, that when I release the cursor and ‘drop’ the image, it doesn’t go to that insertion point in the message. Instead, it shows up at the top of the message:

Frustrating! Move the cursor over the image, however, and a downward-facing triangle appears. Click on it and there’s a hidden menu:
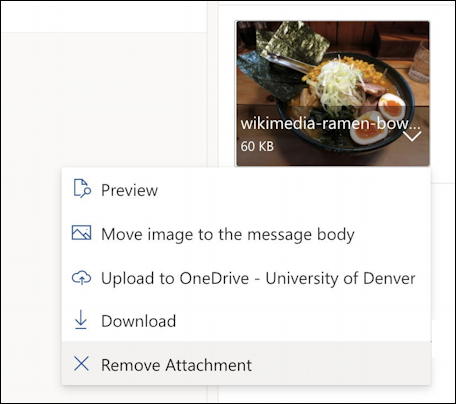
I could simply remove the attachment, as highlighted, but you can also choose “Move image to the message body” which then does what you want. Solved.
But there’s a better way to accomplish this inline image feature in Outlook. It’s one of the zillion buttons along the bottom of the email composition window:

Yes, the tiny image icon along the bottom can be used to put the image inline rather than have it included as an attachment.

What a lot of people don’t realize is that you can click on the image and resize it too. Click and what are known as handles show up around the edges:
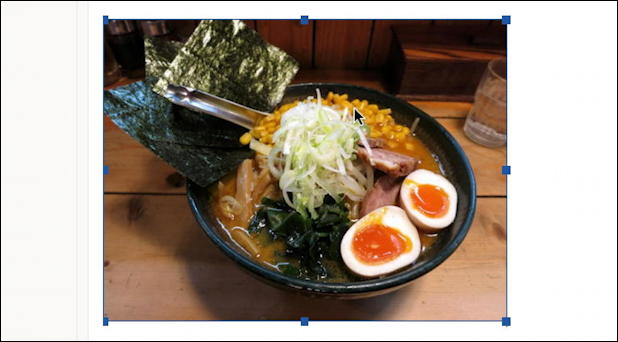
These are all intended to be clicked and dragged, with the corner handles letting you resize in two dimensions simultaneously, while the mid-edge handles let you change just the image height or width. I often click and drag the lower right corner handle to quickly shrink images.
Either way, now you know how to include inline images with Outlook. And while we’re at it…
HOW TO CREATE ACTIVE HYPERLINKS IN OUTLOOK EMAIL
Based on the email I receive, most people don’t seem to realize that, just like a Web page, you can choose a word or phrase in an email in Outlook and turn that into a clickable link. It’s easy. Start by clicking and dragging to select the so-called anchor text, the word or phrase you want to turn into a link.

When you select some text, basic text formatting options appear. I usually choose to bold something I’m linking to help it stand out. While it’s still selected, however, go back to the bottom toolbar and look for the chain link icon. A click reveals a menu with three options:

You can interact with OneDrive, the cloud storage system that’s part of Microsoft Office, but in this instance, we just want “Insert link“, so choose that. A tiny window pops up:
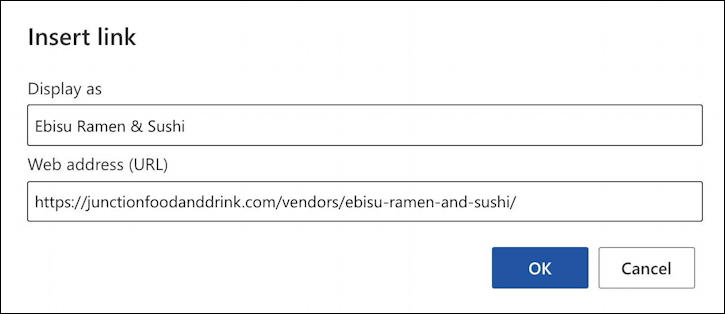
Now just paste the URL you want into the “Web address (URL)” box. Click “OK” and you’re done. Mission accomplished. Easy, right?
And that’s it. Now you know how to add inline images to your Microsoft Outlook emails, resize them to best fit, and even add hyperlinks to other content on the Web. Go get ’em, tiger!
Pro Tip: I’ve been using and writing about Microsoft’s Office Suite for many years. Please check out my Outlook help library for plenty of useful tutorials, as well as additional Office 365 help pages! Thanks.