
A friend of mine posts photos of her baby and they always have really cute frames too. I want to be able to do the same in Facebook. What’s the secret, or is it a third-party app she’s using?
It’s quite possible that your friend is using a third-party app on her mobile device to add pretty frames around the photos she’s posting on Facebook, but maybe not… Turns out that Facebook for Mobile has its own built-in graphical frames, they’re just very easily skipped past in the zeal to share your photographs with everyone else on the popular social network.
I will preface this by saying that it’s only on Facebook for Mobile (in other words only from your iPhone or Android phone) not from the desktop app or from within a Web browser. But if you’re like most people, you’re posting your photos from your phone anyway, so that’s easily solved. Some stats say that up to 98% of Facebook users access the platform via mobile, so unless you’re one of that odd 2 %, you’re good.
HOW TO SHARE/POST A PHOTO ON FACEBOOK
You’re already an old pro at this, but it’s worth noting that you can’t just be in your Photos or Gallery app and share a picture to Facebook. You need to start out in the Facebook app to get to the right place. In other words, in Facebook for Mobile, you’ll be here:
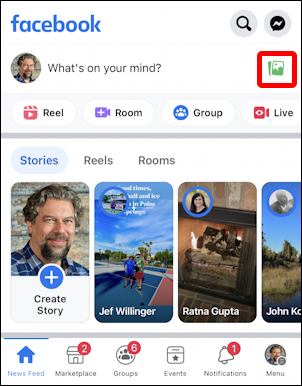
Tap on the green photos icon as highlighted above and you’ll be at the photo picker screen:
Done! Right? Ah, well, no.
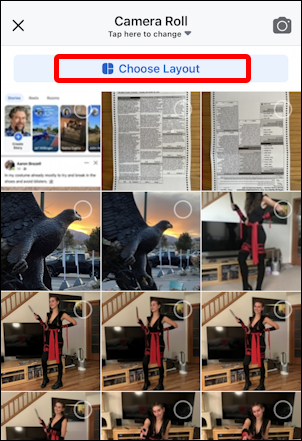
What you want to do once you’ve picked out a photo to add (the empty circle will fill in, and yes, you can pick more than one if you want to make a montage) is tap on “Choose Layout“, highlighted above.
CHOOSING A GREAT PHOTO LAYOUT ON FACEBOOK
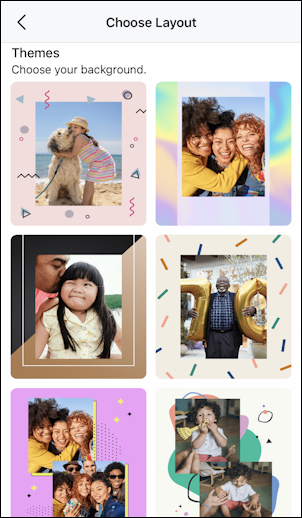
This brings up a two-part gallery, and it’s the fact that it has two sections that I think trips up a lot of people:

It’s easy to miss the very bottom where it says “Themes: Choose your background”. Swipe down, however, and you’ll see that there are a lot of pretty darn fun layouts and frames:
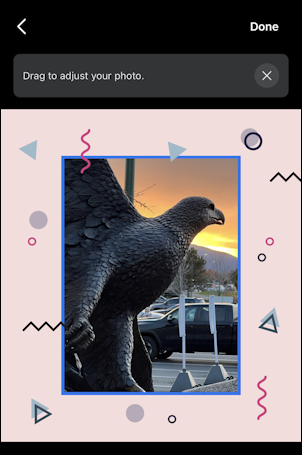
I chose the eagle sculpture against the sunset photo earlier, and now I’ll pair it with the pink squiggles frame by tapping on the first theme on the top left.
Facebook shows you your photo with that ornamental frame theme graphic around it:
A rather weird juxtaposition, but hey, it’s Facebook. The goal is to get attention, right? 🙂
FINE-TUNE YOUR PHOTO THEME BEFORE POSTING
At this point, you can tap and pan around in the photo to get it framed just so by putting your finger on the image and moving it slowly up, down, left, or right.
A tap on “Done” on the top right and there’s yet another batch of edits and changes you can make:
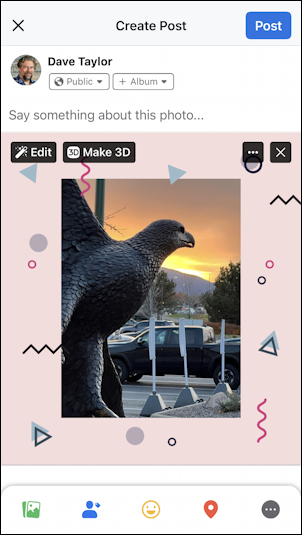
All the usual, tagging location or people in the photo, adding emoji, etc. Notice that this photo can also be made 3D by tapping on “Make 3D”. Try it; you’ll find that the frame elements are also 3D which ends up being really weird. You might like it, but I found it disconcerting!
Add a caption as desired and tap on the blue “Post” button. Congrats, you’ve just posted your first photo on Facebook with a decorative frame. Easy enough.
Here’s how it comes out:
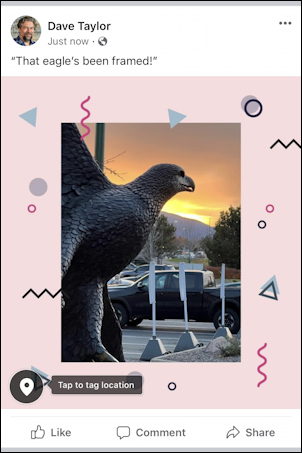
Quite cool, actually, and it only took a couple of extra taps to turn the photo into something more memorable. Now you go and try it, you’ll find it’s easy enough too.
Pro Tip: Please check out my extensive Facebook help library for tons more useful tutorials while you’re visiting. Heck, while you’re at it, why not follow AskDaveTaylor on Facebook too? Thanks!