
I purchased a new Apple MacBook Pro with TouchBar when it was first released. After owning many generations of Apple laptops, I knew that one of the most important followup purchases I’d make would be AppleCare. Here’s how I saved on its purchase…
Any long time Apple device owner knows that AppleCare is one of the best purchases you can make. Whether it’s simple things like a worn out keycap or more serious problems like a display breaking or a port failing two years after purchase, AppleCare is the difference between Apple charging you an arm and a leg for a repair and it being free.
I know, my previous generation MacBook Pro has had its keyboard replaced, a completely new display system installed, battery replaced, and, yes, lots of keyboard keys replaced as they began to wear out after years of typing. All gratis, because I purchased AppleCare from Apple. It’s the best insurance policy you can buy, extending your warranty from 90-days of phone support (and 12mo of in-store care) to three years of hands-on support.
For all that, however, Apple doesn’t offer any discounts at all. So how do you save a few bucks when you buy AppleCare for your device? By getting it through Amazon.com instead.
Now before I go any further, a really important disclaimer: You have to purchase and register AppleCare for your device within the first year of its purchase or it won’t be honored, whether you buy it or not.
So pop over to Amazon, search for “AppleCare” and you’ll see there are lots of options:
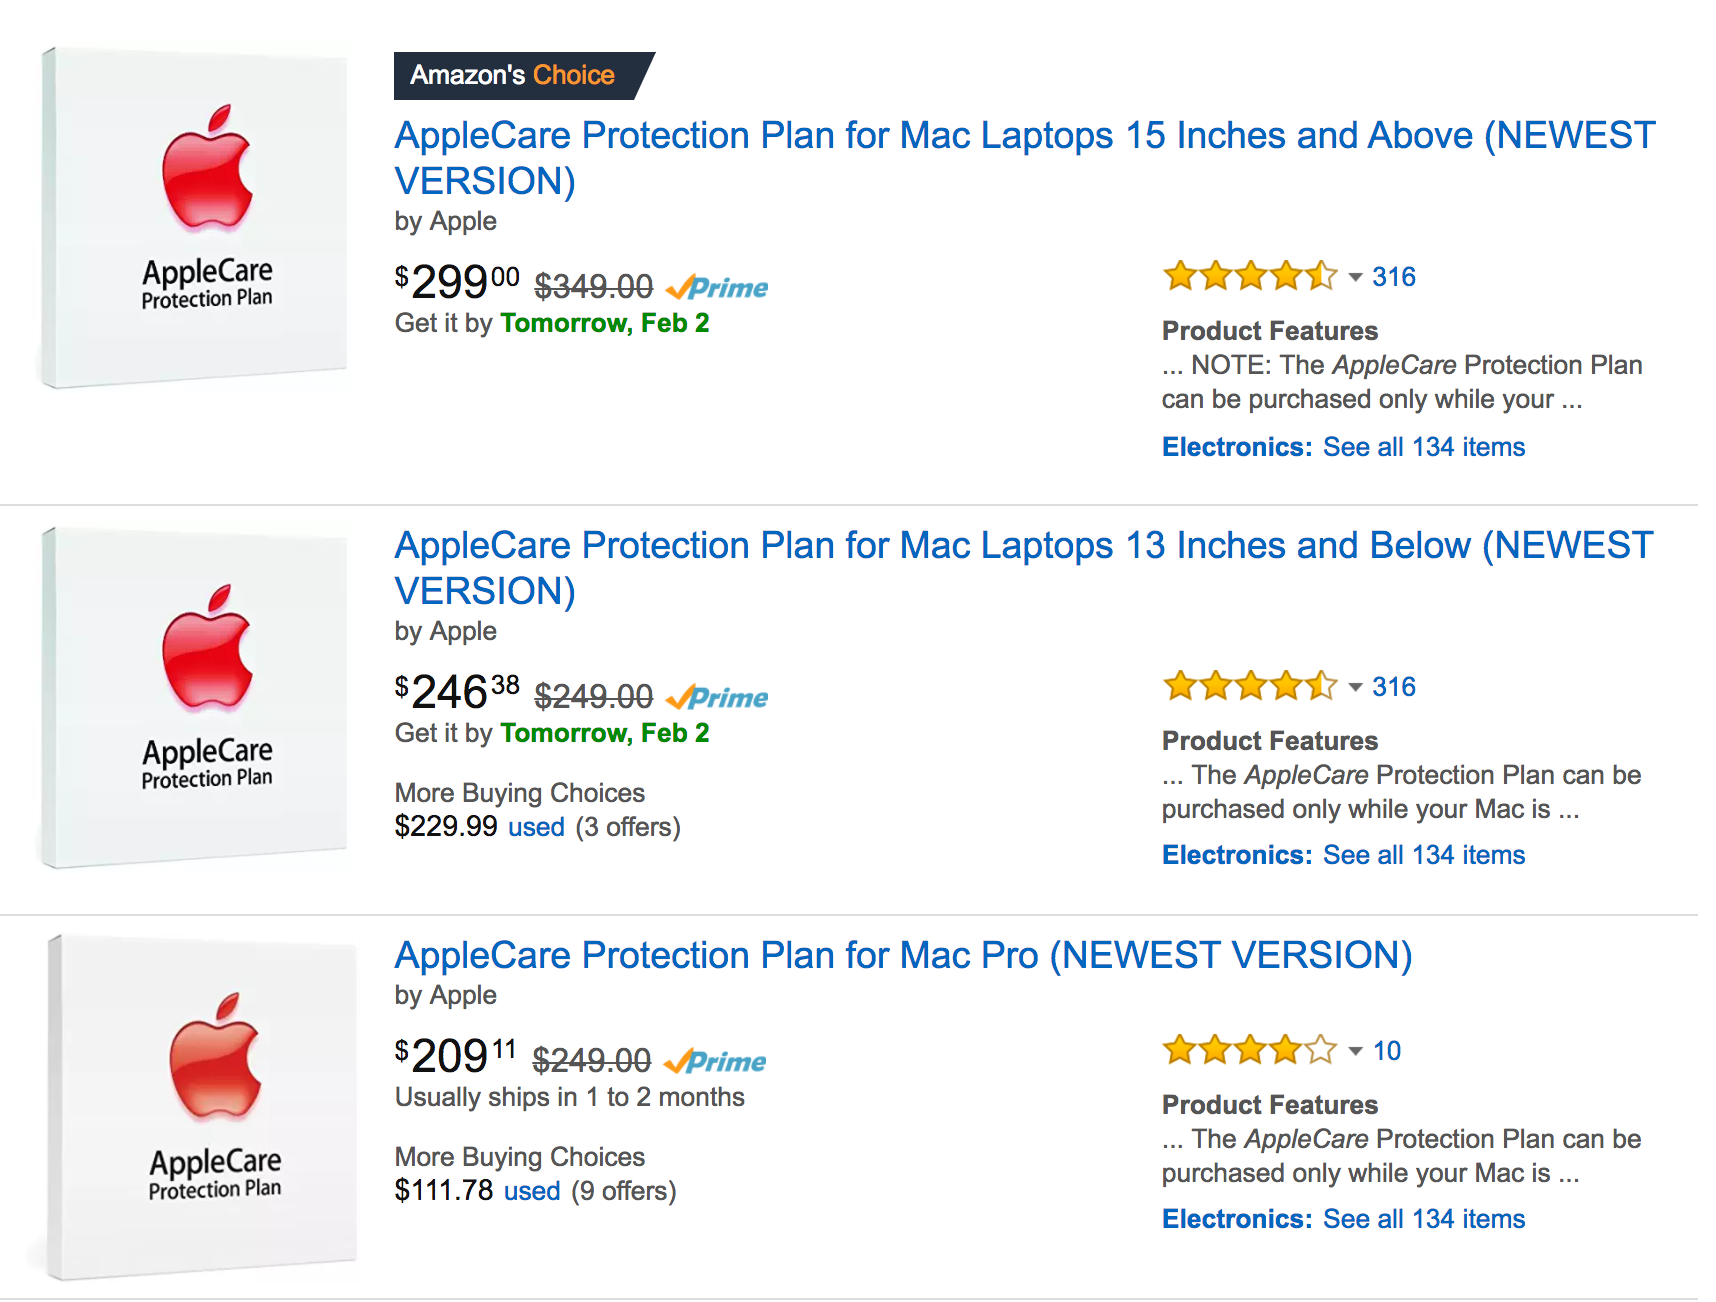
It’s important to get the right package for the device you want to have covered, and be aware that a “Mac Pro” and a “Mac Laptop” are not the same thing at all.
I ended up buying the AppleCare Protection Plan for Mac Laptops 15 Inches and Above, and if you look closely, it’s $299 instead of $349. Yup, that’s a $50 savings. Easy enough.
Worth mentioning is that even with Prime’s free second day delivery, it took about two weeks to finally show up at the office. You might get yours faster, but it’s worth keeping in mind if you’re getting very close to that one-year ownership cliff.
When it does arrive, you’ll find that you have a box with a sticker inside. How do you actually register your laptop with Apple so that coverage starts? The good news is that you don’t need to go into an Apple Store or even talk to anyone on the phone. In the box is the all-important Protection account number and a URL for you to start the process:
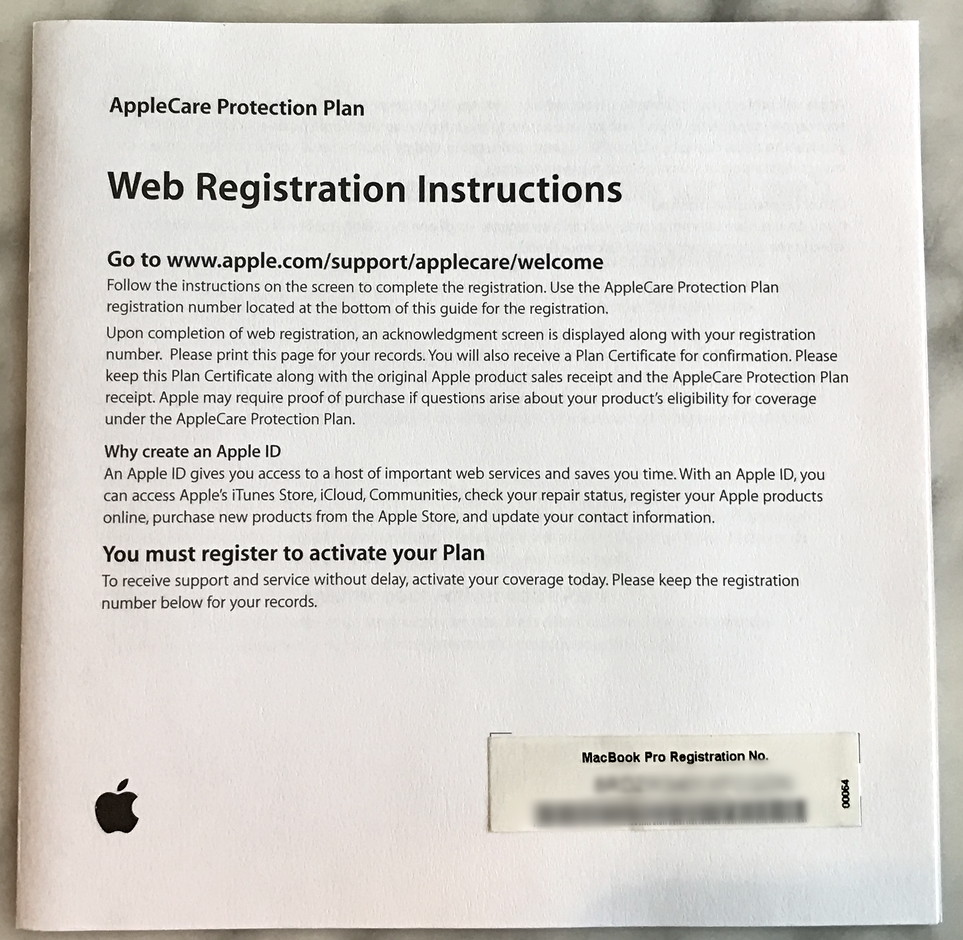
Eagle-eyed readers will see that the starting spot is www.apple.com/support/applecare/welcome
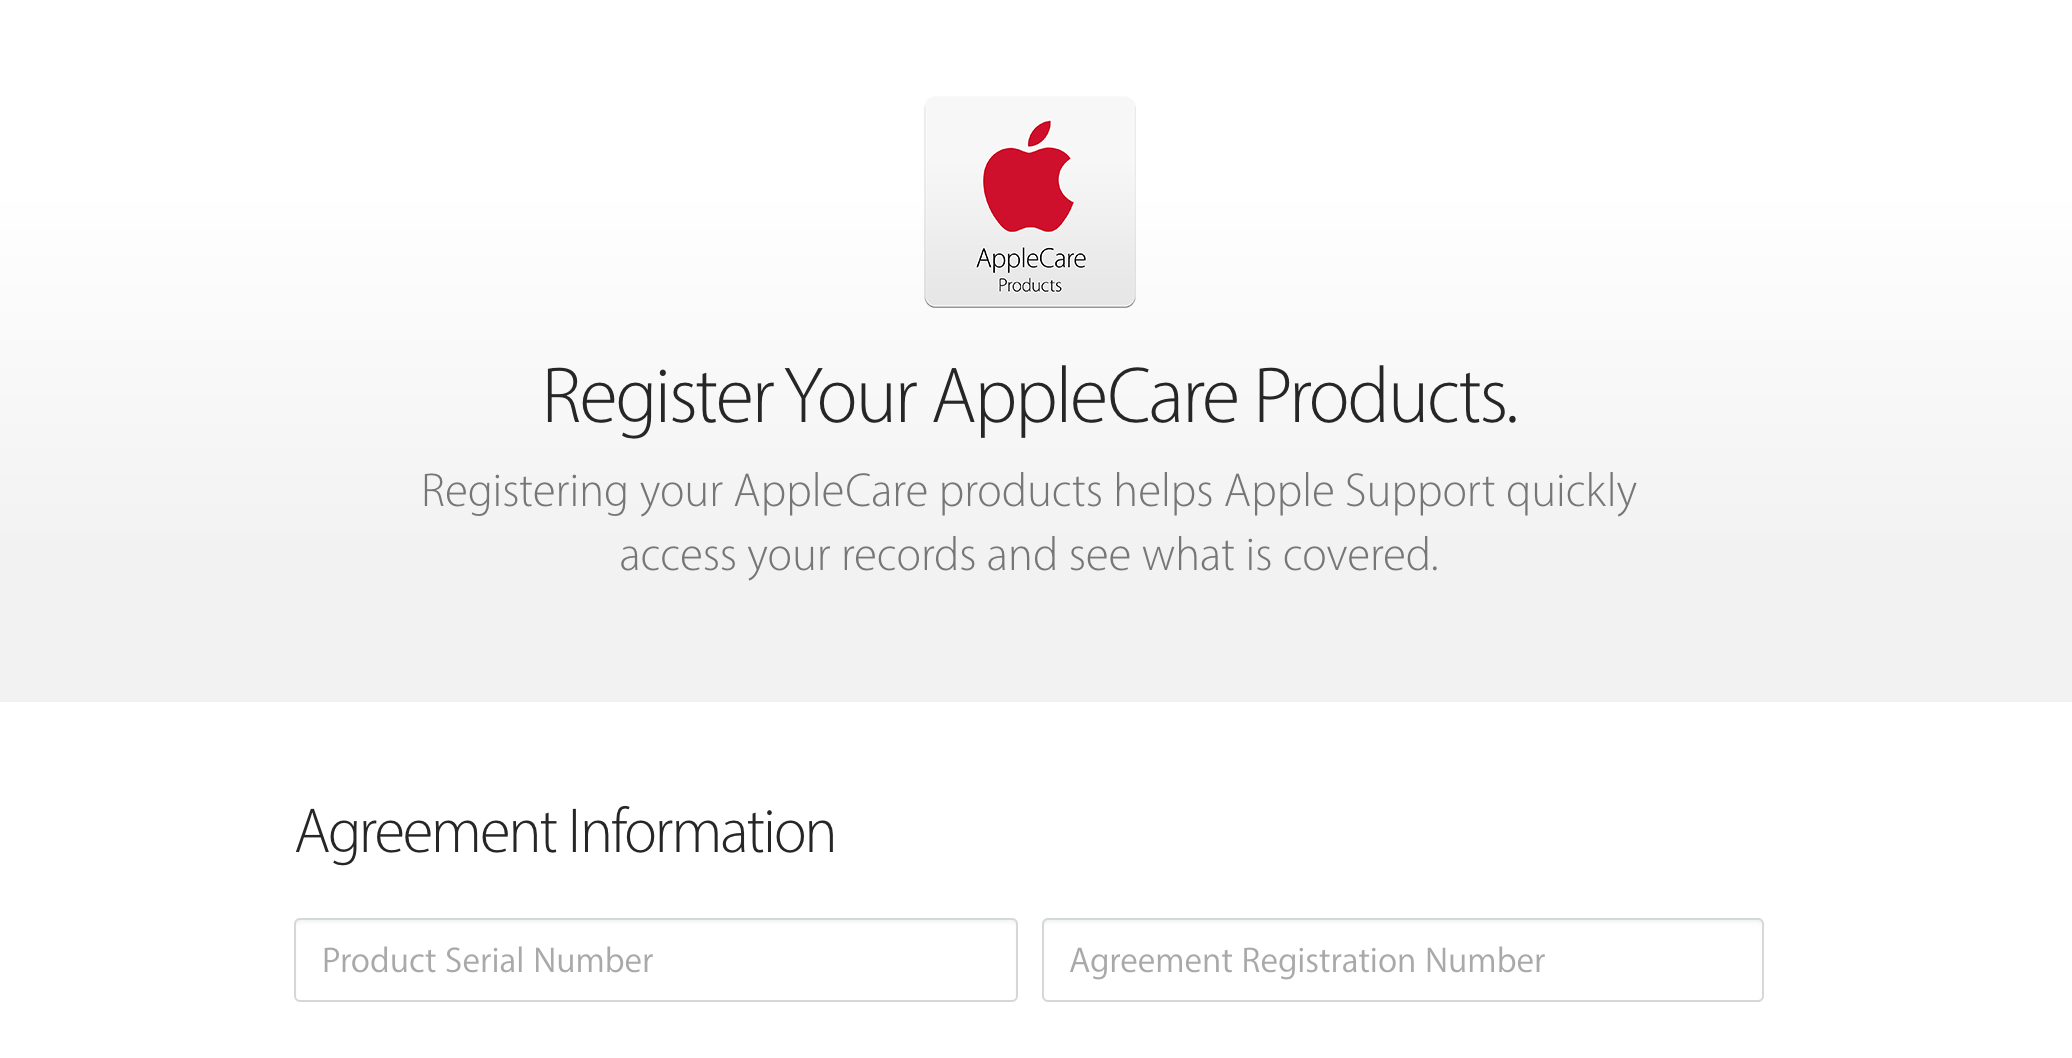
Go there, new AppleCare registration number on hand, and you’ll be welcomed to the online AppleCare Product Support center:
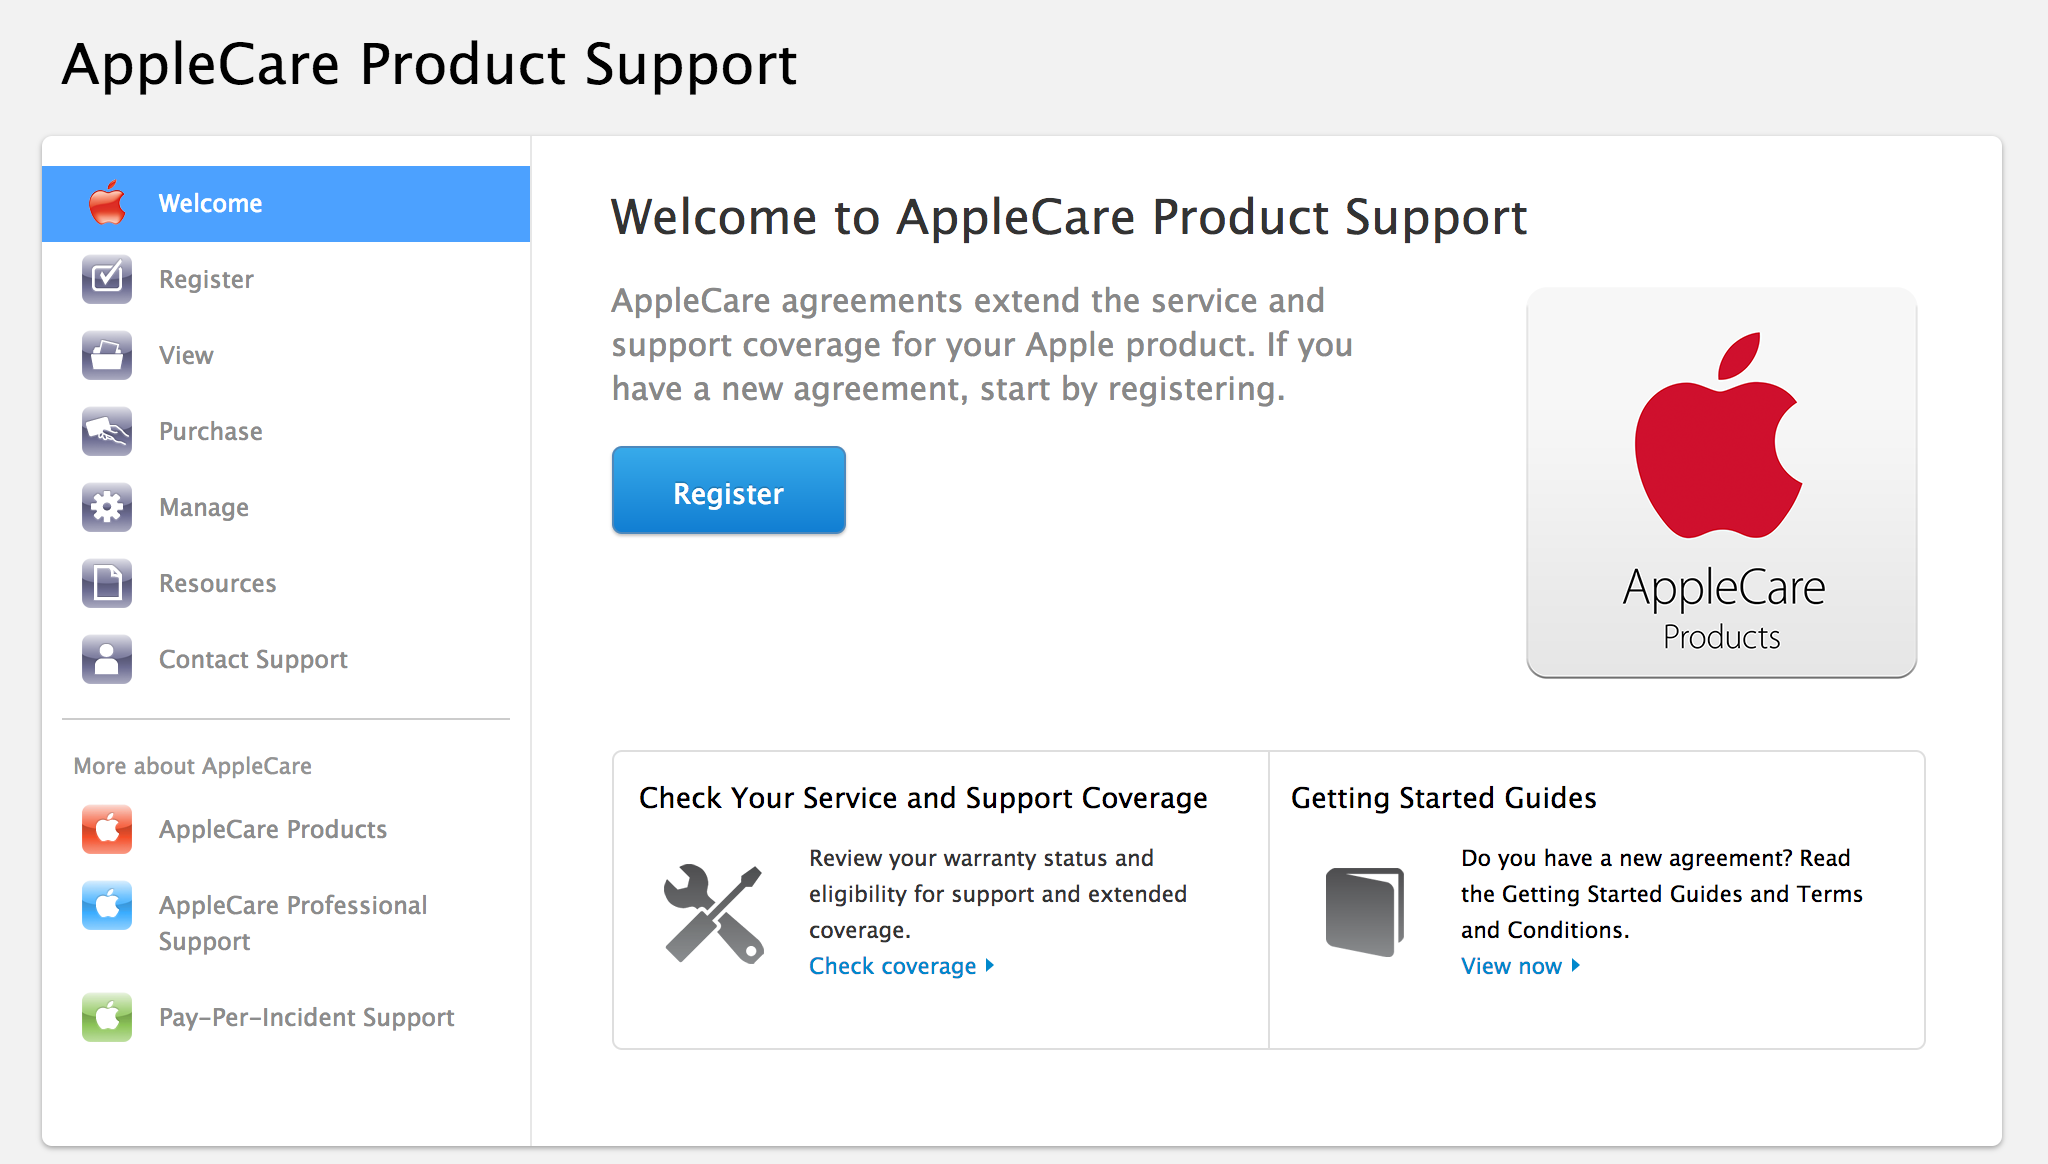
Fortunately, the next step is front and center: Click on “Register“.
Now you’ll get a chance to read the small print, and get a reminder that in addition to the AppleCare registration number, you’ll also need your hardware serial number too:
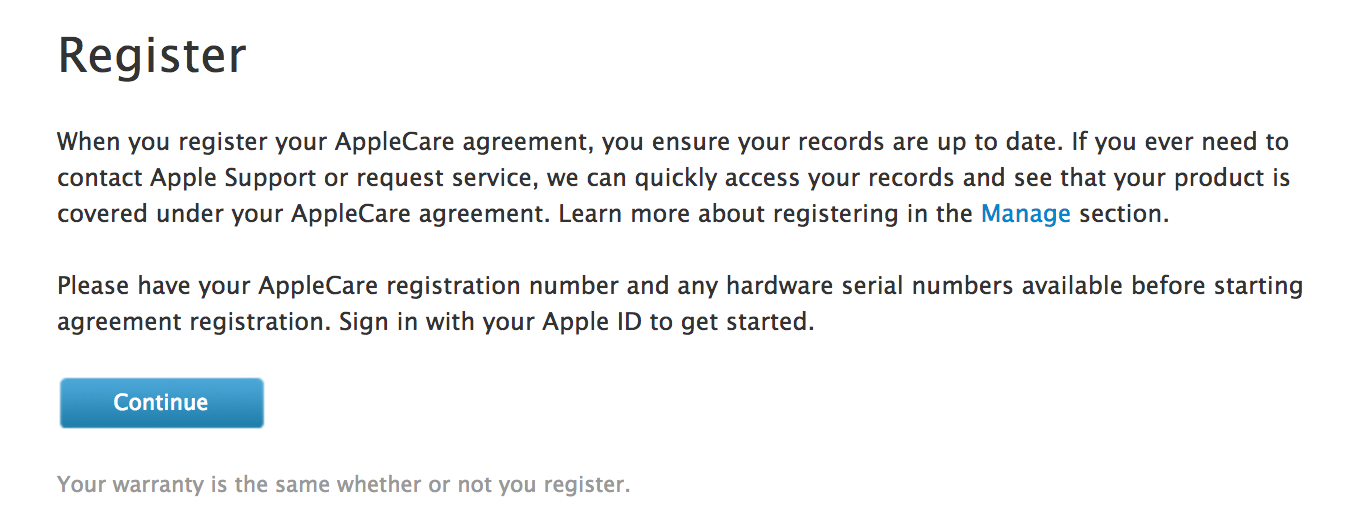
Good? Then let’s continue by clicking on “Continue“. Dawn and Charles will welcome you:

Okay, I made up those names, but they look like a Dawn and a Charles, don’t they? In any case, you’ll need to either create an Apple ID or log in to your existing Apple ID account. Hopefully easily done. Click “Sign In” once you’ve entered the correct data.
Now you’ll be prompted for both your laptop or desktop serial number and the agreement registration number (on the sticker in the AppleCare box) to proceed:
The agreement number is easy, it’s printed on the page you’re probably looking at. But the product serial number? If it’s a MacBook laptop like mine, it’s easy to get by choosing “About This Mac” from the Apple menu on the very top left corner. It shows you a familiar little summary screen:
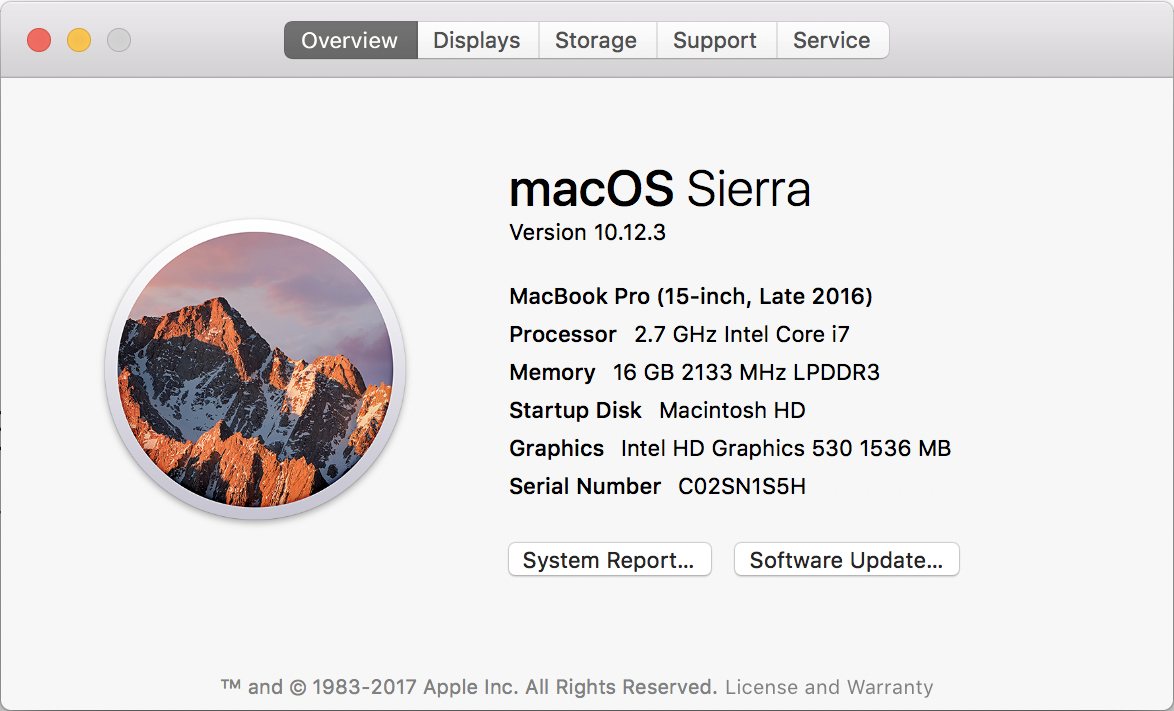
You can see my serial number on the last line. Handy tip: double click on it and you can Command-C copy it to the clipboard, then Command-V paste it into the appropriate field on the Web page form.
On an iOS device, go to Settings > General > About and you’ll see the Serial Number listed near the end of the screen.
Enter both fields of data and if your serial number is for a laptop or desktop computer, you’ll be asked if you want to add one additional device, an Apple display:
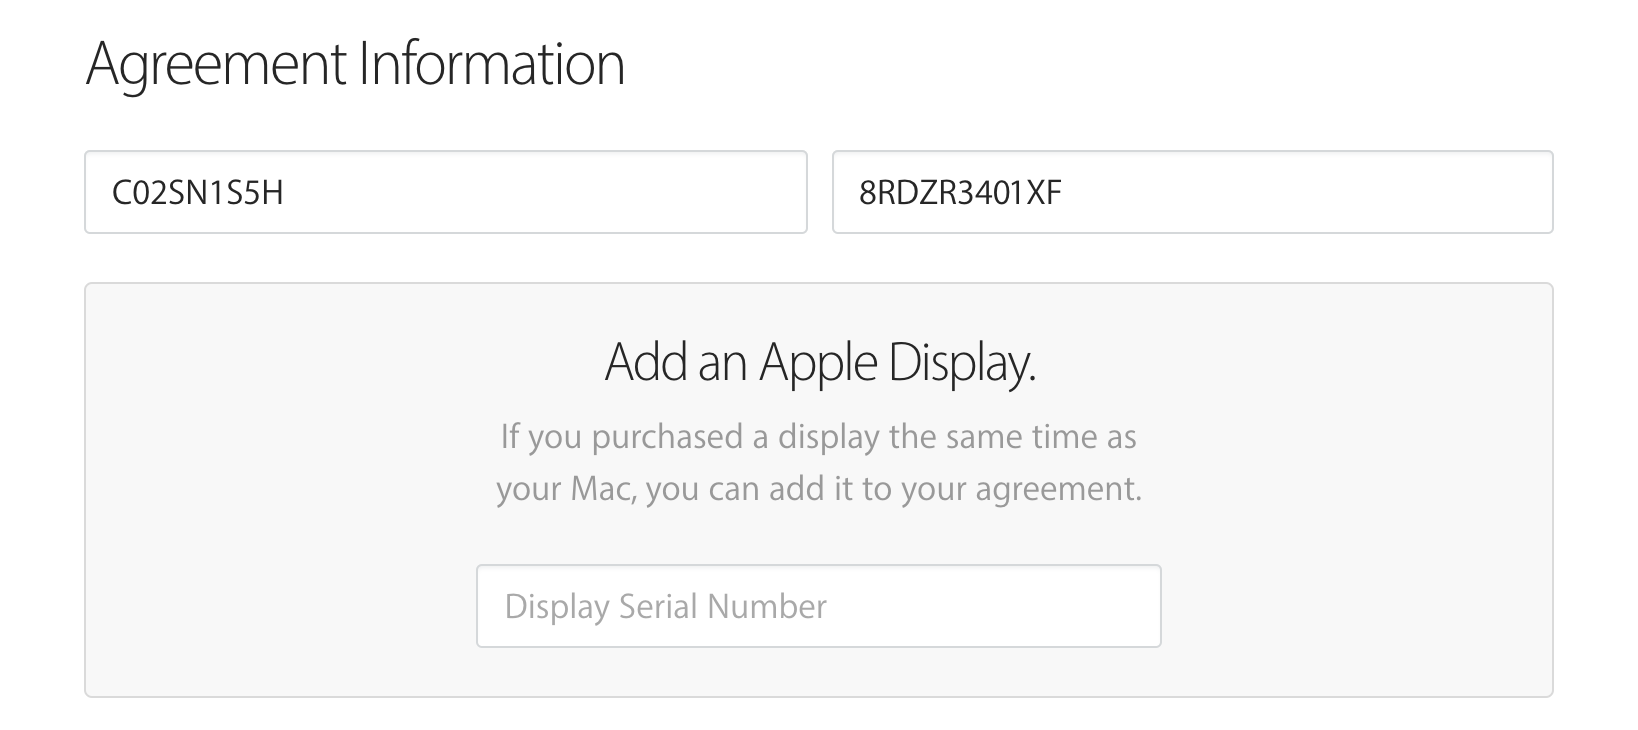
If you don’t have one, no worries, ignore that, make sure the other fields on the page are filled out accurately and properly and click “Register” to proceed. If both values are correct, you’ll see that your registration status is now “pending”, which means that there’s a final approval process of some sort, but this has all worked correctly:

Shortly thereafter Apple will verify that the numbers are both legit and that the AppleCare Agreement hasn’t already been used (sorry, you can’t use mine!). If it all looks good, you’ll get this lovely email message:
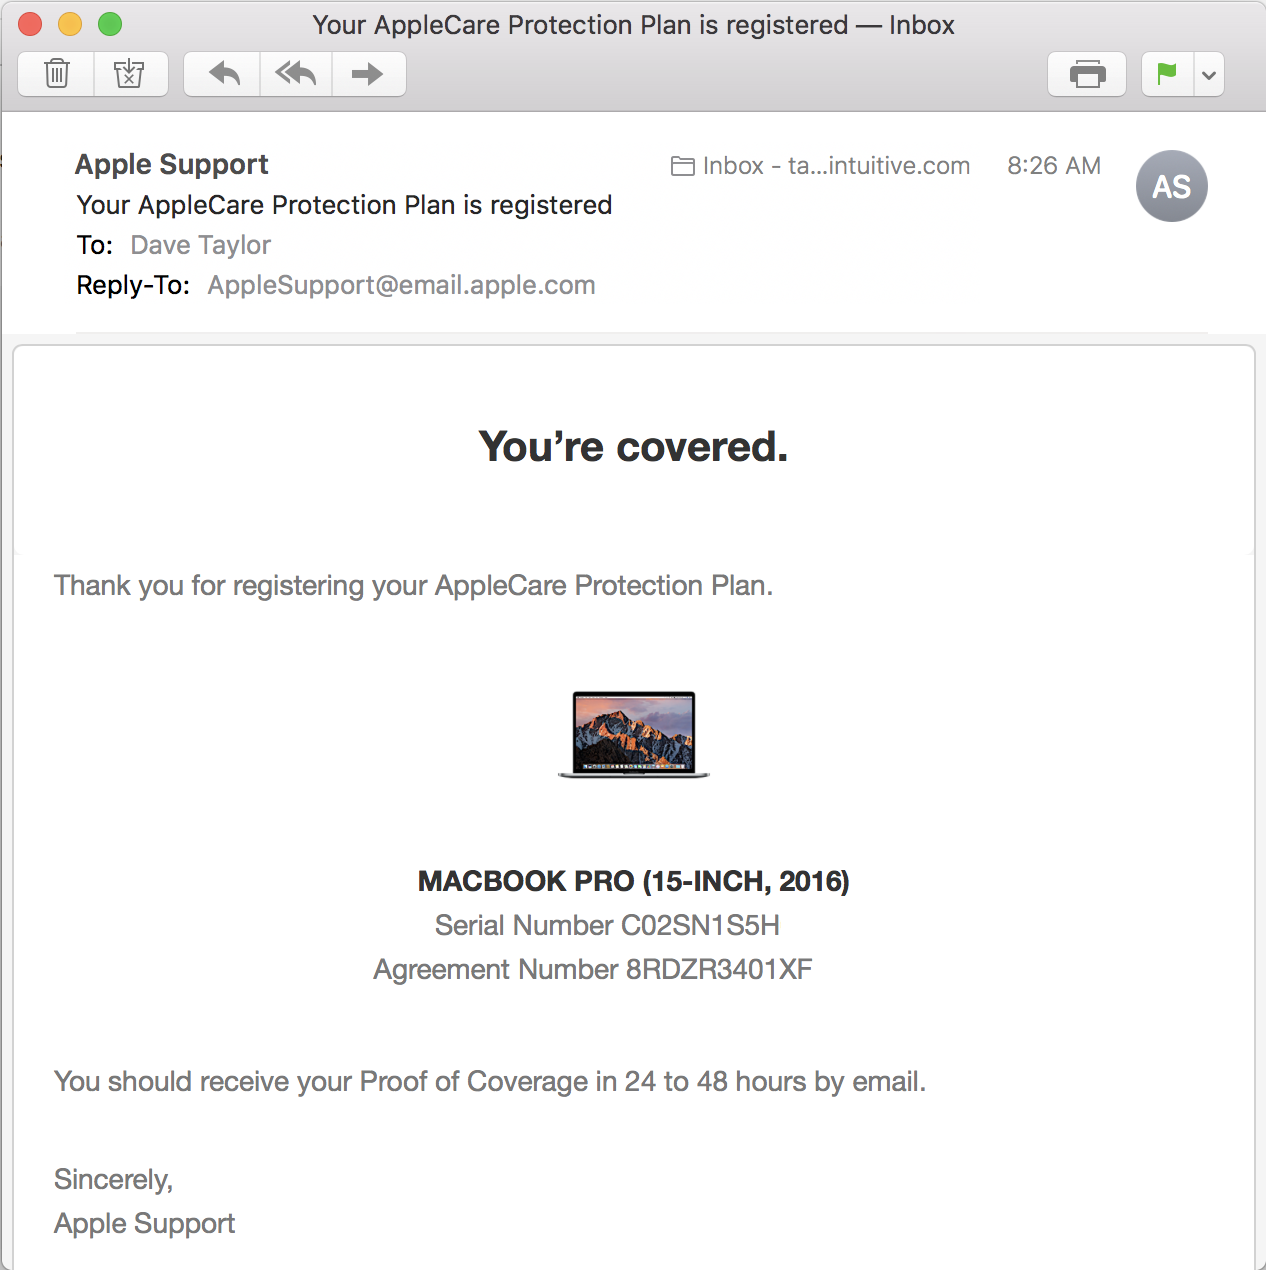
That’s it. Done. MacBook Pro with TouchBar all set up with AppleCare protection, through a discounted purchase at Amazon.com. It’s surprisingly easy to do. Just make sure that you look through all the different AppleCare options on Amazon.com and then very carefully pick the one that’s a match for your product.
Mission accomplished. Money saved. Device protected. Well done!