
I’m running Windows 7 and want to resize a few photographs I’ve downloaded from my digital camera before I email them to friends. How do I quickly and easily resize pictures or photos in Microsoft Windows on my old PC?
I’m so impressed at how considerate you are, wanting to resize your photographs before you share them with friends and family. Me? I seem to have friends who don’t pay attention to this sort of thing so when they share photos with me, those photos are HUGE and I end up having to resize them to even see what they’re about. You know who you are, friends ‘o mine. 🙂
There’s an easy solution for resizing images in Windows, whether you’re running Windows 7 or the more modern Windows 8, but there’s a trick to it because by default images are opened up in the “Photos” app and that has some editing capabilities but doesn’t seem to know how to resize images. Kinda daft, really, but if you want to adjust the color, contrast, or apply some fancy adjustments to your photos before you resize them, “Photos” is the app of choice.
To resize any image or picture file, the tried and true “Windows Paint” application works just dandy.
To start, right-click on the image file that’s on your Desktop and you’ll see a menu full of choices. Look for “Open With” and it’ll show you all the programs you have installed that have said they can deal with the JPG (or PNG) image you’re working with. Here’s my example, using a photo still from an early Godzilla movie:
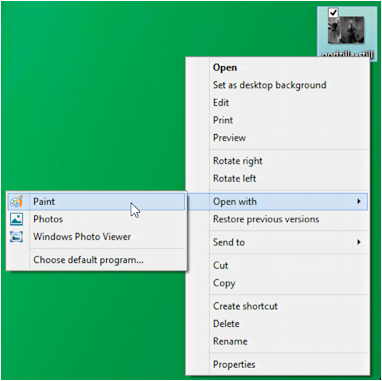
You can see that my choices are “Paint”, “Photos” or “Windows Photo Viewer”. It’s the first of these three that I want to choose, so I do so and click.
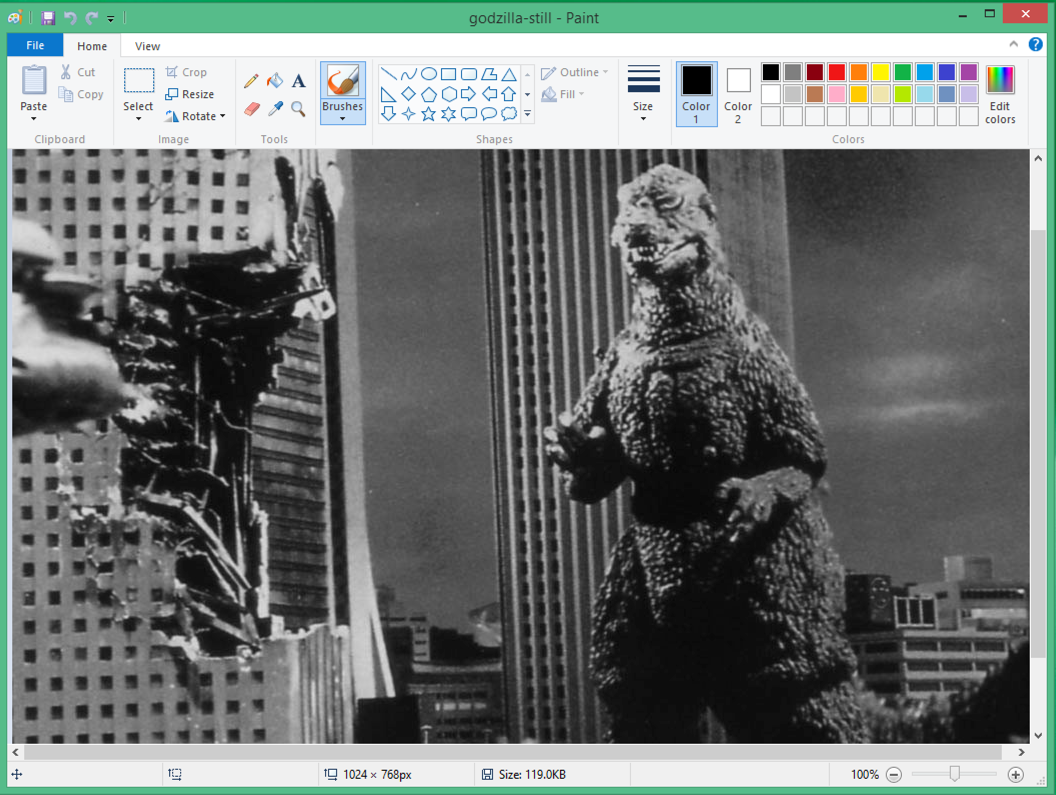
The image is opened up in Paint, showing me quite a few options:
There are two areas I want you to pay attention to here, starting at the very bottom edge.
Let’s look just a bit closer:

As you can see from this close-up, the current image I’m working with is 1025 x 768 (always width x height). That’s a bit bigger than I’d like for an email message, so let’s reduce it down.
To do that, switch your attention to the top left of the window:
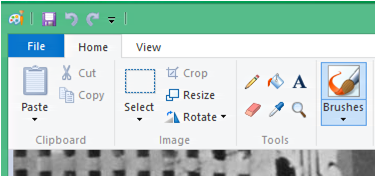
See the “Resize” option? That’s the one we want!
Click on it, and a window pops up:
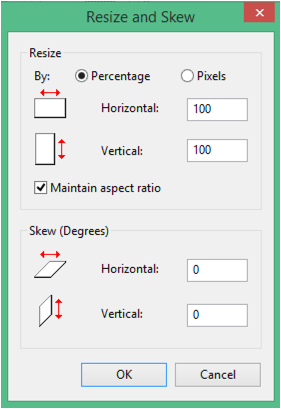
Notice that by default it shows dimensions by percentage. That’s great. Logically, it starts at 100% for horizontal and vertical.
I’m going to resize by simply reducing it to 75% of the current size. To do that, I click in the horizontal percentage box and replace 100 with 75, then click “OK” at the bottom. The result is shown on the very bottom of the window:
![]()
The image itself probably looks exactly the same, actually. Easy enough!
If you don’t care about the original, larger image, you can simply press Cmd-S or click on the tiny floppy disk icon on the top left and save the new, smaller version of the image and you’re done.
That’s generally not considered a good idea because you never know when you want to access the large original image again, so instead let’s go through the steps needed to save the shrunk Godzilla with a different filename.
Click on “File” (it’s blue, on the top left) and choose “Save As…”. You’ll now see something like this:

Quite an impressive list of different image formats. You can stick with the old school JPEG, designed for photographs, but I tend to go with PNG (pronounce it “ping”), which typically does a better job with file compression, making the resultant file smaller.
Choose the format and click. Now you’ll see the usual file save dialog window:

You can see, I’ve typed in “small-godzilla” for the filename. Paint will automatically add the appropriate filename suffix.
Click “Save”.
Done.
That’s it. You can duplicate this process for lots of photos as needed.
Download the free IrfanView and batch process your images in all kind of ways, including resizing.
A great program for resizing photos is Image Resizer. It was originally included in the Windows PowerToys and incredibly simple for resizing only. There is a 64bit program that is NOT a PowerToy, but is identical to the original and is as easy to find as a Google. Simply right click one or more photos and pick from three sizes, small, medium and large. It does not distort and is very quick and great for emailing and uploading to social media sites.
Surely an easier way is as follows:
1. Right click the image you wish to email.
2. Select preview, which opens the image in Windows Photo Viewer
3. From the options bar select email, and in the popup dialogue box select the size you want and click attach.
4. Your email program then opens with the photo resized and ready to be emailed to the recipients you want.
QED
Works for email. But a lot of people resize images for other purposes too, including uploading to social media, etc. 🙂
A quicker way if you don’t want to edit but just resize is to select the photo (or even multiple) then right click and select send to-> mail recipient. Windows will ask if you want to resize. Select the size you want from the drop down box. And proceed to the email.