
I have a dashcam which is great fun, but the videos it produces are huge. They look great, but if I want to share one with a friend, it’s impossible. How can I shrink down my video files on an iMac system?
As cameras get more sophisticated, we’re all enjoying the benefit of higher resolution imagery. Smartphones can now shoot photos that are over 9000 x 6000 pixel resolution, for example. And dashcams are routinely capturing 4K video content as you drive down the road, a resolution high enough you can later zoom in on car license plates and individuals standing on the side of the road. Lots of great upside, but oh! those files. Dashcams try to manage the problem by recording in short snippets, typical 1-2 minute segments, but even those can get pretty darn huge at that 4K resolution.
Fortunately one of my favorite workhorse programs in MacOS X is up for the task of shrinking down those massive video files: QuickTime Player. Used to be that there was a basic player and if you paid a license fee you would be able to use all the editing features (that was “Player” versus “Pro” for those that remember). One day Apple just decided to incorporate most of the Pro features into the default, then called it QuickTime Player, thereby confusing Mac users for years (and upsetting those who loved the greater power and flexibility of QuickTime Pro too).
It’s easiest to just show you how to use QuickTime Player in the latest MacOS X release, so here’s a dashcam video snippet from the VAVA VD-009 Dashcam I’m busy testing out in my car:
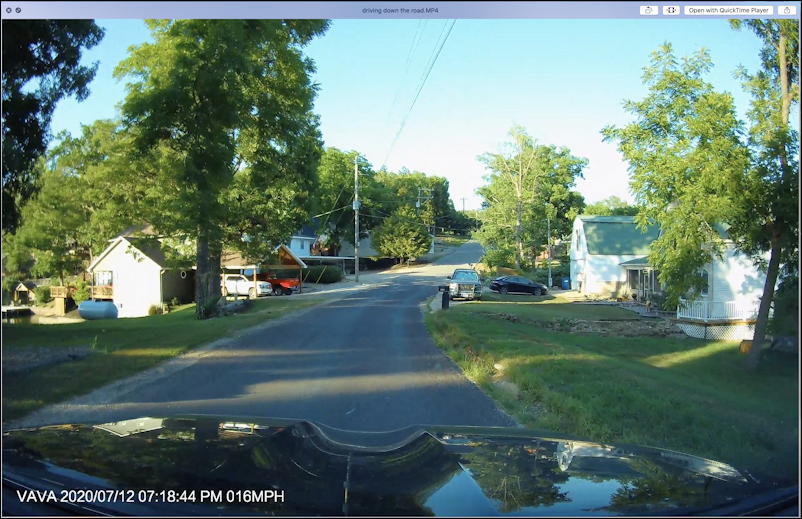
You can see it produces clean, crisp video with a very useful timestamp that includes current speed.
But two minutes of video at this resolution is pretty hefty:

First off, notice that it’s 2560 x 1600, so it’s not quite full 4K resolution (which is 3,840×2,160). Also notice that this 2:01 segment is still a hefty 306.2MB in size. In other words, a really big file, even if you just wanted to share 30 seconds of footage (in fact, it works out to being 2.5MB/sec if you’re curious!)
But QuickTime Player has you covered. Open up the video file with QuickTime Player (probably the default if you double-click on the file) and choose File > Export As to see your resolution choices:
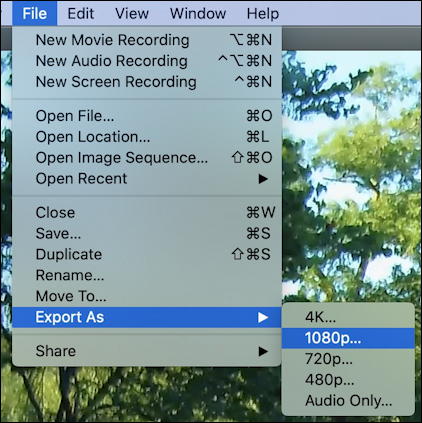
Here’s where there’s an obvious tradeoff you can choose: The smaller resolution, the smaller the resultant video in size and dimensions; 1080p will reduce it a bit, but if you really want to send as small a file as possible, choose 480p. It’s not bad, that’s what most TV shows were using 25 years ago!
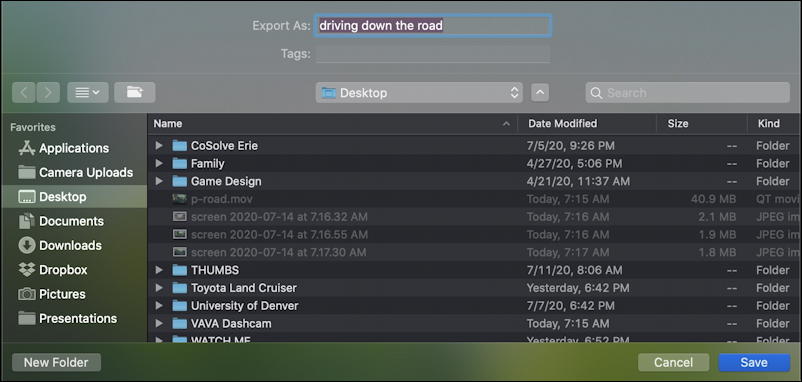
Give your export file a good name and ensure it’s in the desired directory…
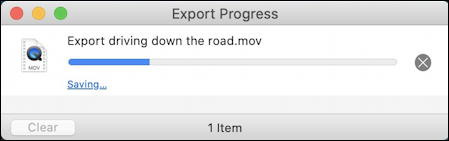
Once you click “Save” it’ll go pretty darn quickly, with a progress bar shown:
Once it’s done you can check the size of the resultant file:
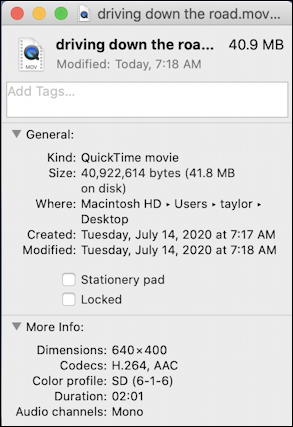
While it indicated it would export in 480p, notice that it’s actually chosen a resolution of 640 x 400. I think that’s to do with the image aspect ratio of the original footage, but either way, notice that the file size has shrunk dramatically, from 306MB to 40MB. How was this sorcery accomplished? Well, the resultant video snippet is definitely lower resolution too:

The easiest way to see the difference is to compare the relative size of the titlebar elements in this 480p version against the original 4K version in image #1. Quite a difference! But 40MB you can send in a text message to a friend or post to Instagram without any hassles at all, so it definitely has its value. And now you know yet another QuickTime Player secret superpower!
Pro Tip: I’ve been writing about the Mac literally since the first unit was released. Please check out my quite extensive Mac help area while you’re visiting!
What about Win 10 OS for shrinking video files?