
I’m a big fan of virtual desktop spaces and use them to separate out my work and personal stuff on my work Mac. Can you give me a heads-up on how to use virtual desktops on my new Windows 11 PC?
I am always amazed at people who don’t utilize virtual workspaces on their computers, actually. Mac, Windows, Linux, even ChromeOS supports the idea of having multiple screens, as if you had multiple physical displays and could slide left and right between them. Windows 11 even made working with virtual desktops easier than it was in Win10, actually! It’s a button that’s probably sitting in the middle of your Taskbar right now. Like all modern virtual workspace solutions, you can also use keyboard shortcuts to move between them, rename them, and even more apps from one virtual desk to another.
Let’s jump in and I’ll show you some of the basics. On your Mac, by the way, you can learn a lot about Spaces (the MacOS version of virtual desktops) by checking out Apple’s Guide to Working with Spaces. It’s all about Mission Control (like we’re part of NASA!). Read it to learn some handy shortcuts for your work Mac too.
SETTING UP VIRTUAL DESKTOP WORKSPACES IN WINDOWS 11
To start out, let’s just have a peek at that Taskbar along the bottom of your Win11 screen…

See that white box overlapping the black box? That’s the icon you want. If it isn’t present, right-click on the Taskbar, go to “Taskbar settings…” and enable the non-intuitively named “Task view”:
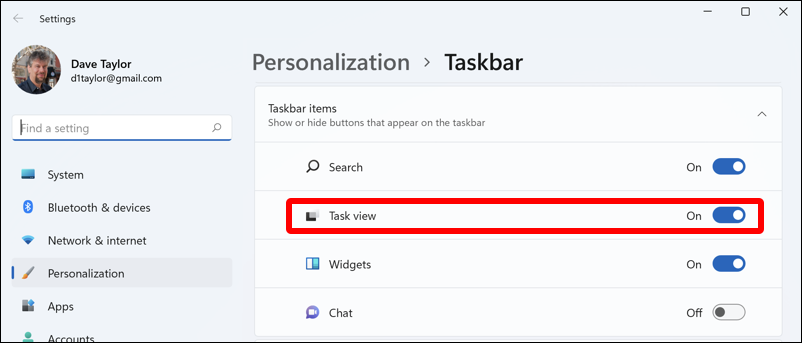
If you’re never going to use Windows 11’s Chat system, you can also hide that button, along with the Widgets button (tho do check out Widgets: It’s one of my favorite new features in Win11).
Once you have the Task view button enabled on your Taskbar, hover your cursor over it and you’ll see a convenient preview window:
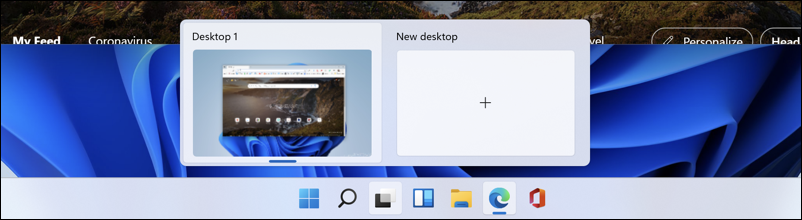
This is a very handy little window because you can easily click between virtual desktops to move around. But for now, click on the Task View button on the Taskbar to replace the preview hover window with the full screen virtual desktop view:
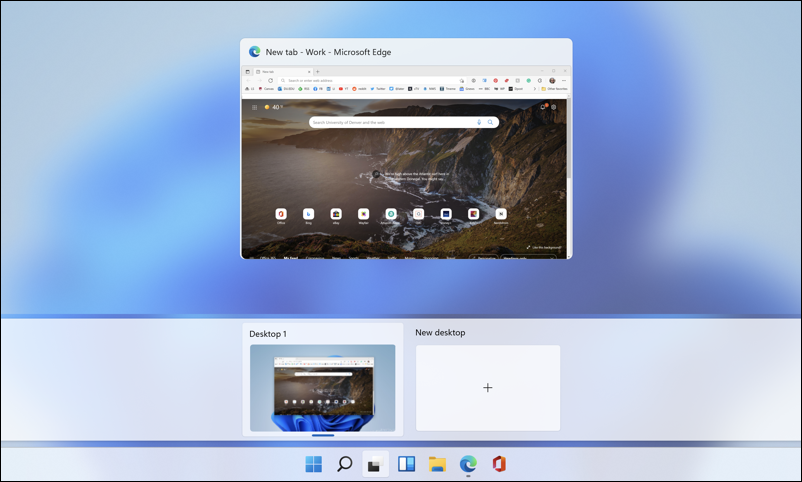
More or less the same, but a bit easier to see what’s going on. Click on the “+” in the middle of New desktop to create a new virtual desktop.
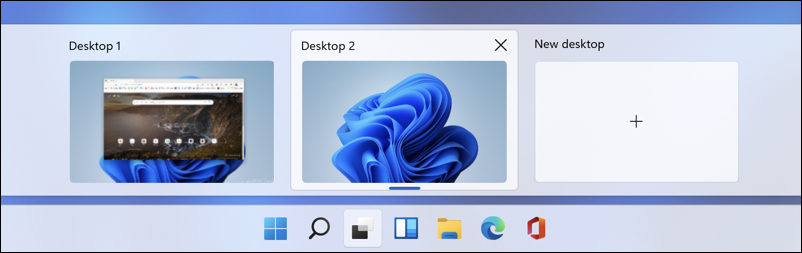
It’ll show up in just a second or two, and you’ll be looking at something like this:
Before you go further, let’s rename these!
HOW TO RENAME VIRTUAL DESKTOPS IN WIN11
It’s pretty easy to rename these and move them around to have things left-to-right as you desire. Just right-click on the virtual desktop’s thumbnail preview and a menu appears:

I tend to give my workspaces functional names, but you’re free to do whatever you want. You can also choose different backgrounds for each to help differentiate them if you’re so inspired, or delete a virtual desktop if you don’t need it anymore. Renamed, here’s what I have set up:

Notice that each has a different program running – Edge in the “Web” desktop space, and Gmail in the “Email” space.
KEYBOARD SHORTCUTS FOR WORKING WITH VIRTUAL DESKTOPS
You can easily switch between desktops with a click or two, but if you want keyboard shortcuts, here are some of the most useful:
| Key Sequence | Result |
| Win+Tab | Open Task View |
| Win+Ctrl+D | Add new virtual desktop |
| Win+Ctrl+Right arrow | Move to virtual desktop “to the right” |
| Win + Ctrl + Left arrow | Move to virtual desktop “to the left” |
| Win+Ctrl+F4 | Close current virtual desktop |
In terms of working with apps and controlling which virtual desktop they appear in, that’s done by either moving to the desktop spacce you want and launching the app (easy!) or going to Task View and right-clicking on the app’s thumbnail:
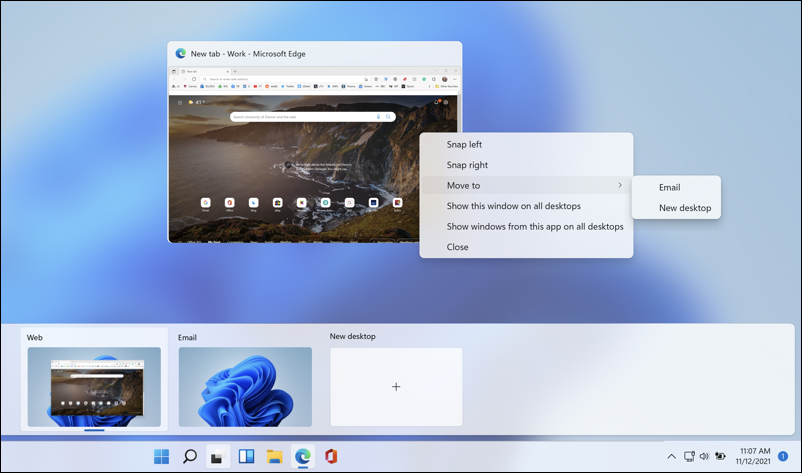
You can see that you can “snap” it to the left or right side, use the “Move to” menu to move it to another virtual desktop (aren’t you glad you named them?) or even “Show this window on all desktops” or “Show windows from this app on all desktops” if you want something persistent across your new virtual desktop world.
Between the on-screen cues, the menus, and the keyboard shortcuts, you should be a Windows 11 virtual desktop ace in no time!
Pro Tip: I’ve been writing about Windows for many years and now have an extensive Windows 10 & Windows 11 help area. Please check it out to find lots of additional tutorials and guides while you’re here. Thanks!