
I’m confused; when I upload photos from my computer to Facebook they’re big and in HD. But if I post photos from my iPhone, they’re small and low resolution. How do I fix that; I want HD photos from both places!
While Facebook seems to be the same service on both mobile and desktop, a closer examination reveals that there are pretty significant differences in both the newsfeed and the user experience. Which makes sense. Your interaction is different and your goals are different too! Heck, mobile has a smaller screen, so that by itself forces Facebook to present the information in a different, more streamlined manner.
The problem is that there are subtle differences in what you publish and how you interact with content on your smartphone or tablet (remember, tablets like the iPad also run Facebook for Mobile, not desktop Facebook). One example is whether photos are uploaded in HD or not, but there are other features and settings too, including whether video automatically plays. But we can hit those as we travel through Facebook for Mobile’s settings…
ENABLE FACEBOOK HD PHOTO UPLOADING FROM IPHONE
First step is to ensure that you have the latest version of Facebook on your iPhone or iPad. Once you’re good to go, open up Facebook as normal. Here’s my Facebook home screen on my own iPhone 12 Pro:
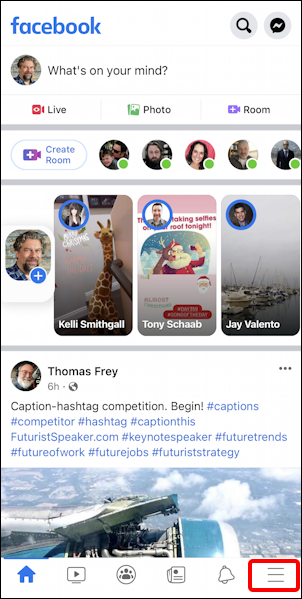
You might never have tapped it, but you want to tap on the three horizontal lines button on the lower right, known in the biz as a “hamburger menu”. Do that and you’ll go to a menu with an astonishing number of options. Swipe down to find “Settings & Privacy“, as shown:

I’m not going to jump directly to the HD photo upload feature because there are other elements that worth examining – and changing – to meet your own preferences. First off, Dark Mode, which lets you have Facebook track your mode preference on your phone or switch directly to dark mode, if desired:
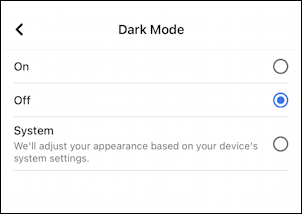
I switched my Facebook Dark Mode settings to “System” so that at night it’s not so darn bright.
Now tap on “Settings” from the menu when you’re done with Dark Mode. The Settings submenu in Facebook for iPhone looks like this (at least in the current version!):
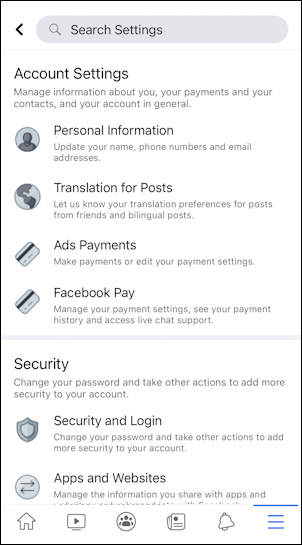
Obviously, much to explore to ensure that it has accurate personal information and you have payments, translation, etc, set up. Swipe down further on this very long menu and you’ll find the “Media and Contacts” option area:
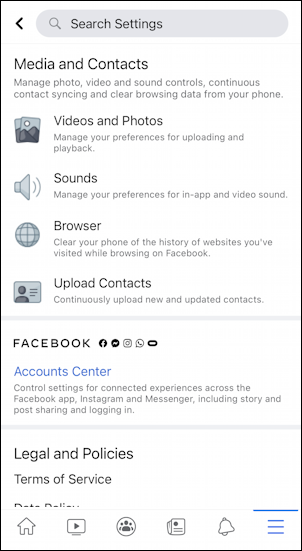
Yes, Videos and Photos is where you can change that HD setting, but before we go there, I encourage you to check out the Sounds settings…
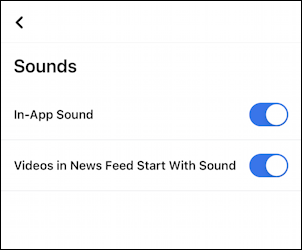
(I disabled both of mine: I prefer a quiet Facebook user experience)
Now check out Upload Contacts because my guess is that you want to disable this important privacy setting:
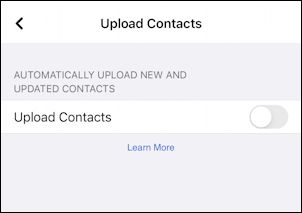
From a privacy perspective, you definitely want to think twice before you have Facebook get a continuous stream of all new contacts you add on your mobile device: here’s where you can disable that feature!
Finally, yes, tap on Video and Photos.
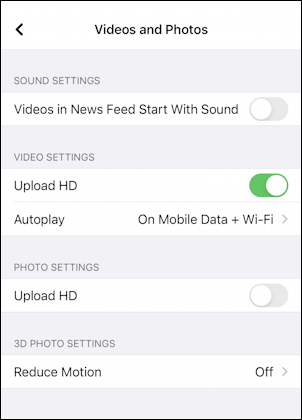
Ah, so you can see the problem here: My videos are uploaded in HD, but my photos are not. To fix the problem, simply tap on the switch icon so it slides to the right and displays green. You might also want to consider if you want to retain autoplay videos (ones you encounter in your feed from others, not your own) if you’re just on cellular. Disabling that can definitely help you save on cellular bandwidth which can potentially lower your connectivity charges.
Tip: If you’re on an Android phone, Facebook for Android looks almost the same in settings, except you want to choose “Photo Quality (High)” in Media and Contacts, there’s no “Videos and Photos” subsection.
So that’s it. A few sidetracks for critical other settings, but now you have enabled HD uploads for the photos you upload from your iPhone to Facebook. Nicely done.
Pro Tip: I’ve been writing about Facebook since it first branched out beyond colleges. Please check out my extensive Facebook help and tips area for lots of additional tutorials! I’m also quite active on Facebook too and invite you to follow AskDaveTaylor on Facebook for fun and unique content there too. Thanks.